FAQ (Common Questions)
Q) “Why did you use G.SKILL 800 MHz?”
A) Because it’s the fastest RAM. G.SKILL is one of the many brands which are offering such a memory.One of the most important characteristics of every system is its response time. In the context of C90S the memory subsystem has its own specific response time too, which depends on different components as Memory Controller Hub (MCH), System Memory Interface, … , and DRAM. Details you can find out in “Intel 945 Express Chipset Datasheet”, (PDF file, 7.5 MB)
The speed of DRAM depends on two factors:
- The speed of data transfer between MCH and DRAM ( e.g. 800 MHz )
- The response time (Latency Timings) of DRAM or just Timing ( e.g. 5-5-5-15 )
My choice of memory was made considering above two things.
Let see our C90S case regarding to the use of 667 MHz or 800 MHz RAM.
The performance will be the same if we have the same RAM timings. “Why?”.
Both types memory work at 532 MHz in C90S. “Why?”Q) “I think that C90S chipset can't get over 667 MHz, right?”
A) You are absolutely right!Q) “By the way, clarify me...Will the E6500 (45nm) work with the 1002a BIOS?”
A) Yepp, It works!As a Wolfdale (FSB 1066MHz and Operating Frequency at 2.93GHz or lower) CPU it must be recognized correctly and run at full power with BIOS 1002A. Beware that the E7600 (3.06GHz) will doesn’t run or properly recognized (without a BIOS modification.
Q) “Must I change the power supply? Mine is 120Watts max. output.”
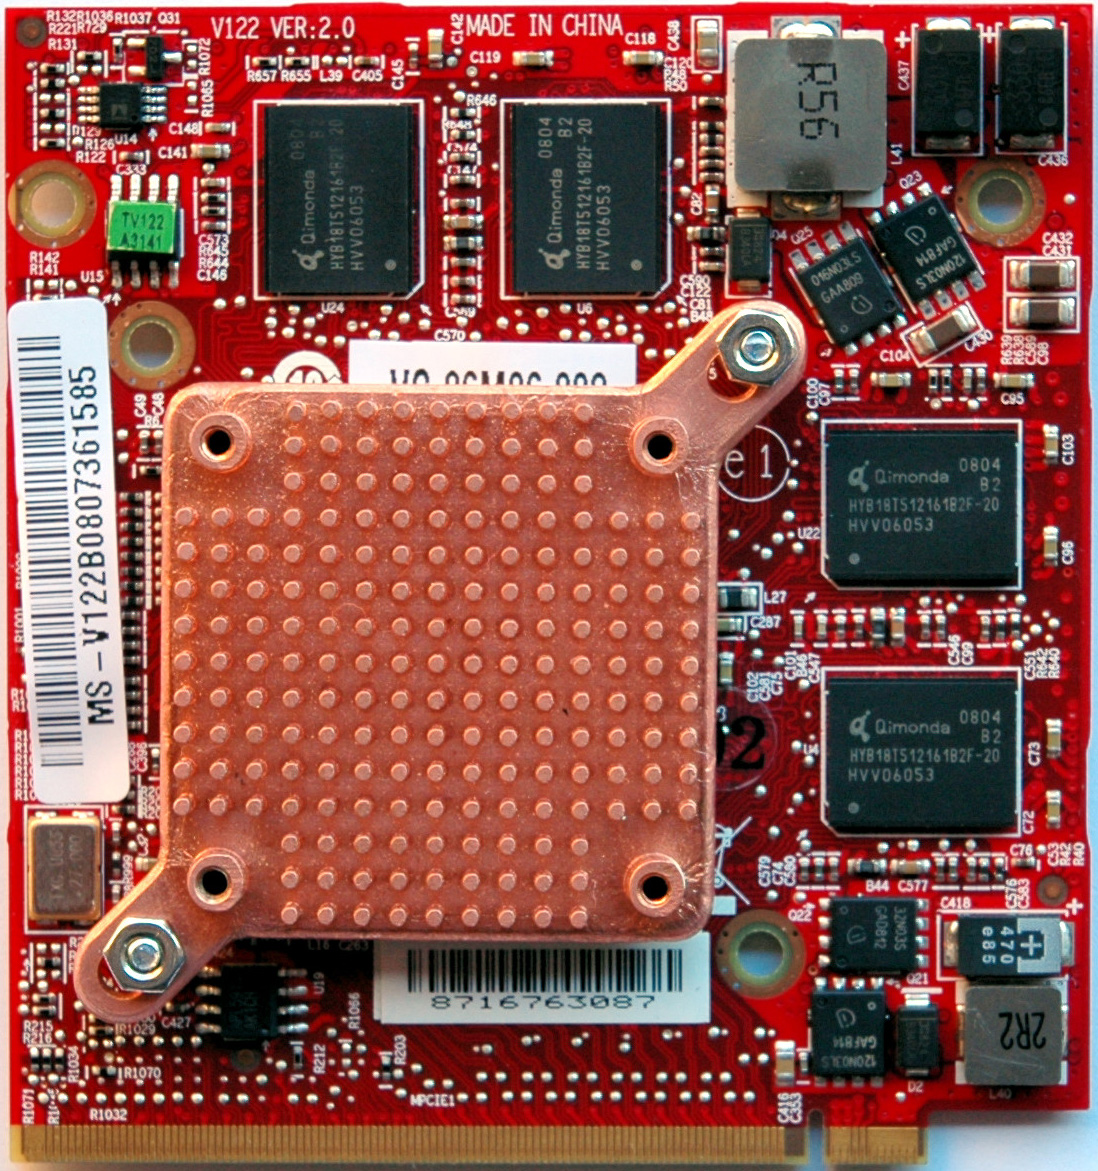
A) No! Your PSU is more than enough for C90S.Q) “Correct me if I'm wrong, the North bridge is directly under the GPU and the south bridge is under the big aluminum heat sink on the other side of the ram from the GPU right?”
A) Yes, you are right!Q) “Is there any gas/fluid inside those copper heat pipes?”
A) The heat pipe nature is based on that. I don’t know about ours in C90S.Q) “Maximal CPU E7500 is 2.93Mhz or may be more?”
A) Here you are the E7500 specification “Intel Core 2 Duo Desktop Processor E7500”Q) “What is maximum CPU in Mhz can be work on C90S?”
A) The maximum supported CPU speed in C90S is 2.93 GHz and Bus Speed at 1066 MHz.Q) “You mentioned the need for heat pads, do you think it would be possible to modify the copper to not need the heat pads and instead use thermal paste?”
A) Yes, it's possible if you have at your disposal industrial equipment.The solution is on the next picture, custom copper pads between GDDR and the heatsink with 2 layers of thermal compound for ATI Mobility Radeon HD 3650:
If you keep the GPU temperature under 65 ºC then there is no need from any kind of pads.
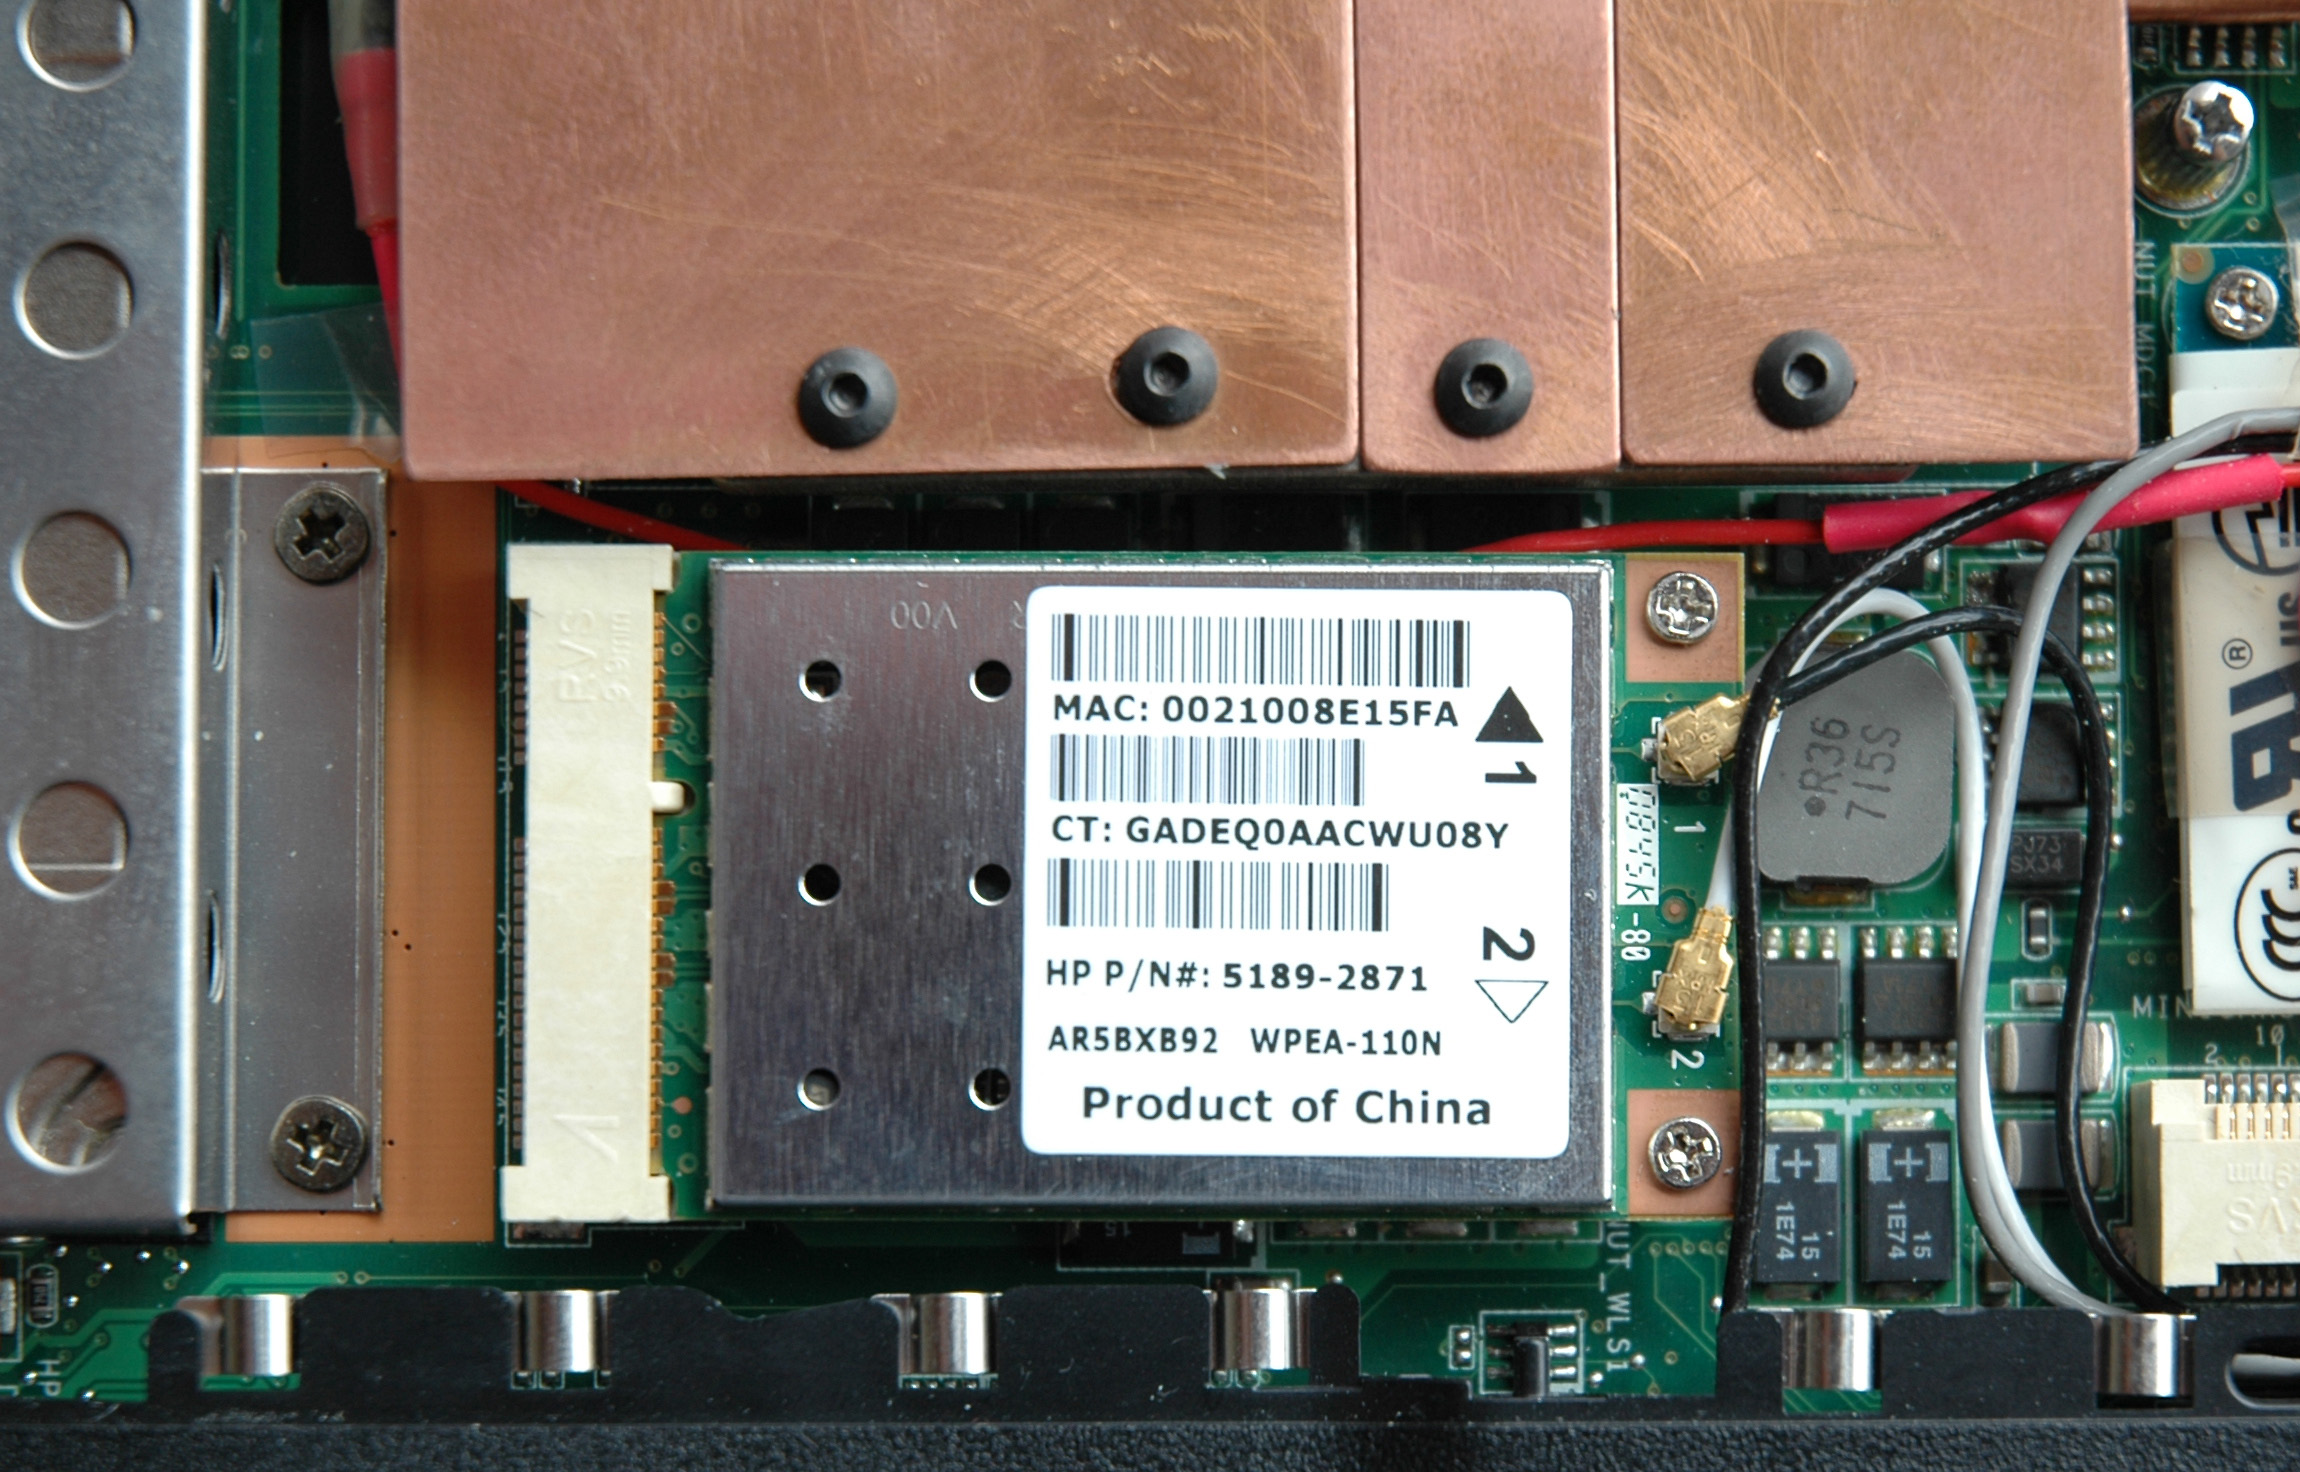
Q) “What wifi N card are you using on your c90s? I tried a 4965 and only got 65mbps.”
A) The “Intel Wireless WiFi Link 4965AGN” isn't good choice for C90S. The better WiFi card for me to the moment is “Atheros AR9280”. Here you are a picture and the link to “Atheros AR9280 Drivers”:
The reliable WiFi communication is something that depends on things as:
- clarity of the frequency environment
- the signal strength
- communication standards and protocols
- devices and their configuration
Q) “It seems to me you could get a new bios which could recognize any LGA775 desktop processor, and have it to work at bus speed 1066 MHz max if possible. Or something like that?”
A) Let me explain shortly what is that BIOS from my point of view.When I started this article one of the first things I said in “Analysis & Agenda” was:
“Every computer is a computer system consisting of many different components at different levels and layers connected each other. It’s essential to understand that definition when you have to deal with any software or hardware computer problem. Don’t forget the USER!”
In this context the BIOS is a software layer between the hardware (the C90S’s motherboard chipset) and the operating system. The hardware design and specifications of the components define the BIOS structure and its behavior. That’s why the BIOS is a child of the motherboard manufacturer and it is only one small and important part from the laptop. Rhetorical question: “Why the BIOS name of our manufacturer is AMI?”
The C90S is a good example for a system with a flaw in its cooling design and despite the error of the manufacturer it was on the market. To solve the thermal problem of C90S has been designed the “ASME” Video Heatsink. Every change in the thermal design requires a change in the corresponding thermal polices too. In respect with this the original BIOS has been modified and evolved into BIOS version 1002b according to the new hardware environment:
- “ASME” Video Heatsink rev. 2.0
- Improved internal airflows with my secret weapon “double diffuser”
- Underclocked Q9550S
- Running system memory on 667 MHz
- Specific user’s Fans polices via Operating system
- Keep GPU temps under 49 ºC in Idle & CPU load < 3%
- Keep GPU temps under 65 ºC in 3D Stress Test with ATITool
- Keep HDD temps under 48 ºC in ZFL disk stress test & CPU load < 3%
- Keep C90S internal temp under 70 ºC under max CPU, FPU, GPU loadsFans noise in Idle < 20 dB-A
- Ambient temp ~ 25 ºC
- Support only one CPU - Q9550S
Q) “How reliable is your C90S?”
A) I have no BSOD, freezes, restarts or lost of wireless connection in any performance modes on battery or AC.The reliability of one system is defined by the reliability of the weakest part in this system. The life span of the electronic components depends on the temperature. The higher temperatures lead to their shorter life span.
Every one system that had been built by me in the time period between 1990 - 1999 has life span more than 10 years. The secret was 10 ºC lower temperature than the competition and the creation of optimal working conditions for the hardware.
Until now I have two broken systems and you own one of them. The other one was with the legendary “rock stable” motherboard A7N8X-XE that died after 23 months in result of a capacitor’s leak.
My experience with the products of this manufacturer is a life span less than 2 years.
Q) “If I was to install the ATI 4650 DDR3 would your ASME heatsink fit this as well or need any adjustments to make it fit?”
A) The “ASME” 4.0 will fit perfectly on all ATI 4650 DDR3/DDR2 without any adjustments.Q) “I found it is possible to have memory working at CAS 4, but dis-synchronized of the CPU bus speed!?”
A) The MCH (82945G/82945P) doesn’t support DDR2-667 4-4-4.Q) “Please, do you know if C90P's north bridge is really colder than C90S's one?”
A) Yes, it is. The C90S North Bridge is hotter than one in C90P. For details please read thermal specifications of the both chipsets P35 and 945.Q) “So that it could be easy to use the all copper C90P's GPU heatsink with C90P's north bridge heatsink in the C90S?”
A) It’s up to you. Beware of that the C90S & C90P motherboards have different layouts. For me C90P thermal design looks good. It will be efficient if you accept for normal GPU temperatures more than 80 ºC.Q) “You are making a Peltier effect cooling on the C90S?”
A) Monsieur Peltier is a healer of the C90S thermal illness.I had an intention to make a test of some thermoelectric modules without the idea for an implementation. The nature of such kind of cooling requires additional energy which I consider as an inefficient approach from energy point of view.
The thermal results were impressive and I decided that the thermoelectric cooling to be added as an additional and independent cooling system to the existing one. Of course the change requires entirely new design of ASME, replacement of Delta fans with these of Sunon using MagLev design (Magnetic Levitation System), fan policy adjustment, and a hole in C90S case for additional power source.
Results from the test at ambient temp ~ 25 ºC:
- GPU & CPU temps never cross 50 ºC in 3D Stress Test with ATITool and respective CPU Stress Test
- GPU Idle temp 30 ºC ~ 37 ºC
- CPU Idle temp 30 ºC ~ 35 ºC
- Fans noise in Idle and Stress Modes < 20 dB-A
- 2 Peltier Modules 30 x 30 x 3 at Voltages between 9V ~ 15V
- 2 additional small Peltier Modules as an option
Q) “Will you show your rev 3.0 cooling very soon?”
A) No. We will talk soon about “ASME” 4.0. The new in ASME 3.0 is an additional copper plate between North Bridge and VGA (bottom) with two thermal bridges to the top of the GPU & CPU heatshink.Q) “Do you know which terminal on the battery corresponds to the ground?”
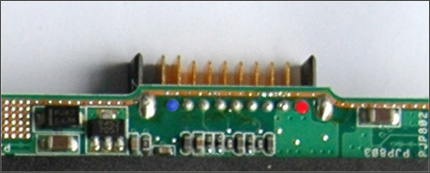
A) The minus/negative (-) battery's terminal is the blue one (ground) and the positive (+) is in red at the picture:
Q) “When disassembling the motherboard is there something I should be careful?”
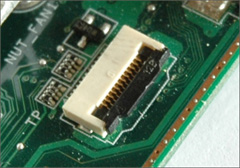
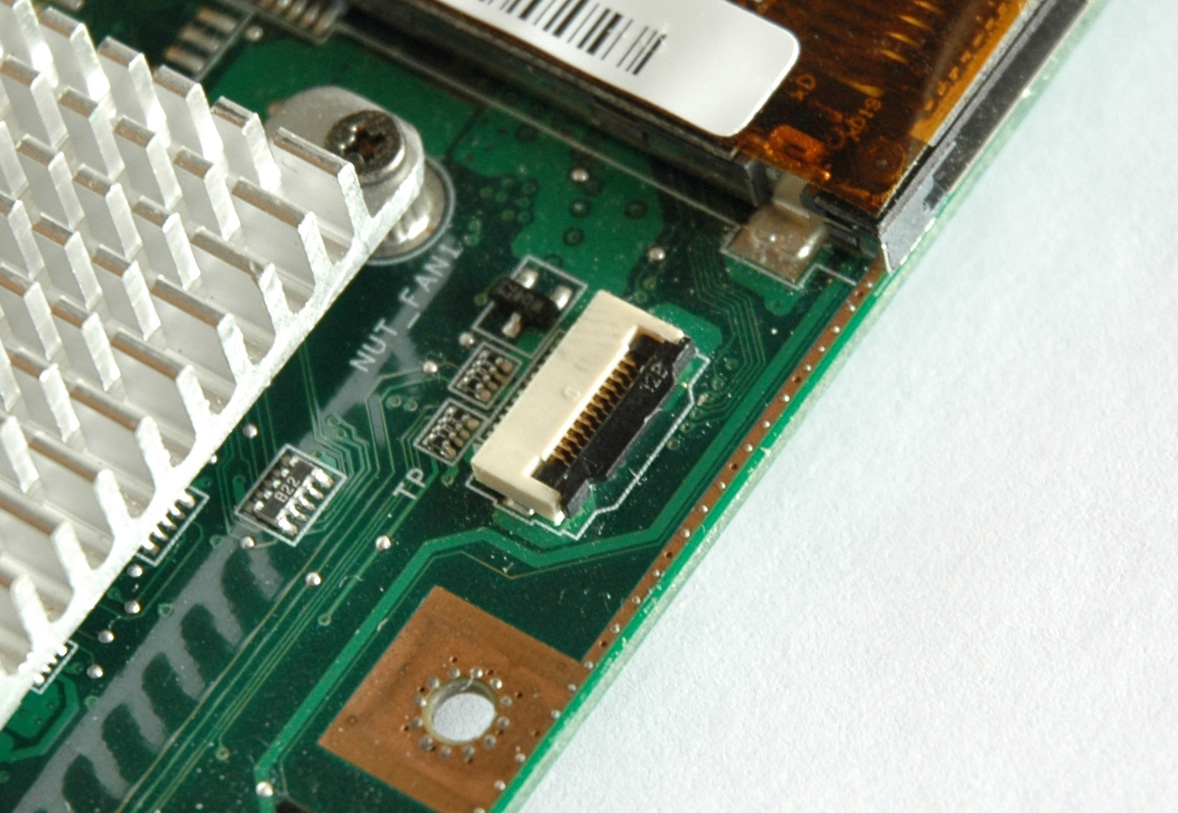
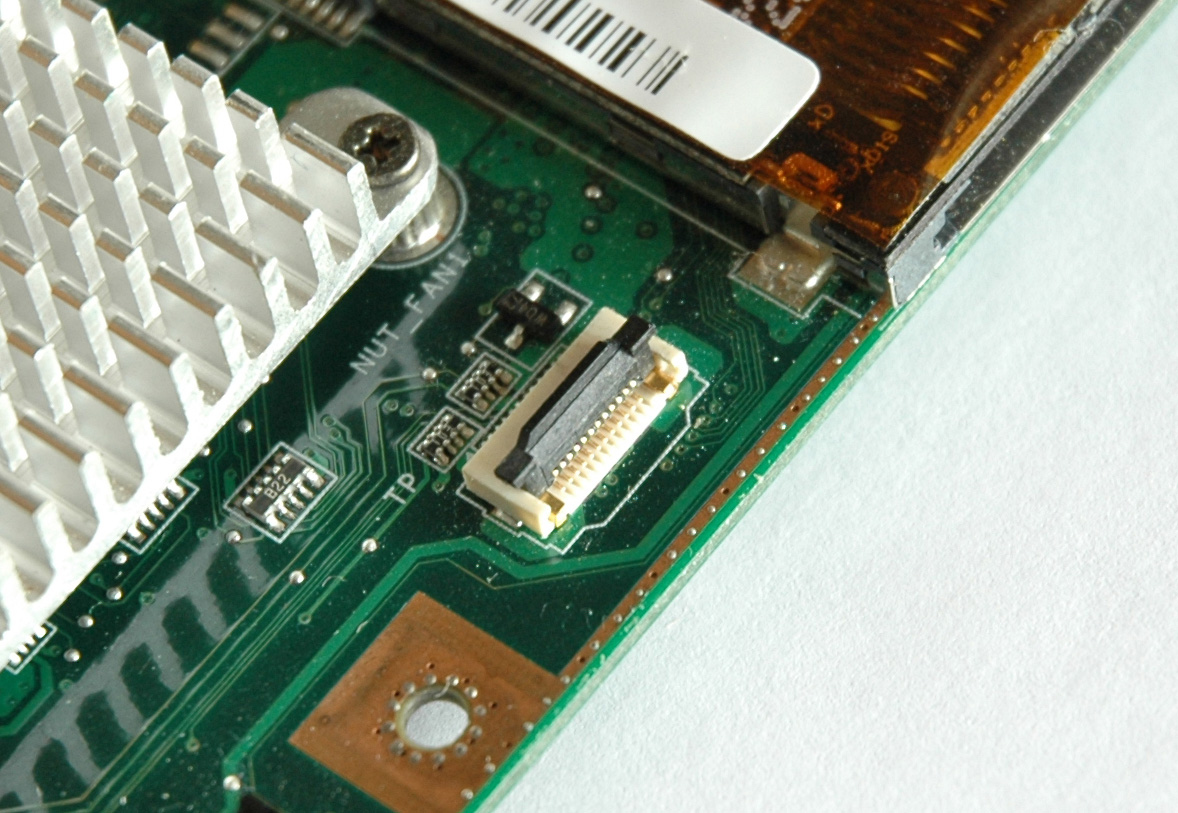
A) Yes of course, almost everything!Before to start the laptop disassembling first remove the inserted dummy or real modules from ExpressCard & SD slots, they must be empty! You should be very gentle with the keyboard, mouse pad and fingerprint reader plugs. They are different and specific to unplug. First release the lock and then pull out the cable. Don’t try to pull before unlocking because you will break the plugs. Here are the pictures of these fragile sockets in locked & unlocked states:
Keyboard

Debug Connector
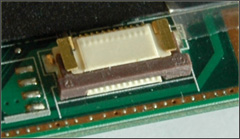
Touch Pad
Q) “Where I can find quality toggle power switches for the hardware fans mod?”
A) Some info regarding to toggle power switches.There are two categories Mini & Sub-Mini. For our purposes Sub-Mini is our case. The bad news is that they are unreliable with high failure rate and fail easy. It’s very difficult to find a quality in this category. That’s why my choice is DiMarzio - the best quality 2-position DPDT (double pole double throw) Mini Switch. Its lever is a little bit longer and I prefer to cut a part of it (a delicate procedure).
Terms & links:
DPDT - double pole double throw
Pole - a number of switch contact sets
Throw - a number of conducting positions
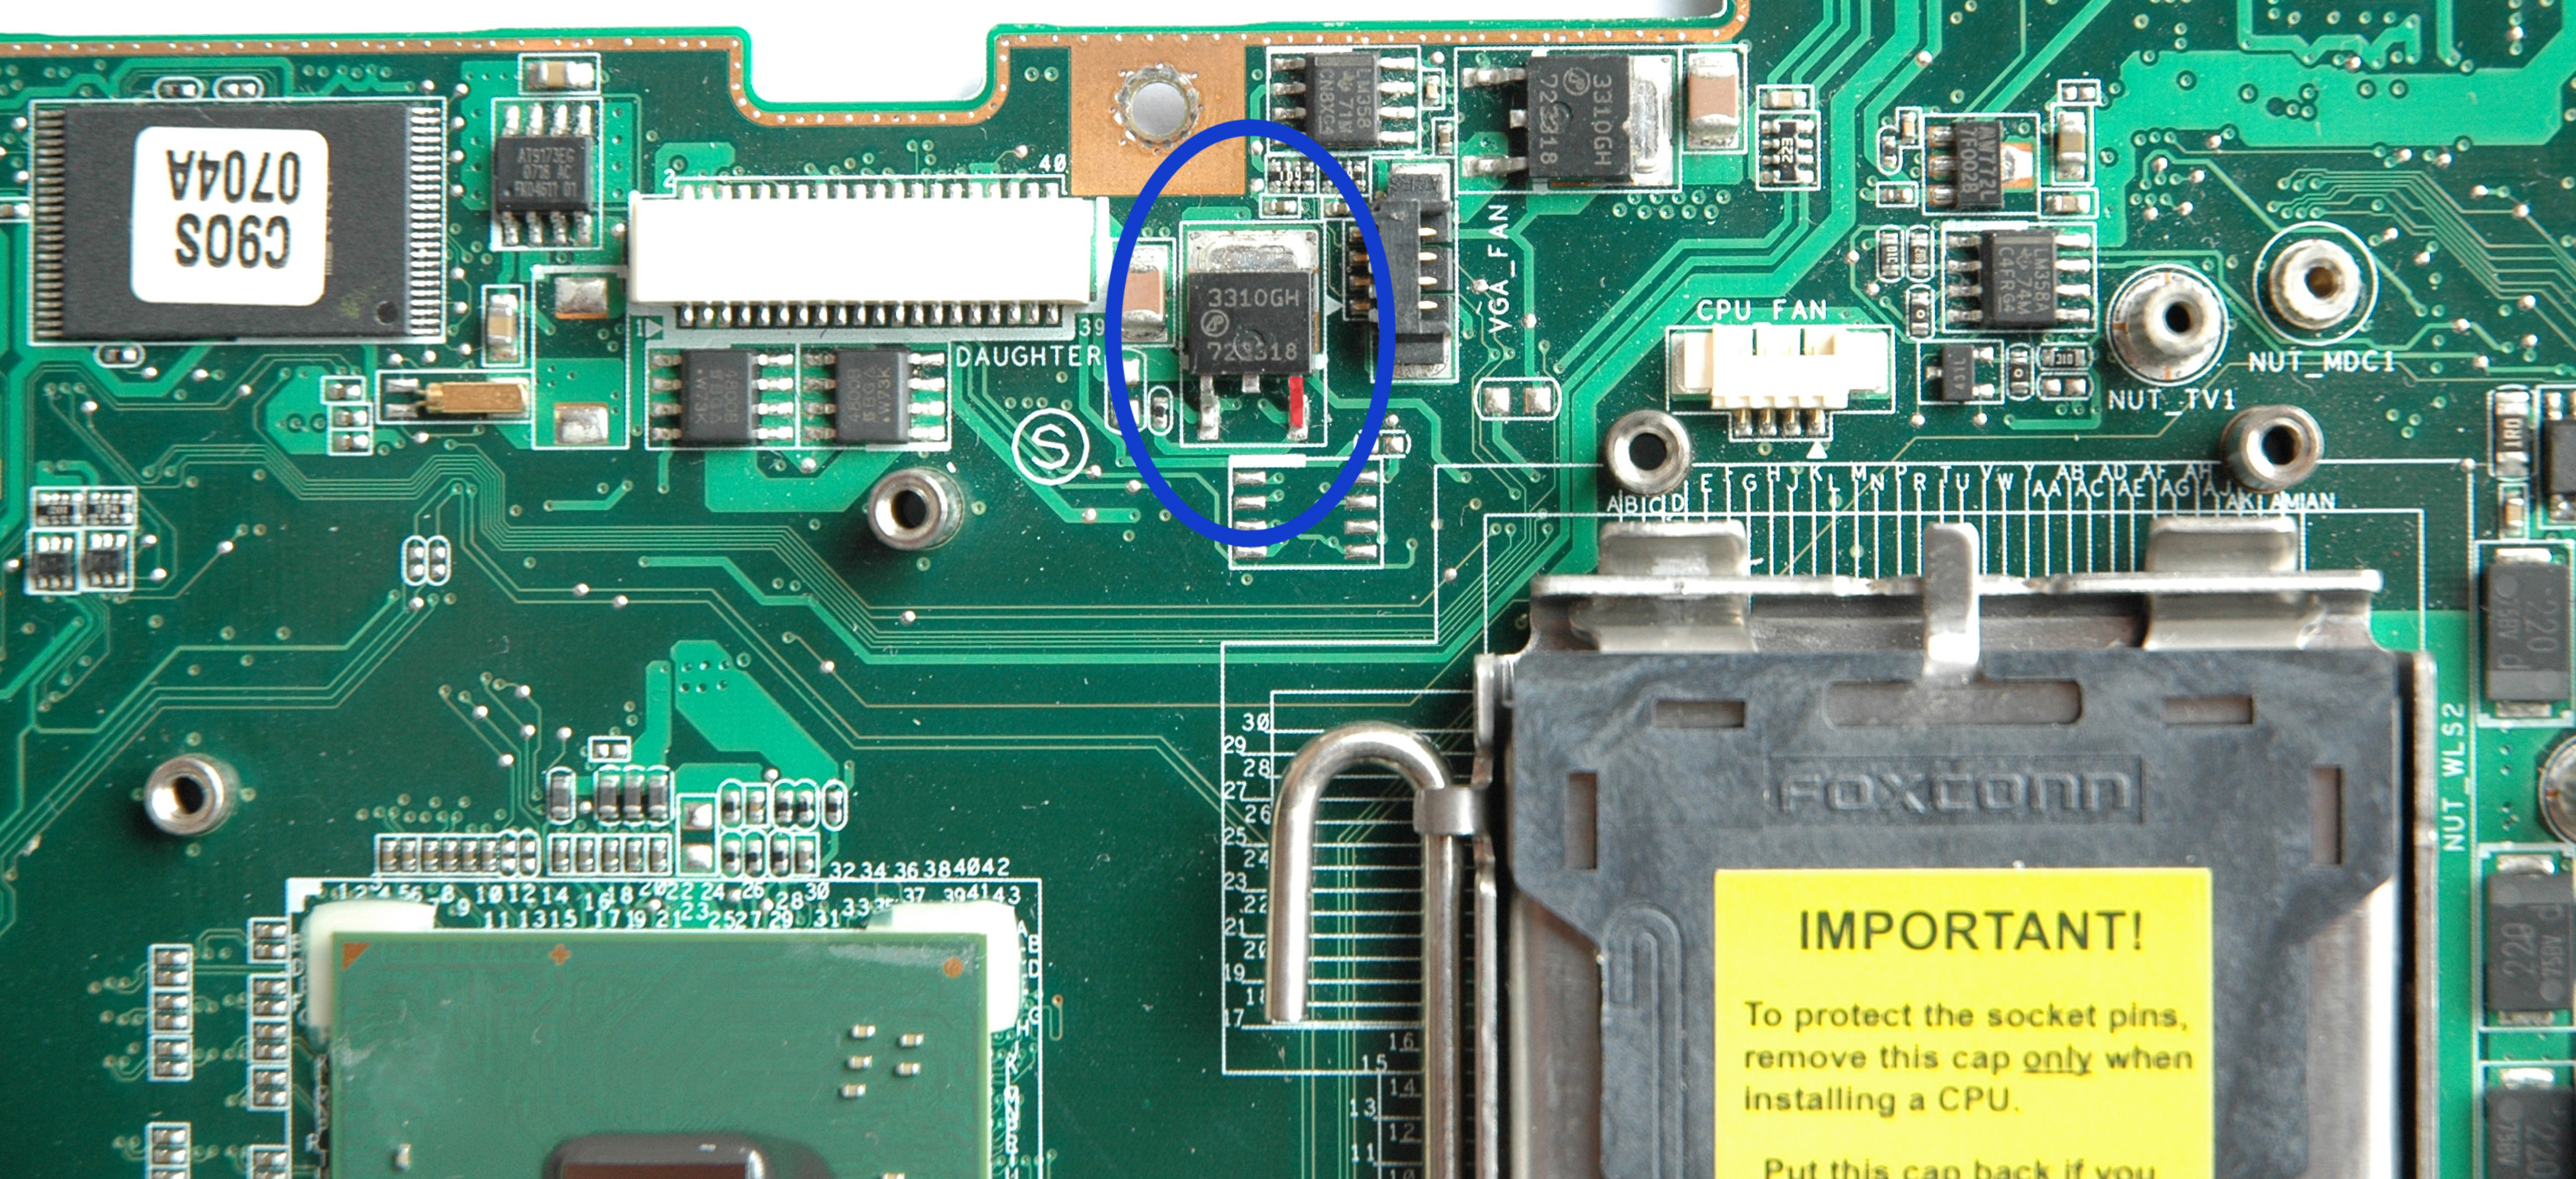
Q) “From where I can get 12V power for the fans?”
A) From the right leg of the VR transistor 3310GH which is outlined in red on the picture:
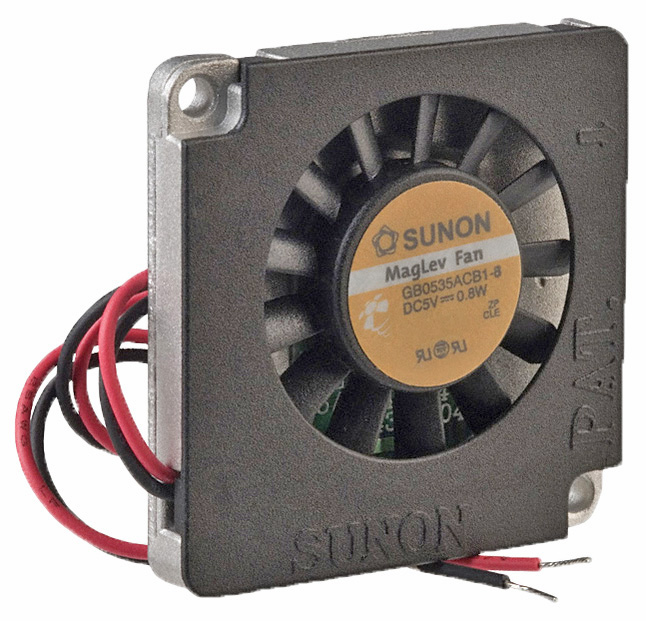
Q) “Is it possible to be attached additional fan?”
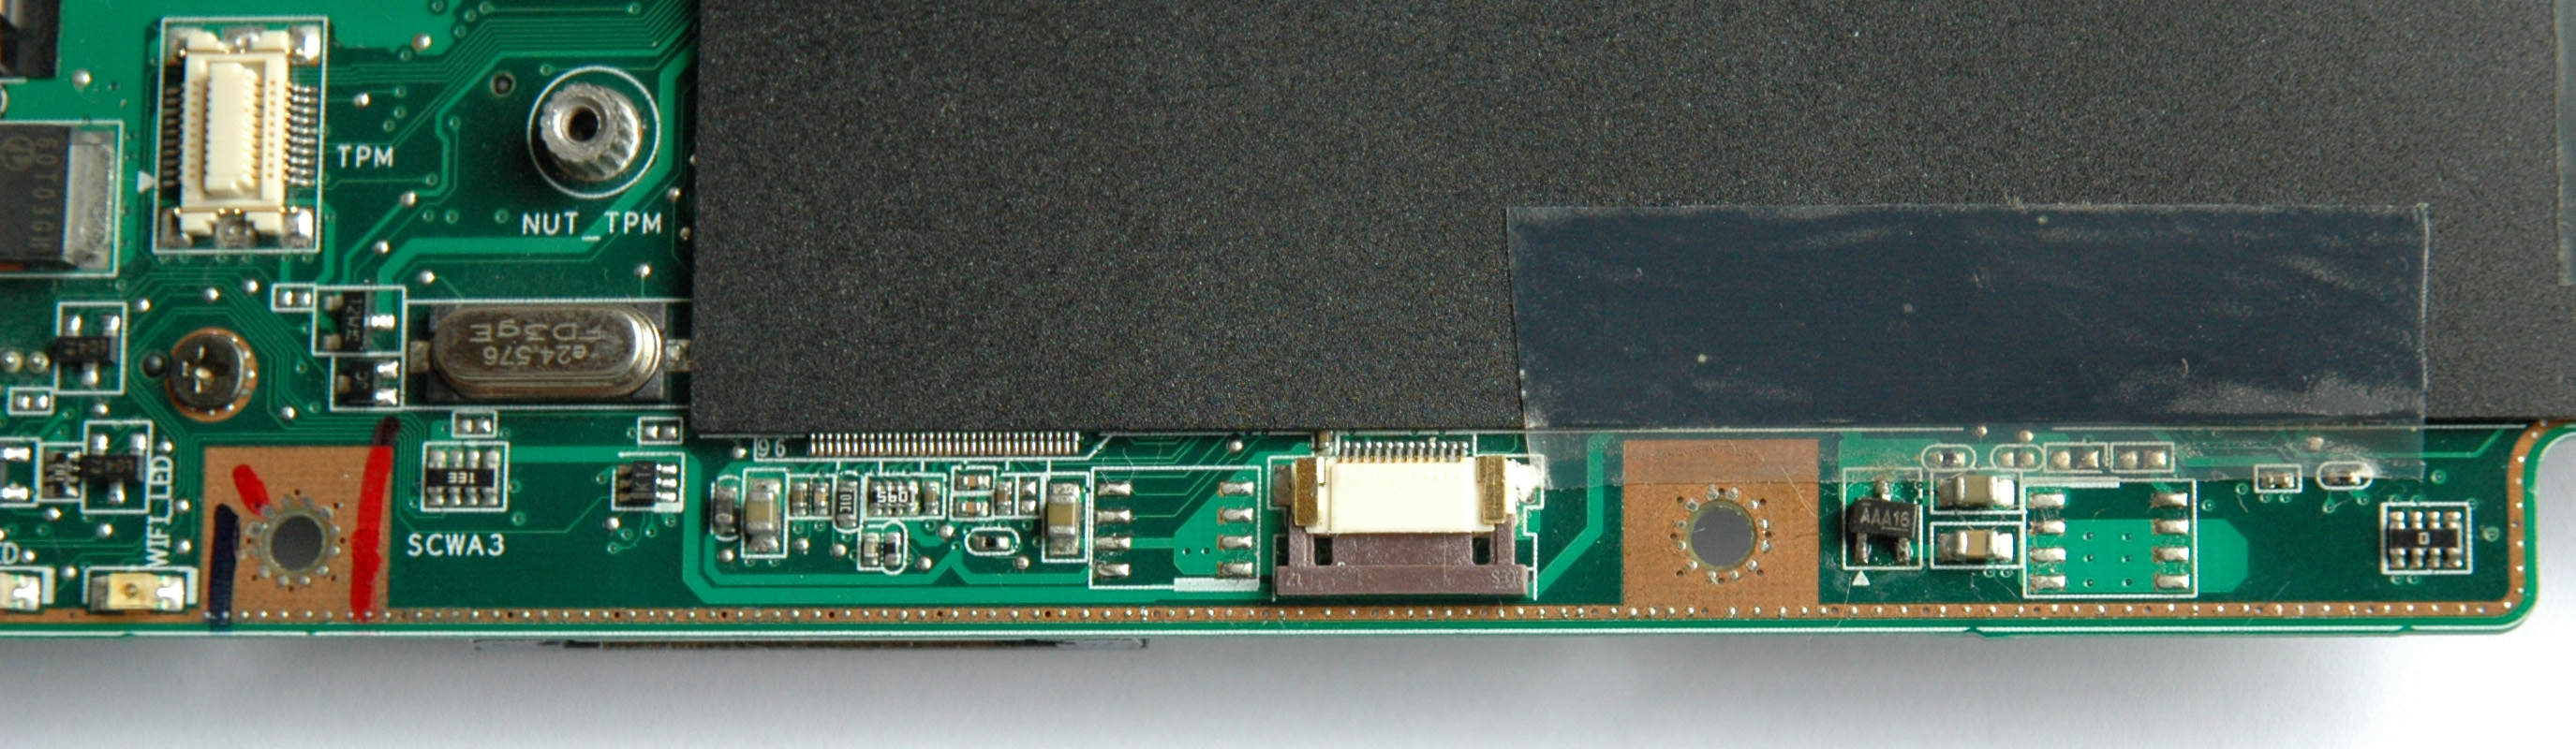
A) Yes, it is possible.The motherboard revision 1.1G has system fan connector used to power a fan blower 40x40x6 mm at 5V attached to the South Bridge. Here you are pictures of the fan with 3 and 2 leads (for reference):
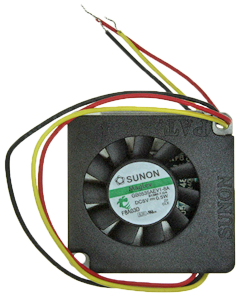
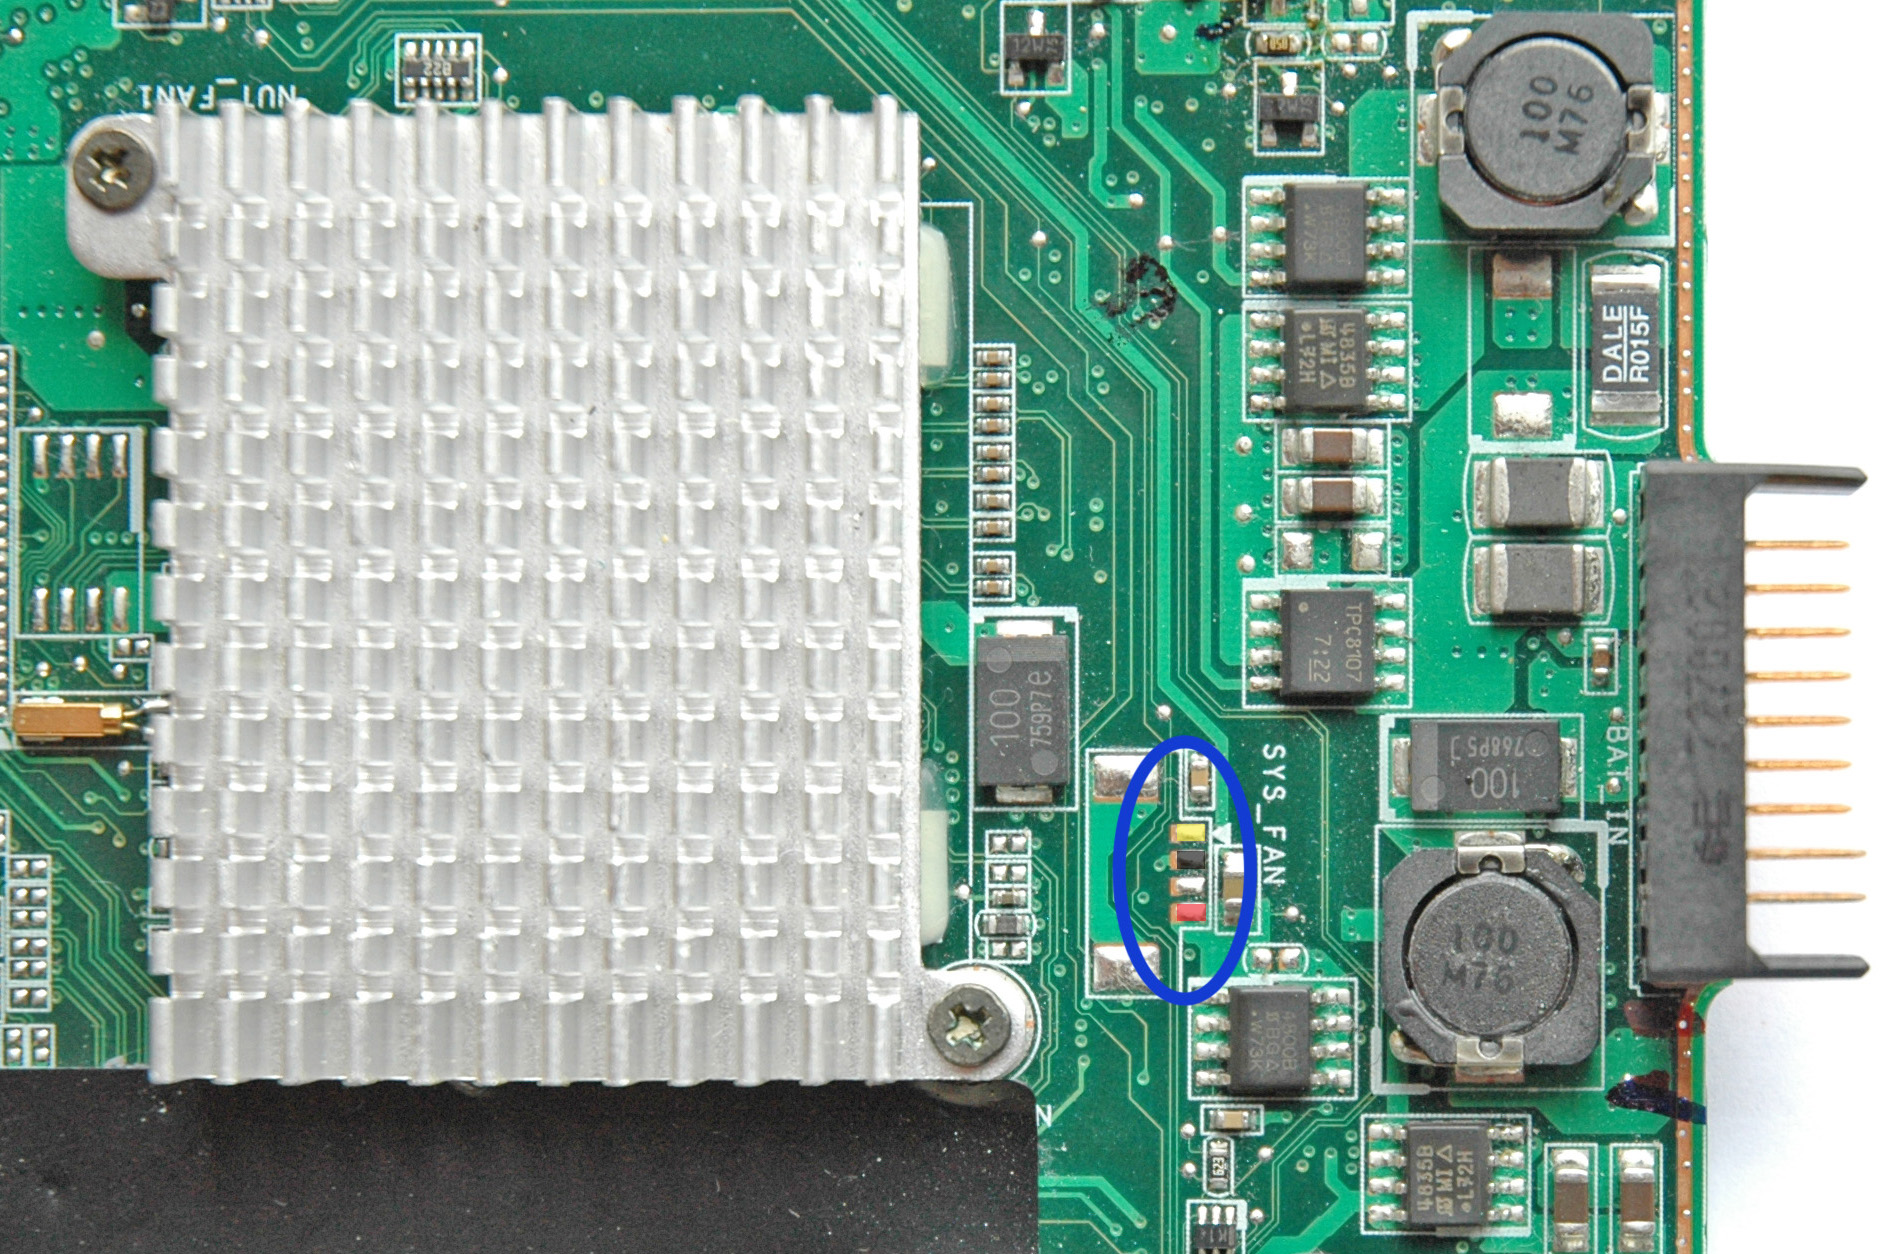
The layout of the motherboard makes useless the use of the fan at that place. That’s why it was replaced by the aluminum heatsink in the next motherboard revision 3.0G and the system fan connector was removed. The power interface assigned for the system fan is still available and can be used for 3 leads fan at 5V. Here you are the picture of the header location:
You can choose the desired fan from Digi-Key, Sunon or who you prefer.
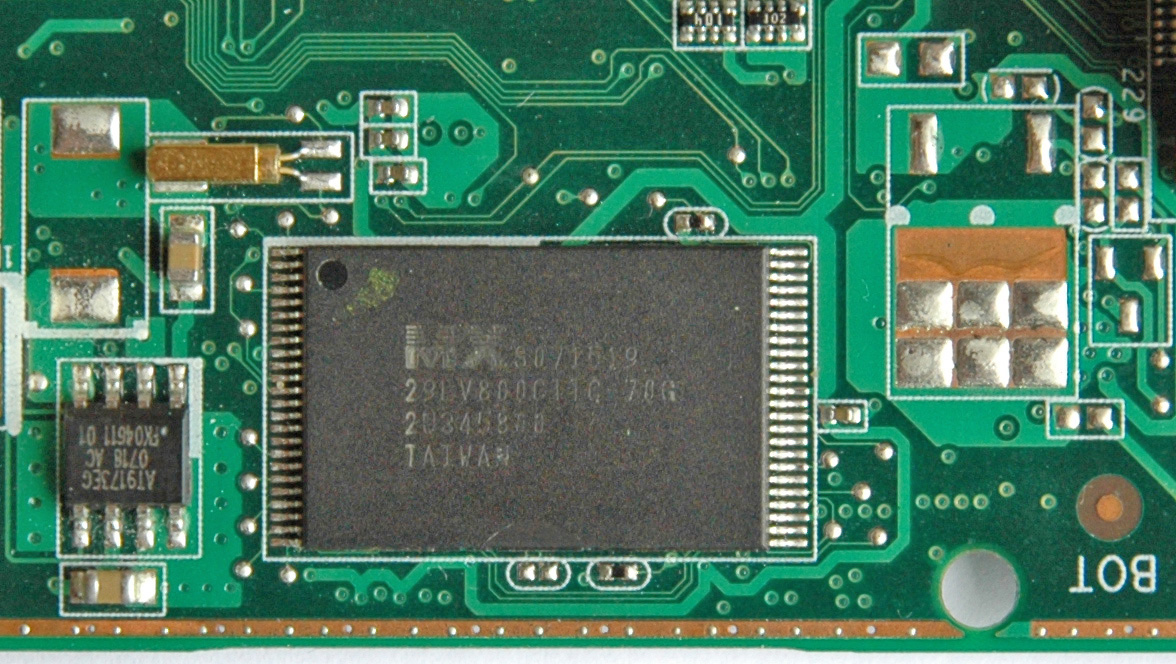
Q) “Where are the BIOS chip and its model?”
A) Here it is on the picture:
Q) “How many C90S you have?”
A) Seven of Seven! The C90S star fleet is unstoppable and everyone fighter is equipped with Borg’s technology.Q) “Do you really think the Samsung Spinpoint HDD is faster than the Seagate Momentus XT, or than the WD Scorpio Black?”
A) Yes, I do!The question reminds me that the HDD speed is relative according to the different user’s points of view(s). For the way I use my HDDs the most important parameter is the “Average Latency”. According to the HDD manufacturers this value for the mentioned HDD drives is:
4.17 ms Seagate Momentus XT
4.20 ms WD Scorpio Black
4.13 ms Samsung Spinpoint MP4When you have a constant and huge stream(s) of data going to or from the HDD then you will see the real performance of this drive. If you try to read a 300 GB file from your Momentus XT and also you try to guess how long will take this operation based on HDD specifications you will be surprised that the real drive speed is slower than your calculations.
So on my real tasks the both Momentus XT & Scorpio Black are outperformed by MP4.
If you think that the Momentus XT is the fastest or one of the fastest HDDs then what you’ll say about my FDD Teac which is faster than any SSD at the moment. Do you know how this is possible?
The Momentus XT is the fastest 2.5” HDD when the required data are already in its 4 GB NAND cache and we are trying to read that data.
Another important parameter for me is the reliability of the disk drive. In this connection I consider the current state of NAND technology as unreliable when comes to use it as a regular HDD - the best way to lose data.
In the past the life span of HDDs was ~ 5 years and ~ 3 years warranty. It was funny when I decided last year (2010) to give a try to WD Scorpio. First drive was DOA, next has a problem at the first minute. In a such situation my 20 years old Seagate ST-225 was faster with its MFM controller, 8-bits ISA interface, read speed of 280 KB/s, still without bad sectors and without autopark ability.
There is an interesting educational story in 3 acts about the HDD speed which I’ll tell when I have more time.
Q) “I'm very interested by RamDisk, have you any tutorial, how to use it, or so?”
A) Here you are a simple video made especially for you how to use RamDrive Plus. It’s a 15 days fully functional 32-bits trial version, downloaded from SuperSpeed.
Q) “Ramdisk is really fast, yes it is, but how to use it? We could use it for temporary files, but nothing other, have you more ideas? So it doesn't need much space, right?”
A) The RAM drive is useful for those applications which performance mainly depends on the speed of the I/O stream(s). In example I have an application for searching, analyzing and generating texts files with heavy demands to the I/O operation on the HDD. The time to finish the same task on HDD & RamDisk takes 6 hours against 20 minutes respectively.If the bottleneck of an application performance is the HDD’s I/O speed then the RAM drive is the solution to be increased the performance if its size is appropriate to the application's requirements.
If you put on the RAM drive an application which performance gain depends on the CPU speed then the bonus to use the RAM drive is a faster application loading into memory. In this case there is no gain in the performance. Also it’s possible to have a negative result because we took a memory for the RAM disk in the same time when the application may require more memory for a better performance.
Working with RAM drives & properly adjusted Cache(s) is the key to a smooth operating system and better application performance!
Do you know when will be not true the above statement?There are interesting situations when the cache can slow down the performance. One of the most important cache elements is the Cache Algorithm. Do you know why the CPU L1 cache size is so small compared to the cache size of the Momentus XT?
The next article is a good introduction into the world of the memory:
“What every programmer should know about memory” by Ulrich Drepper
Q) “Is the C90S eSATA is working?”
A) Yes, it works!Be aware that the C90S eSATA interface based on JMicron may cause problems with some of the eSATA interfaces of other manufacturers. I have 3 different eSATA HDD enclosures and one of them is working unstable. The problem enclosure works perfectly on all my Toshiba(s) without exception.
With the “Driver Version 1.17.63.1” everything is fine under XP. All of the recognized external drives perform well and without problems. The same is under linux with vanilla kernel 3.6.9.


What can I do to make C90S stable
For me the properly functioning C90S is this one which is working 24 hours per day, 365.2425 days per year without BSOD, freezes, restarts or lost of wireless connection in any performance modes on battery or AC at environment (ambient) temperatures between 12 ºC ~ 40 ºC without any cooling pads, Air Conditioners or additional air flows except these produced from own fans.
To be achieved such kind of stability and reliability is necessary to be followed the next steps:
Step #1:
Correct the Thermal Design Errors – We can’t do that without entire redesign of the C90S Case. It’s possible to be solved some the problems and the solutions are here on this WEB site.
Step #2:
Fill in the gaps between the fans themselves and fan’s frame assy.
Step #3:
Seal with an Aluminum Tape all holes on Bottom Case Assy (Optic Drive Holes), CPU Door Assy (CPU Holes & those under GPU & CPU Heatsinks).
Step #4:
Replace the fan’s mesh with a better one (more air).
Step #5:
Don’t make the common mistake to drill holes over the GPU. It’s wrong! (Why?). If you already did it, seal the holes with an Aluminum Tape too if it’s possible or replace the Bottom Case Assy with a new one.
Step #6:
Remove the mesh over the South Bridge and the Memory (CPU Door Assy).
Step #7:
Remove the Keyboard and seal with an Aluminum Tape all holes except the cable. Be careful because the tape is sharp and can cut the keyboard cable.
Step #8:
Now it is the difficult part where you must properly to choose the path(s) of the airflow(s). You need to adjust the airflow intake (more than one) according to the video adapter and the implementation of the cooling. This includes sealing of part(s) of the air intake holes of the South Bridge and necessarily to be drilled holes with 5 mm or 6 mm drill over the HDD compartment.
If you follow and implement correctly these 8 steps then yours concern about the fan speed will be gone and you will be happy in the way I am with my star fleet of seven C90S.
If you can’t implement the steps above there are still some options for you. One of them is the change of the fans speed policy according to yours requirements, using hardware or software solutions like the next ones:
- Build Yourself a Fan Temperature Control by Tillmann Steinbrecher
- NoteBook FanControl by Stefan Hirschmann
Which are the Best Components for Upgrade
CPU
- Intel Core 2 Duo E7500 (SLGTE) @ 2.93 GHz / 3 MB Cache / FSB 1066
RAM
- G.SKILL 4GB (2 x 2GB) 200-Pin DDR2 SO-DIMM DDR2 800 (PC2 6400)
Dual Channel Kit Laptop Memory (F2-6400CL5D-4GBSQ)Video Card
- ATI Mobility Radeon HD 3650 / 256 MB DDR3 - Perfect Balance Between Performance & Power Consumption
- ATI Mobility Radeon HD 4650 / 1 GB DDR3 / Hynix - Unbeatable & Outstanding Performance
Screen
- C90S LCD Screen 15.4" WSXGA+ Matte (CCFL backlight)
SKU: NXK543-L2-0HDD Storage
- Hitachi Travelstar 7K1000 HTS721010A9E630 0J22423 1000GB SATA 6Gb/s 2.5-inch 7200 32MB
- Hitachi Ultrastar 3.5-Inch 2TB 7200RPM SATA III 6 Gbps 64 MB Cache Enterprise Hard Drive with 24x7 Duty Cycle Internal Bare-OEM Drives (0F12455)Ultrastar 7K3000 - HUA723020ALA640 - 0F12455
SSD Storage
- ADATA XPG SX910 ASX910S3-128GM-C 2.5" 128GB SATA III MLC Internal Solid State Drive (SSD)
Hard Drive Docking Station
External Enclosure for 2.5'' Drives
- Anker Uspeed USB 3.0 & eSATA Hard Drive Disk HDD SSD External Enclosure with UASP Support
- Eagle Tech ET-CS2XMESU2-BK 2.5" SATA to USB/eSATA Portable Hard Drive Enclosure (Tool-less)
WiFi
- Atheros AR9280 (802.11n/a/b/g 300 Mbps, 2Tx2R MIMO)
PSU (Power Supply Unit)
- Toshiba 120-Watt Global AC Adapter PA3717U-1ACA
How to check whether the new video card is working
When you have a new VGA you want to test it. That is natural
!!! Warning !!!
Be careful when you are attaching the heatsink! Do not use for more than 2 minutes! It’s only for a test to see POST messages or something on the screen!
What is the proper way to update the BIOS
How to update C90S BIOS ver. 0103 to 1002A
Some thoughts on your BIOS flashing process
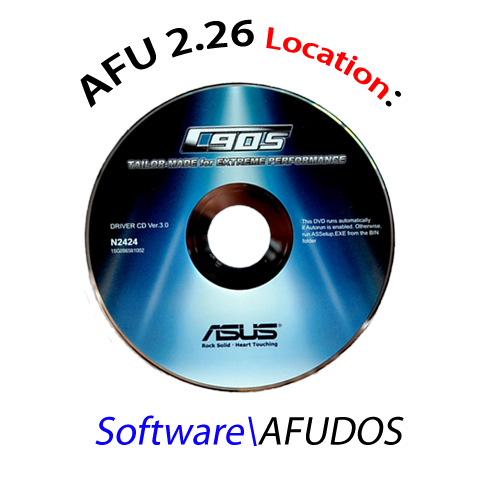
The regular way to flash the BIOS on C90S is performed by Asus AFU 2.26 (from DOS) and C90S BIOS file with related BIOS version. The location of AFU is on your Driver’s DVD:
Using AFU 2.26 we can flash back and forth between the different BIOS versions. The syntax of our BIOS flashing utility is:
afudos /i<ROM filename> [/o<save ROM filename>]
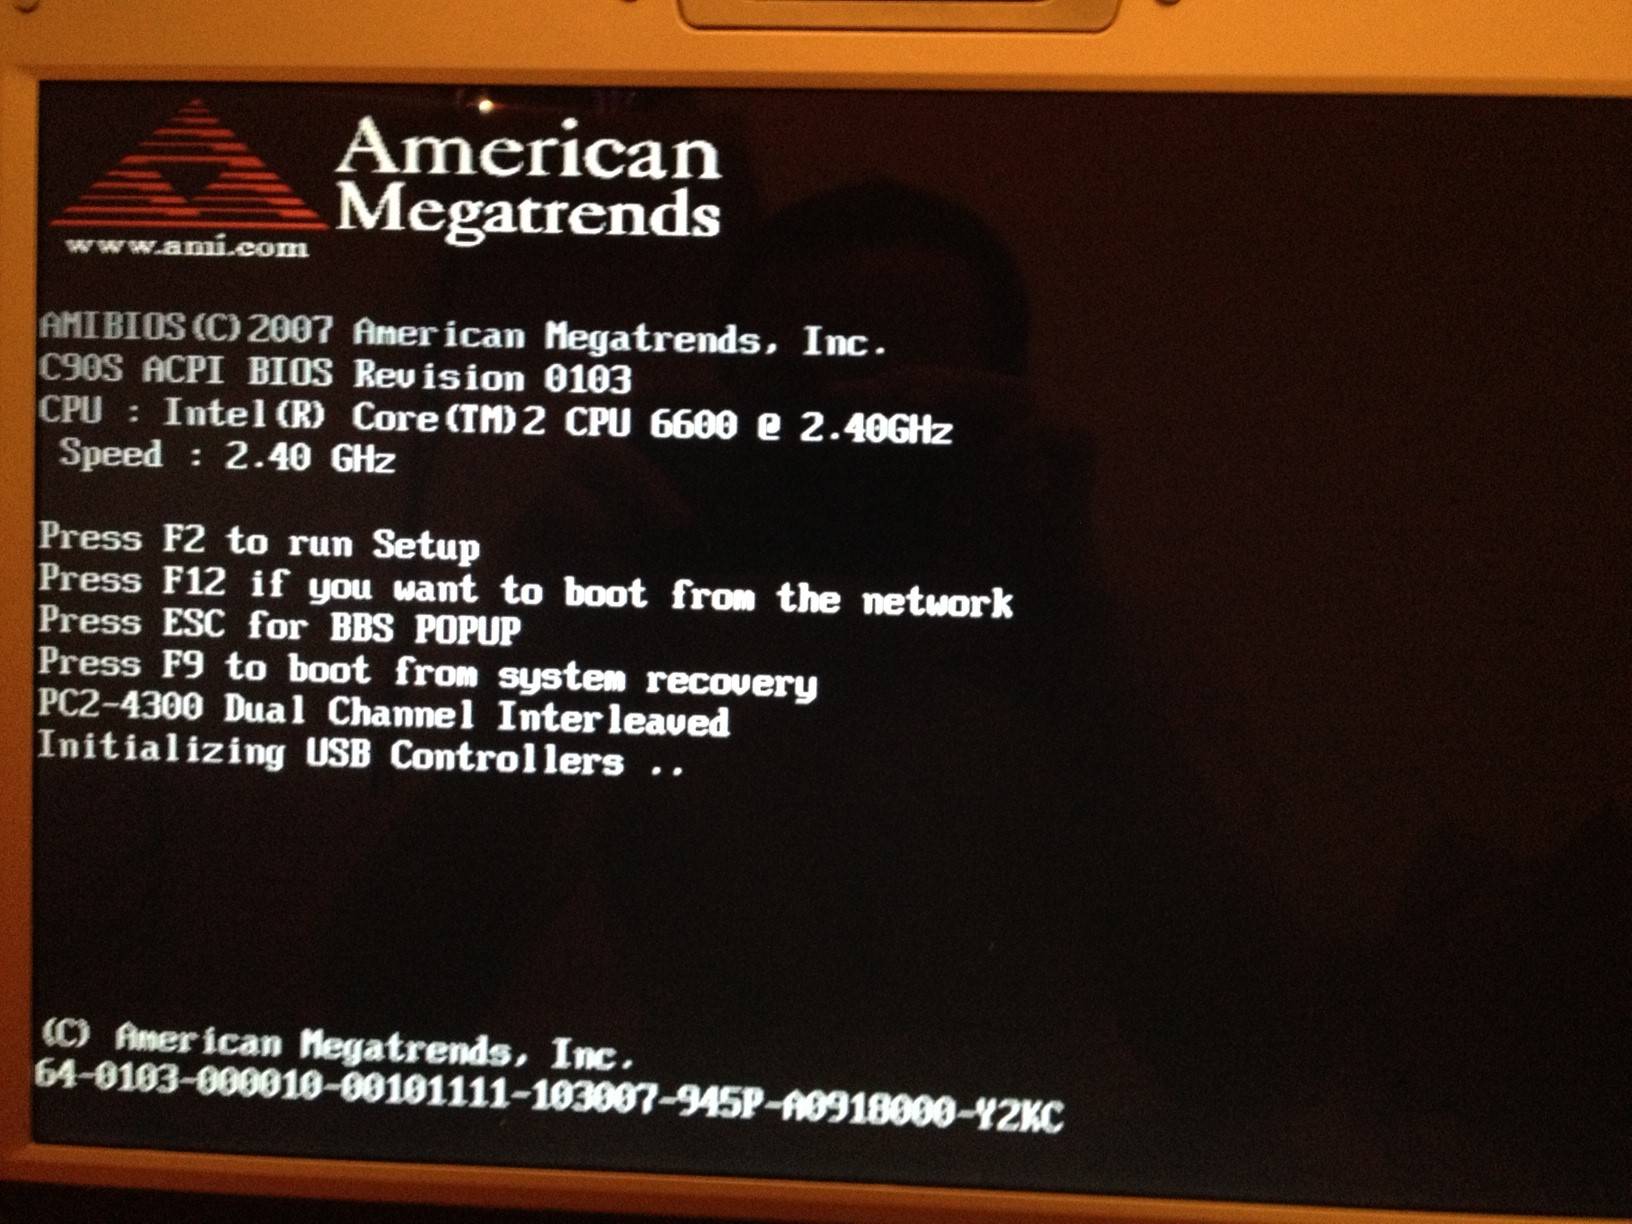
The POST screen with reported BIOS version 0103, one of the oldest C90S BIOSes:
So until now we have Asus C90S, Asus C90S BIOS flashing tool AFU 2.26 (DOS) and C90S BIOS version for flashing. The flash task is simple and in the same time is very important process. There isn’t room for errors, that’s why we are using clean DOS and without any drivers. You type at the prompt the command and its parameter:
A:\>afudos /i1002.rom
In your case you are trying to flash maybe the first C90S BIOS release 0103 with the last one 1002 (1002A) and you can’t succeed it. The cause for this reported by AFU 2.26 is:
“ROM file ROMID is not compatible with existing BIOS ROMID”.
It’s a little Asus surprise! This means that we really have two different ROMID’s or that the flashing tool reads wrongly them. I think that AFU works correctly and we have two different ROMID’s whatever is the reason for that. The solution is to ignore it and to perform BIOS flash without this check and here comes the second unpleasant surprise - we can’t do that with our Asus AFU 2.26 ES (AMI 1.19) version. In its “documentation” there isn’t officially supported such an option.
At this stage our need is from AFU DOS version which can properly to flash our BIOS without ROMID’s check. This task is really annoying because the odds to brick the BIOS data are rising. From other side we don’t know the AFU version and there isn’t prompt documentation for such important task. The only information comes from the network and it shows how difficult is for our manufacturer to describe the presence of this option. Here is the syntax of previous AFU DOS version:
afudos /i<ROM filename> [/o<save ROM filename>] [/nr] [/p[b][n][c]]
/nr - don't check ROM ID
/p (with the keys):b - Program Boot Block
n - Program NVRAM
c - Clear the System CMOSWith AFU 2.11 from the ISO archive C90S-Bios-ISO-1002A (BIOS Version 1002a for Asus C90S with all AFU versions touched by our assembler) you should update to BIOS version 1002A. Type at the DOS prompt and run:
A:\>211_afu /i1002A.rom /n
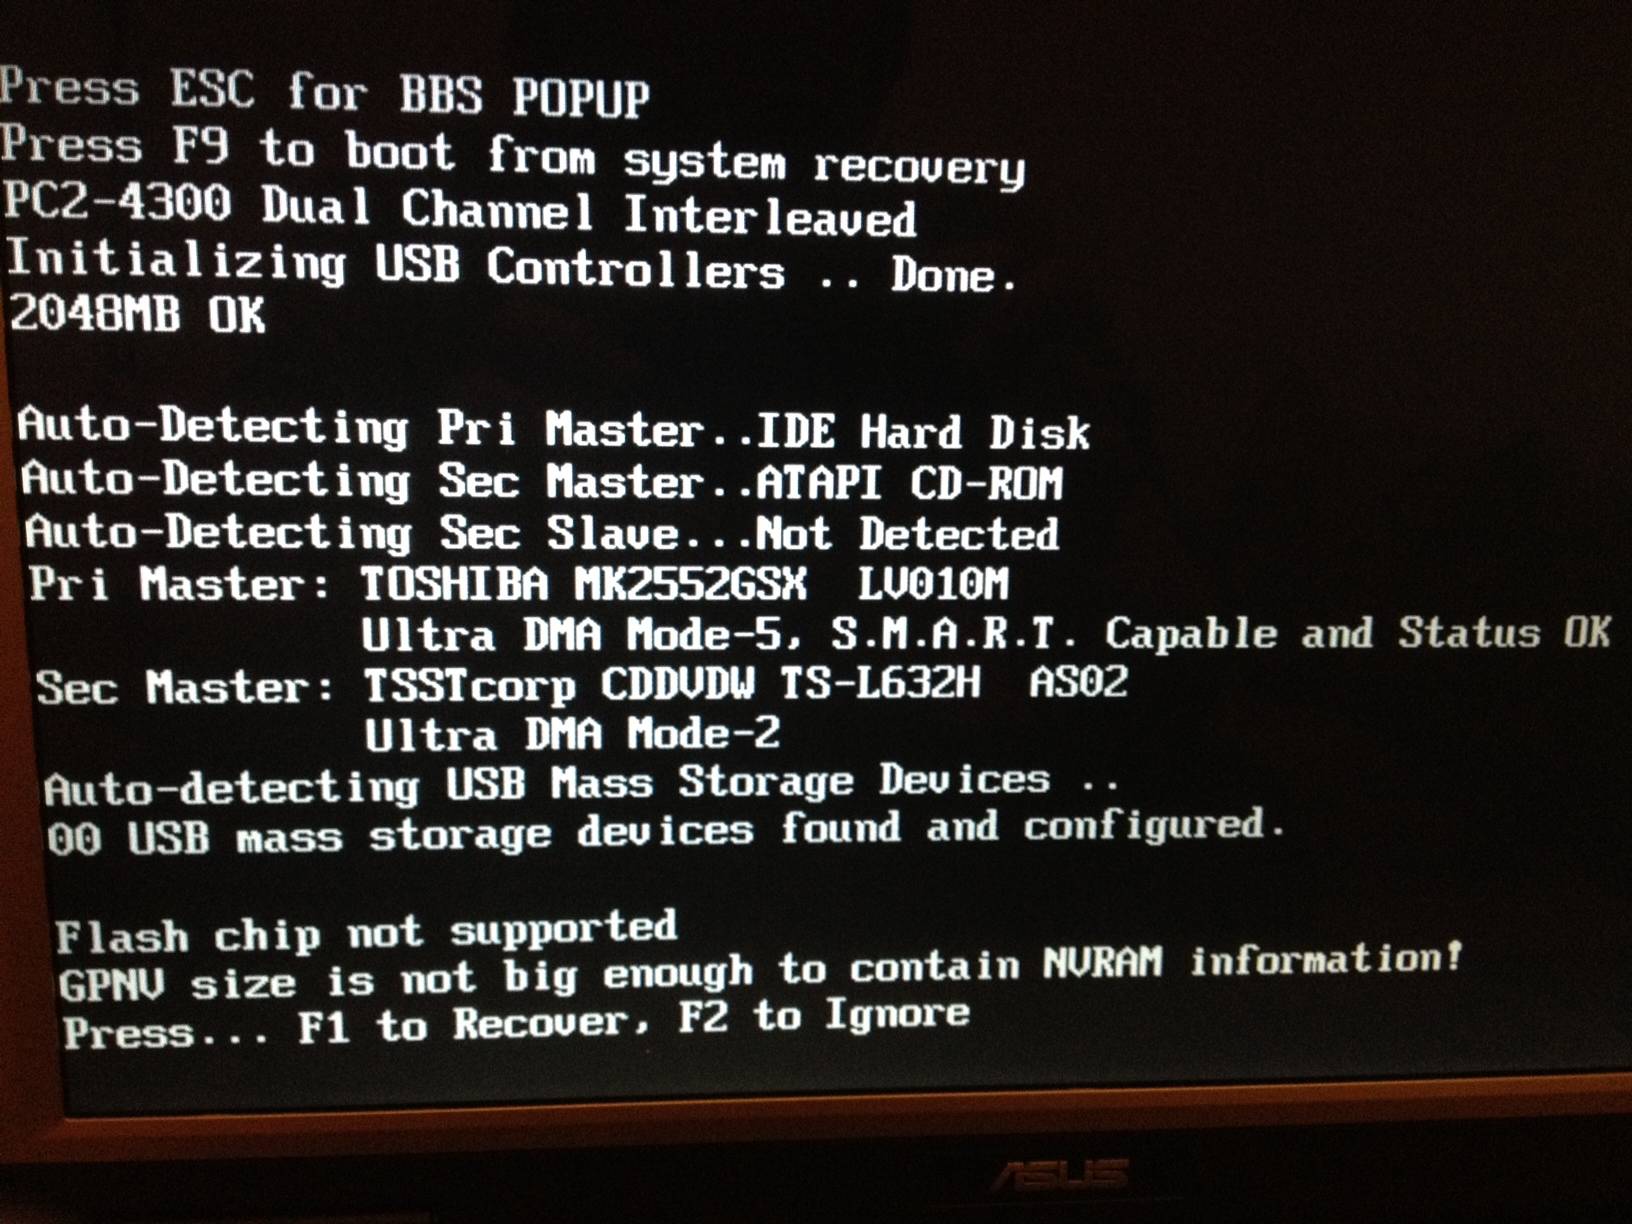
And after the system restart you will get the next POST screen:
In some reason after the BIOS flashing we have Locked GPNV Storage Area(s). The General Purpose Non-Volatile Storage Area is a storage area(s) managed by the System Management BIOS (SMBIOS). It’s not fatal but is still annoying message. The solution is to flash the BIOS again using AFU 2.26 at two steps. The first one is to flash the original BIOS version 1002 and after the restart to proceed with the second one - flash with 1002a. The final step:
A:\>226_afu /i1002A.rom
The result: “Fly, C90S, Fly, Up, Up To the Sky”!
How to recover broken System & Video BIOSes
System BIOS (sBIOS) Recovery
Note: In the most cases when the sBIOS Boot Block is damaged the new sBIOS can be flashed without desoldering of the EEPROM chip. It depends on the motherboard architecture and requires additional equipment.
There are two cases where the BIOS Boot Block is intact and when it isn’t.
The second case is the worst one because to be revived the broken BIOS we need to desolder the BIOS EEPROM chip and then to reprogram it if it isn't damaged. After that we should to resolder it again. That is it!
In the first case when the BIOS Boot Block is not damaged we will be able to recover the BIOS fast and without trouble using an USB flash drive. Please follow the next procedure step by step:
- Format your USB Flash (pen, stick) Drive with a FAT (it’s FAT16 DOS file system, up to 2 GB partition size). No need to put the OS files or make it bootable.
- Copy the desired BIOS file into the root folder on the already formatted USB flash drive, in our case 1002a.rom
- Rename it from 1002a.rom => C90S.ROM
- Restart the system
- When you see the POST messages press ALT+F2 (starts EZ Flash BIOS). The file C90S.ROM will be read and then will be written to the EEPROM.
- Don’t interrupt the process! If the screen is disappeared wait around 5 minutes and until USB drive light stops flashing.
- Restart the system and enjoy on your updated BIOS
Video BIOS (vBIOS) Recovery
Note: In the most cases when the vBIOS Boot Block is damaged the new vBIOS can be flashed without desoldering of the EEPROM chip. It depends on the video card architecture and requires additional equipment.
Unfortunately the vBIOS doesn't support a recovery mechanism when gets corrupted. If the flash utility can't see the video card then
How to use Toshiba’s ATI HD 4650 / 1GB / DDR3
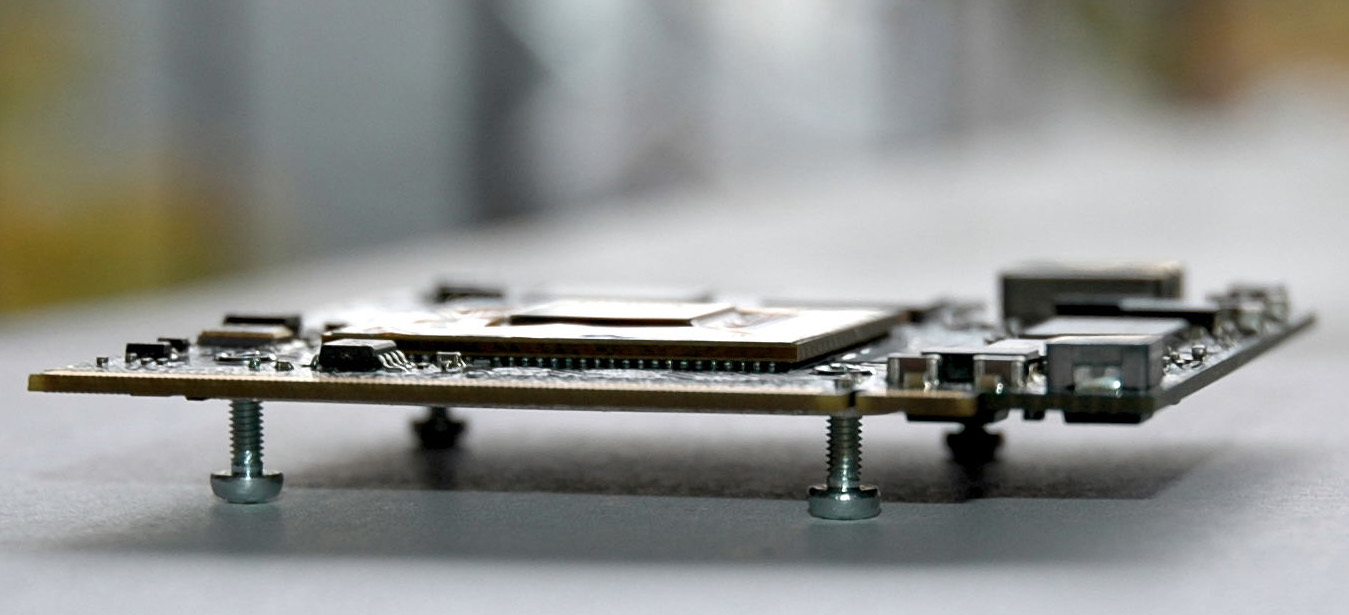
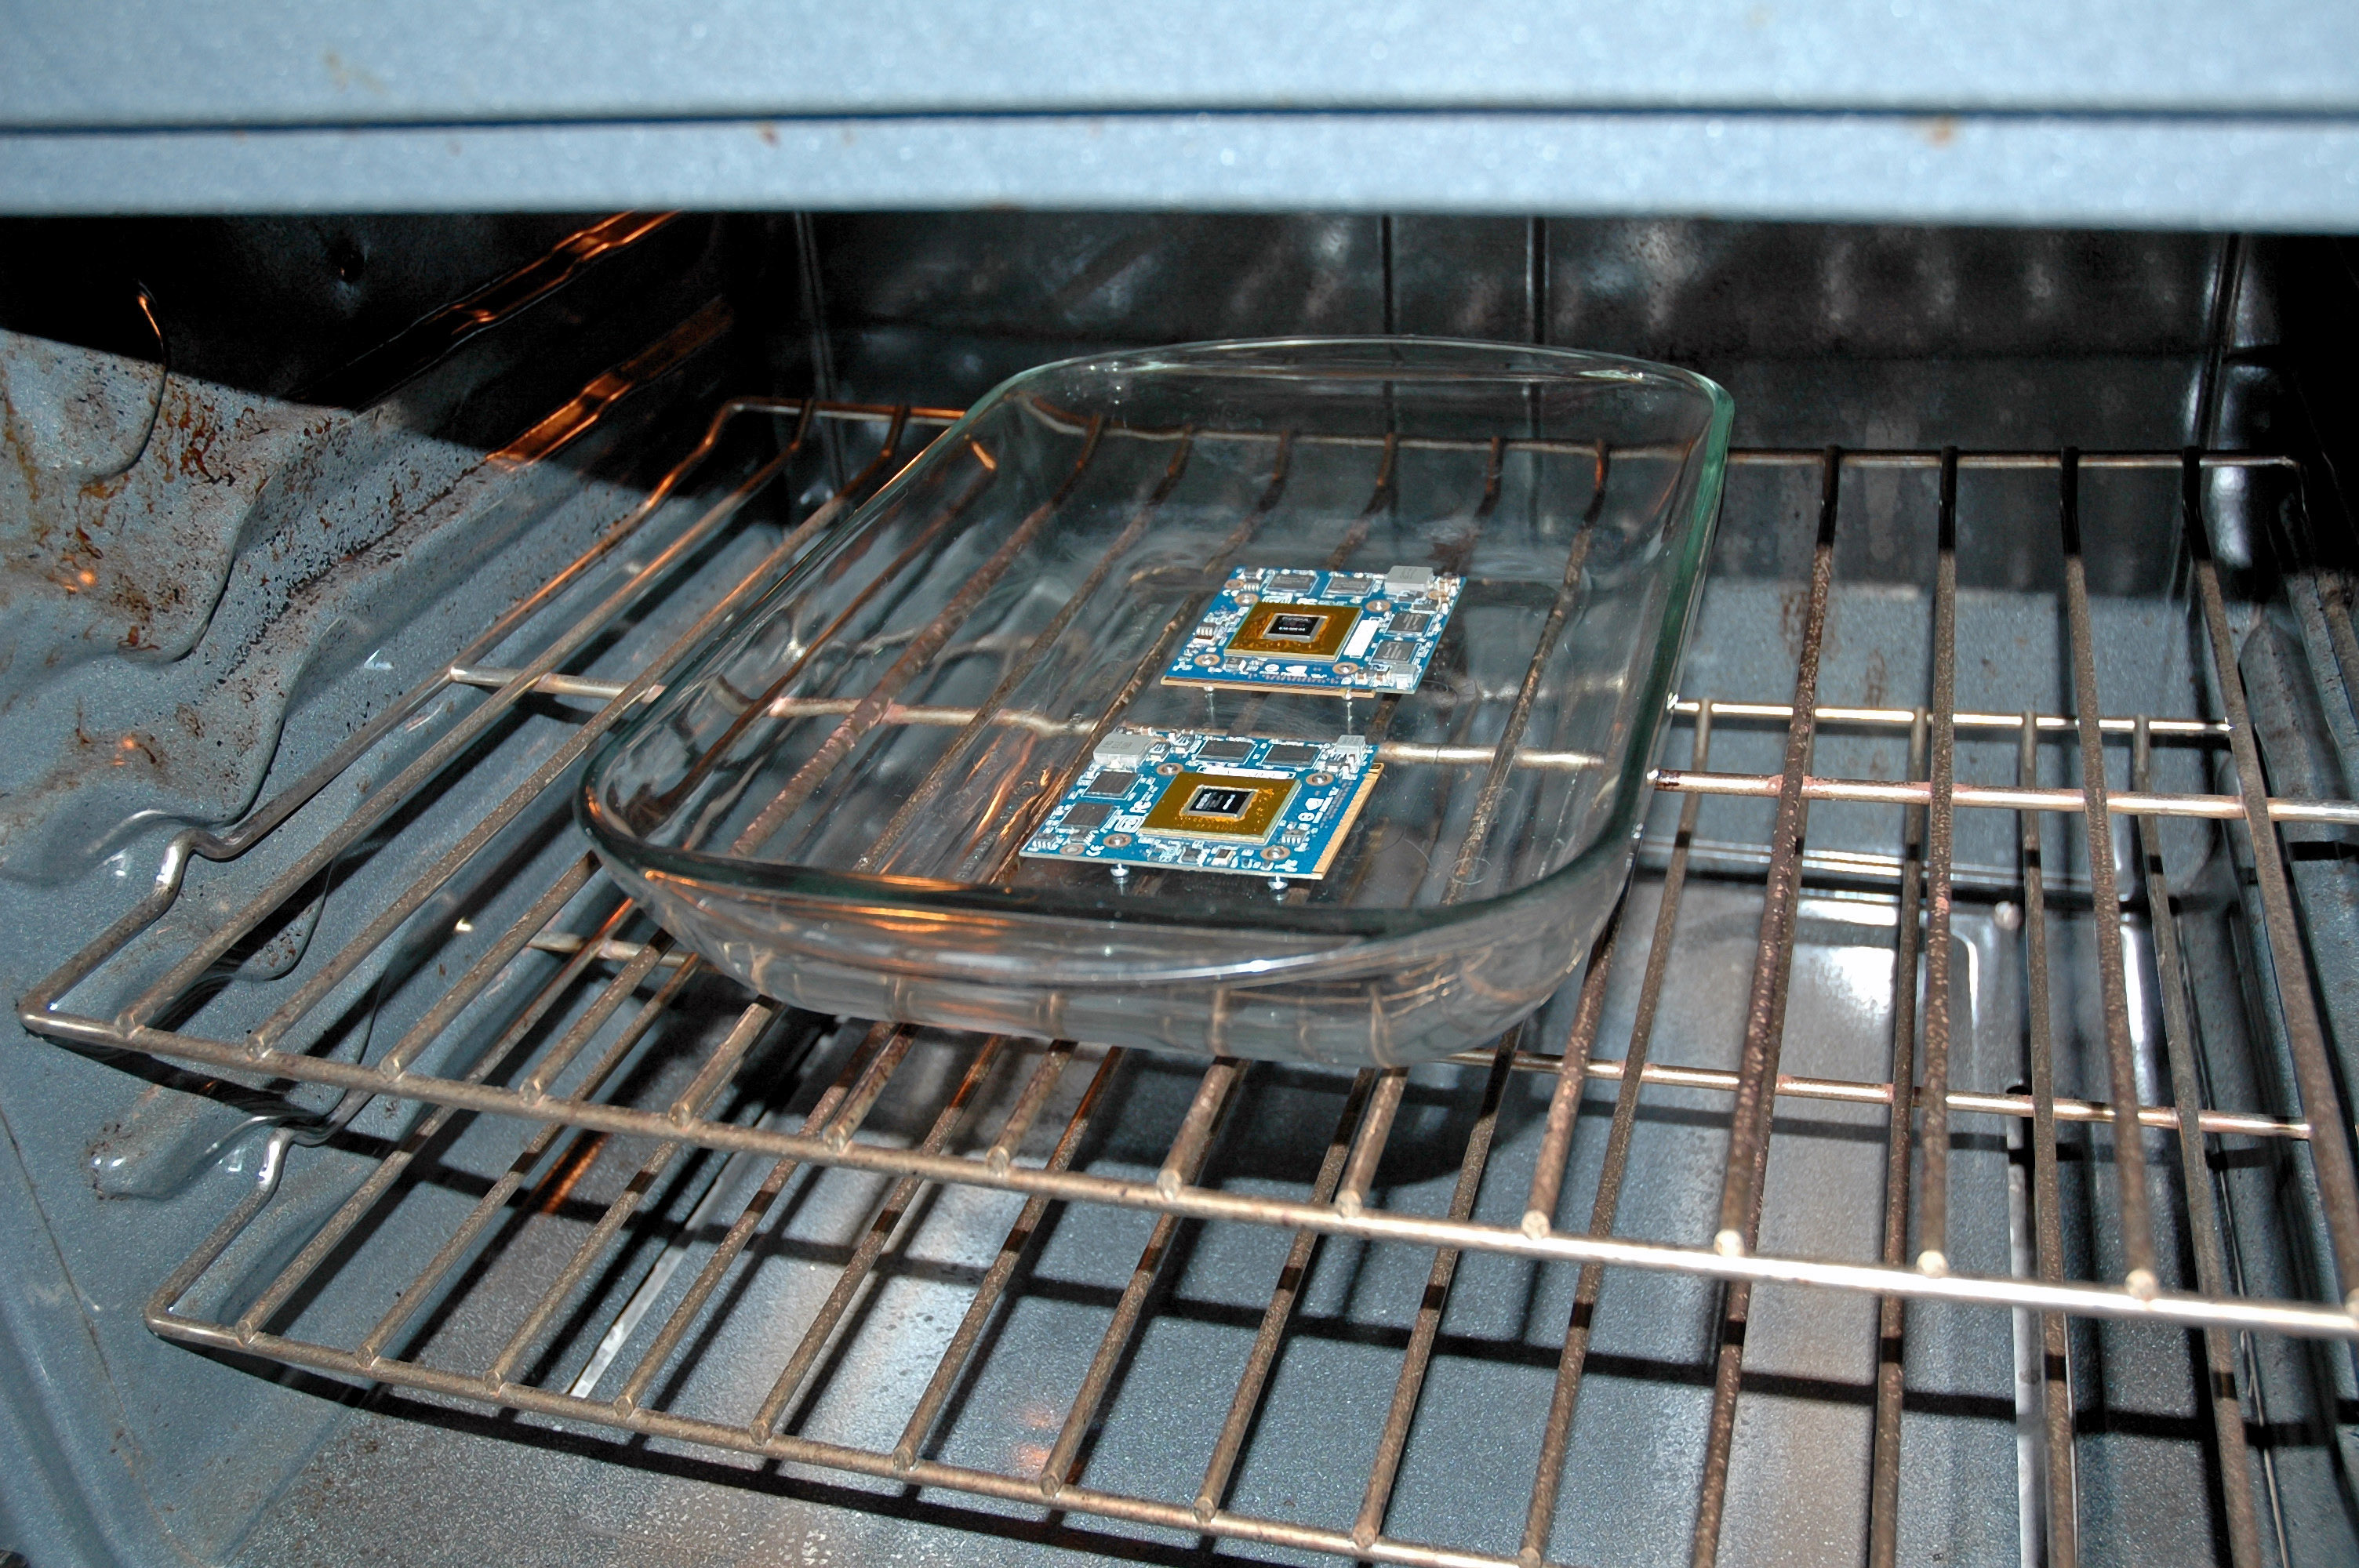
How to Cook a Delicious NVidia 8600M GT
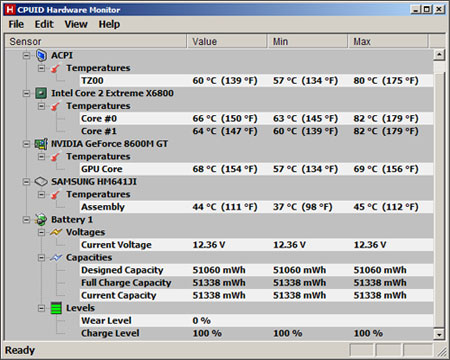
Ancient Inca’s Secret Recipe : How to Cook a Delicious NVidia 8600M GT (in pictures)
In the middle of October, 2011 I bought my fifth C90S and of course with a dead VGA. As an unexpected purchase I was not prepared with the beauty ASME 4.0. So until it will be manufactured for ATI’s 3470 I’ve decided to resurrect the thing NVidia 8600M called video adapter.
Time to prepare: ~ 50 minutes
Ingredients:
1 Uncooked NVidia 8600M
4 screws 2.5 x 8 (metric) or what you have
4 fresh thermal pads 0.5 mm thickness for dressing
1 drop thermal compound in your tasteSteps:
1) Remove the VGA from the laptop
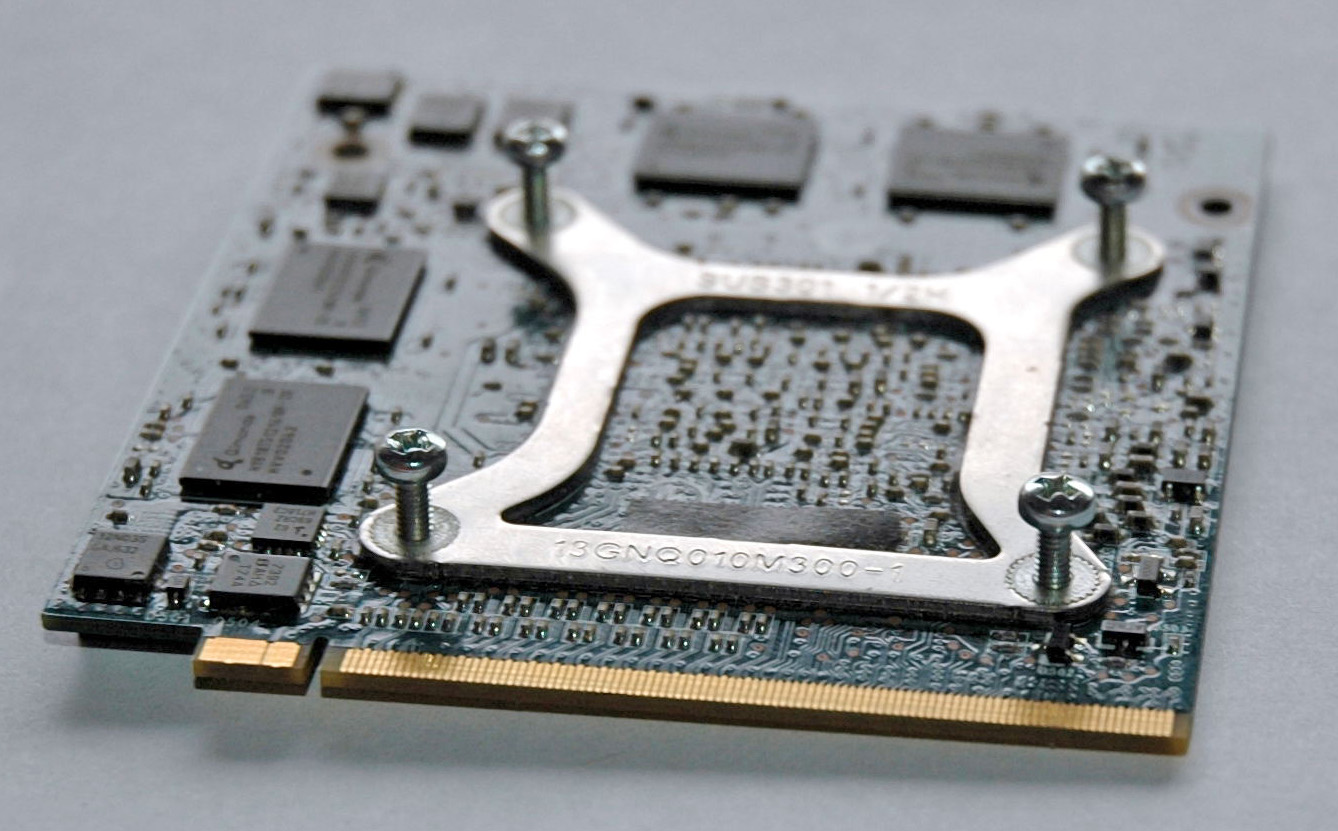
2) Remove the “heatsink”, thermal pads and clean the thermal compound from GPU
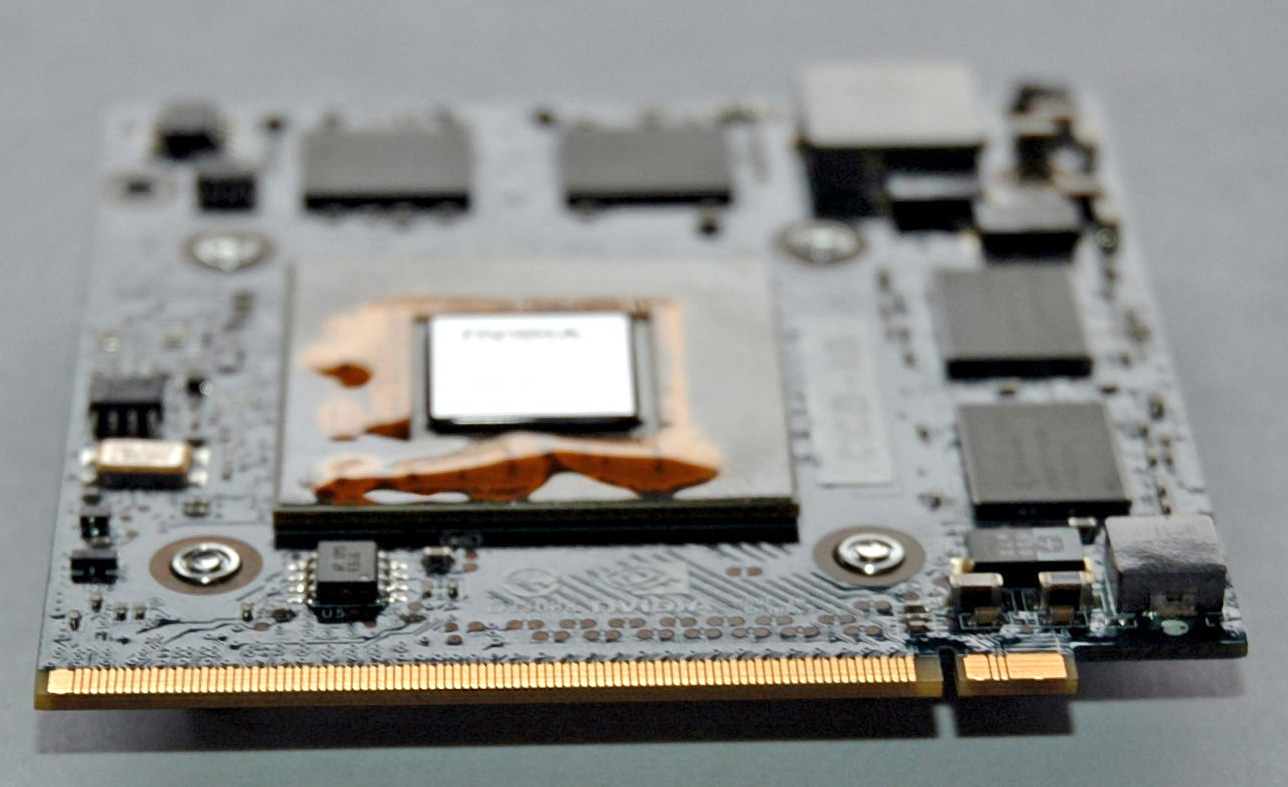
3) Use the 4 screws as legs of a table for the card
4) Preheat the oven at 350 ºF / 175 ºC (tolerance 10 ºC)
5) When the internal oven temperature reach 350 ºF / 175 ºC put the meal inside for 7 minutes or until Barry White is singing its “Hard to Believe That I Found You”.

6) When the time passes, turn off the oven and open its door. Don’t touch or move the baking dish! Let it to cool down to the room’s temperature
7) Take the card and remove the screws. Dress the meal with thermal pads and drop of thermal compound
8) Cover the card with the “heatsink”Enjoy on your heavenly delicious product!
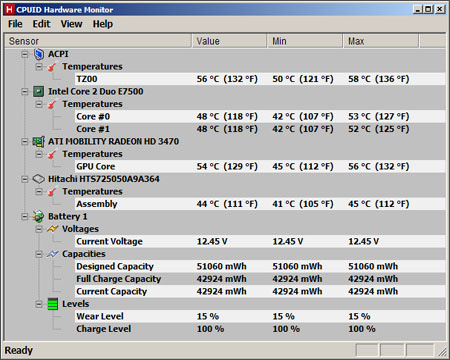
Now the dessert (Picture #1) and just for reference next to the same system is another one with E7500 & ATI 3470 (Picture #2), Room temperature 22 ºC:
Good Appetite,
NVidia’s Bakerman
PS: This recipe was implemented by me over a dead 8600M six months ago that still is working. Also 4 another adapters was resurrected and all of them are in good condition working without problems.
Note: Don’t forget that the Incas are disappeared as a civilization!
How to use 4 internal SSD Drives on C90S
This mod is not easy without two Mini PCIe SATA SSD Drives designed for the Mini PCIe Hardware Protocol which are extremely difficult to find!
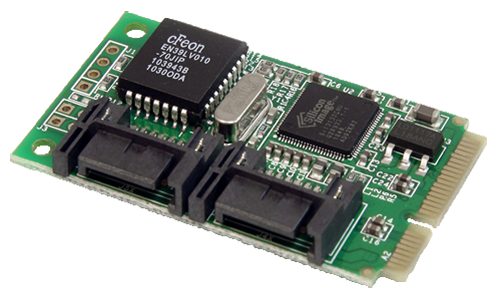
In that case you can use the StarTech’s “2 Port Mini PCI Express Internal SATA II Controller Card”. The difficult part is to be provided the required power for the SSD drives. Here it is the card:
Hint: The power for the new drives can be taken by the existing ones.
Here is the place where you should recall the specifications of PCI Express and SATA I/II. Our system is based on PCI Express revision 1.0 with the maximum data transfer speed of 2.5 GT/s or 244 MB/s while the max speed of SATA II is 3 Gbits/s or 292 MB/s. Here are the calculations:
Max Speed of the PCI Express 1.0:
(2.5 GT/s) * (8/10) = 2 Gbits/s
(2 Gbits/s) / 8 = 0.250 GBytes/s
(0.250 GBytes/s) * 1000 = 250 MBytes/sTo be the calculation precise to IT measures:
(250 MBytes/s) * (1000/1024) = 244.140625 MBytes/s = 244 MB/sMax Speed of the SATA II / 3 Gbits/s
(3 Gbits/s) * (1000/10) = 300 MBytes/s
(300 MBytes/s) * (1000/1024) = 292.96875 MBytes/s = 292 MB/sThe real speed is lower. Why?
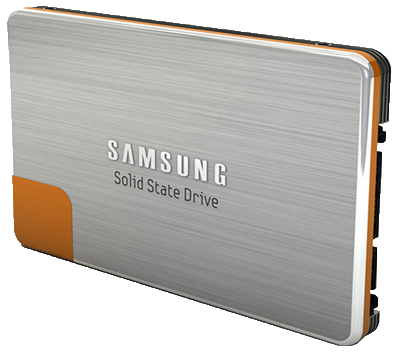
How Fast is Samsung 470 (64G/59.63G) on Write Operations
It’s a time to be increased the speed of the disk Input / Output (I/O) operations using the Samsung’s SSD 470 Series. The results are impressive compared to the fastest 2.5” HDD at the moment (October 11, 2011) for me Samsung Spinpoint MP4 HM640JJ 640 GB 7200 RPM 16 MB Cache. It’s the first SSD which get my attention, here you are a picture:
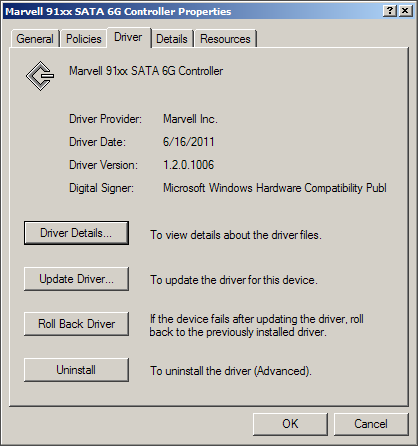
The test of the SSD was performed after the properly disk alignment and under NTFS file system without compression. The disk performance was measured when it was attached to the internal SATA interface and to the 6 Gbits Marvell via the external ExpressCard slot. The performance results with and without system cache are available.
Here you are the pictures with the Agenda & Results:
_SSD_Write_Test_Agenda_FAQ.png)
Here you are a 15 min. movie with the performed Tests & Results:
Software Environment
OS: WinXP Pro & SP3 (32-bits)
Storage Drivers:
Some Notes
ZFL’s view:
The Samsung’s SSD is nearly 1.14 times faster than the Hitachi’s HDD. The Hitachi (HTS725050A9A364) is writing with 59 MB/s against 67 MB/s for Samsung’s 470 (64). The SSD hits 52 ºC at room temperature 21 ºC.
My 3 years old Patriot 32 GB Flash Drive gave me constant 17 MB/s at writing. The USB Flash is faster than Samsung’s 470 (64G) in the same conditions namely when the cache was disabled (see the movie).
Leprechaun’s view:
The Samsung’s SSD is nearly 3 times faster than the Hitachi’s HDD. The application Leprechaun Quadrupleton has serious requirements to the storage system speed and its good performance depends on it.
Except the SSD(s) there are two very important tools which will improve the I/O speed of any system. The idea isn’t a new and it’s based on this to use a part(s) of the RAM memory as a storage device(s) or as an additional system cache. The company SuperSpeed LLC is the developer of these two applications - RamDisk Plus and SuperCache.
Thanks to these tools we can precisely to optimize (tune) I/O performance at system or application levels. They are well written and can work together without conflicts.
In example the HDD emulated by RamDisk Plus is faster than fastest SSD on the market. The speed of such drive depends on the RAM’s architecture, the system speed and the used file system.
Thanks to the innovation ideas of our manufacturer we can’t use the memory space behind 3.2 GB in C90S. On other systems with 4 GB RAM and 32-bits Win OS we can reach the “missing” ~ 800 MB RAM via PAE (Physical Address Extension).
_SSD_Write_Test_Agenda.png)
_SSD_Write_Test_Results.png)

How to Attach RAID Storage
Existing RAID
An existing RAID storage can be attached to the C90S in two ways:
1) via the existing C90S eSATA interface with JMicron controller – 292 MB/s
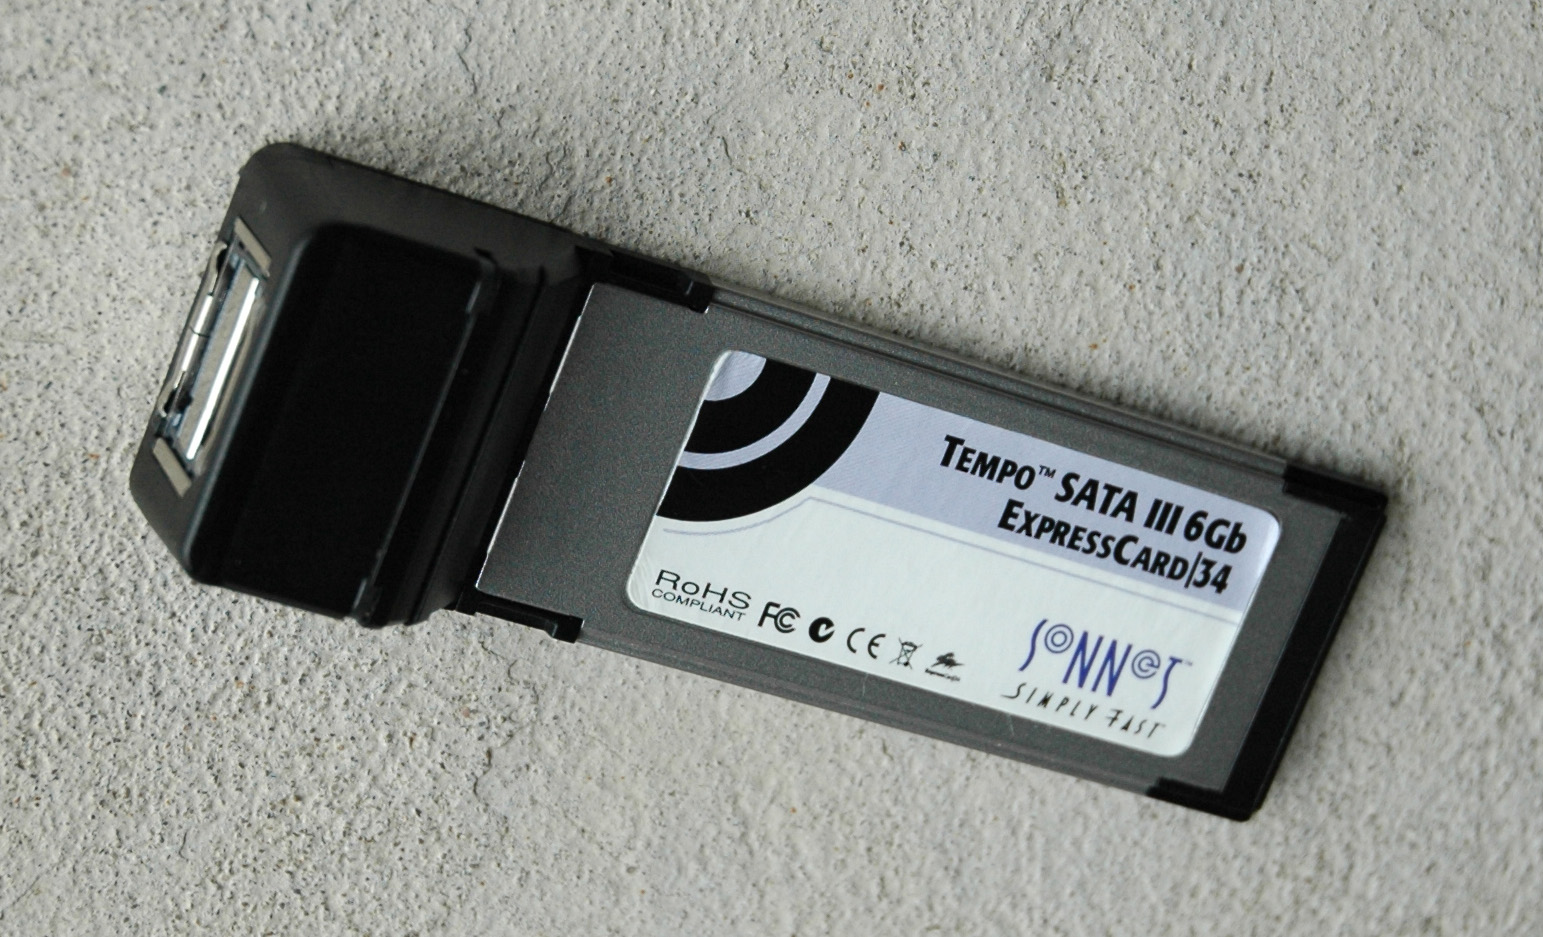
2) via the ExpressCard slot using an adaptor card with eSATA interface(s) – 244 MB/sIn this case is good to be used a card that supports booting via its eSATA interfaces like a Sonnet's Tempo SATA III 6 Gbit. Here it is a picture:
The card has two eSATA interfaces and can be used to boot any attached SATA drive or RAID storage.
Create RAID
Another option is to be built the RAID storage from already attached disk drives to a software or hardware RAID controller that supports SATA drives. In this case we can use:
1) the internal Mini PCIe interface
An example with the software RAID is the StarTech’s “2 Port Mini PCI Express Internal SATA II Controller Card”:
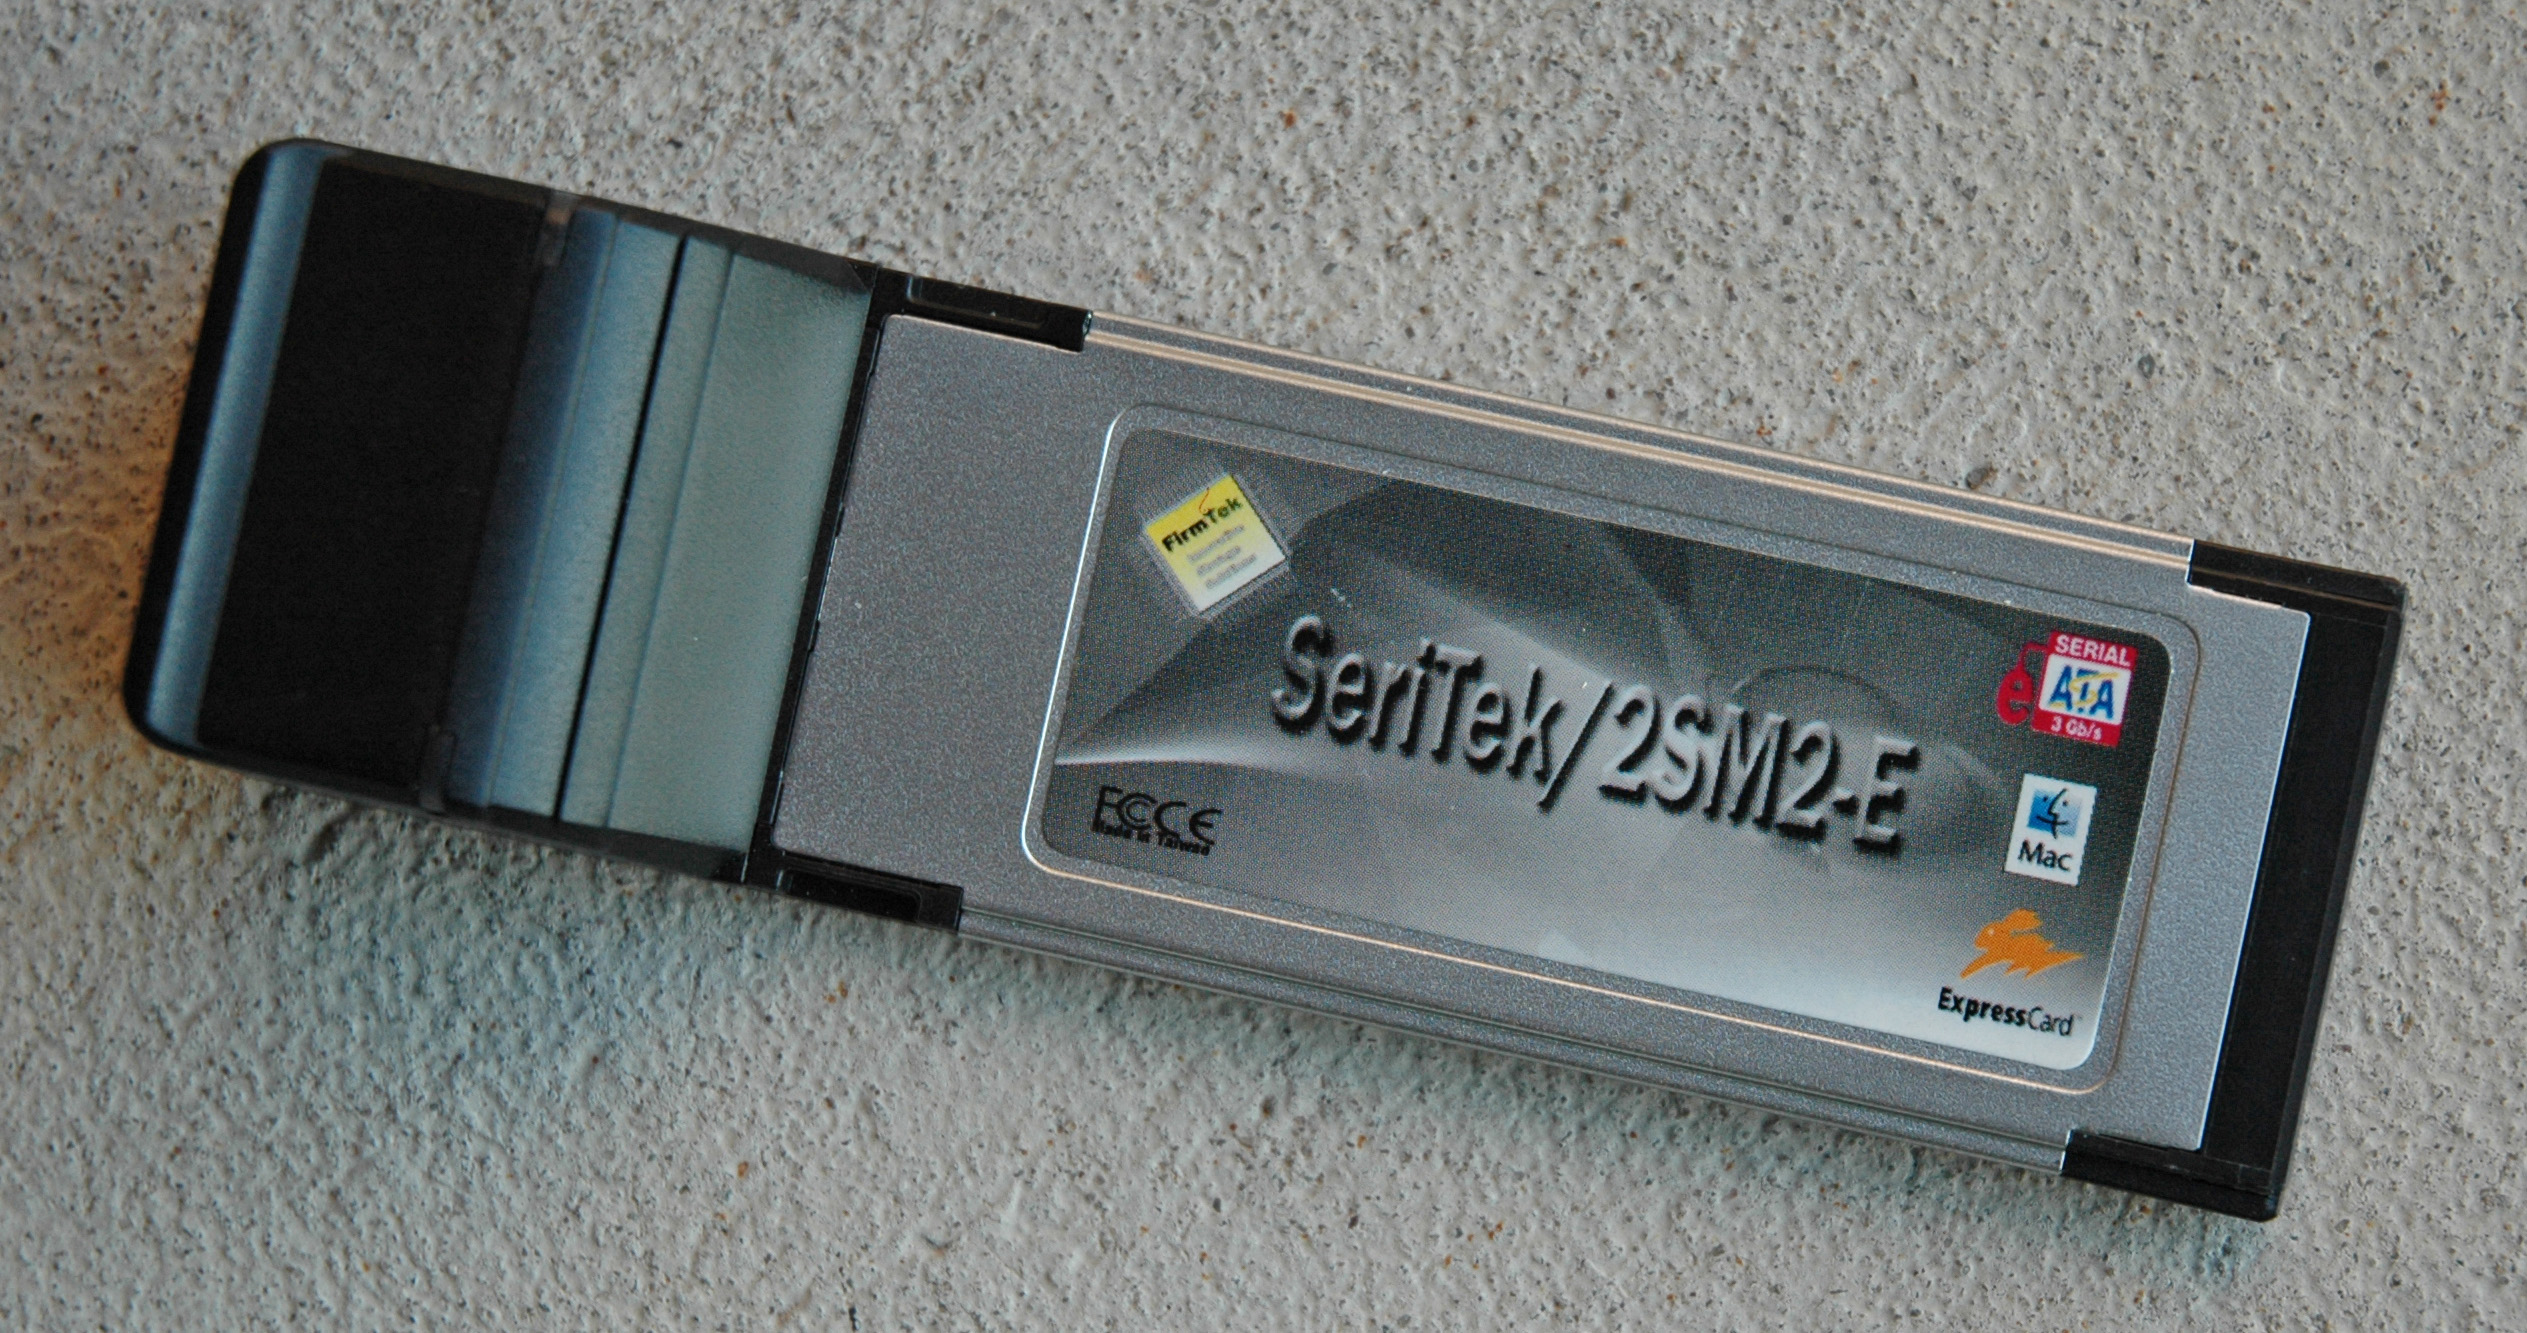
2) the external ExpressCard slot
The FirmTek's card “SeriTek/2SM2-E” is a hardware RAID controller with two eSATA ports whithout bootable capabilities. Here it is a picture:
The version of the card “SeriTek/6G eSATA 6 Gbit” can boot from the created RAID storage.
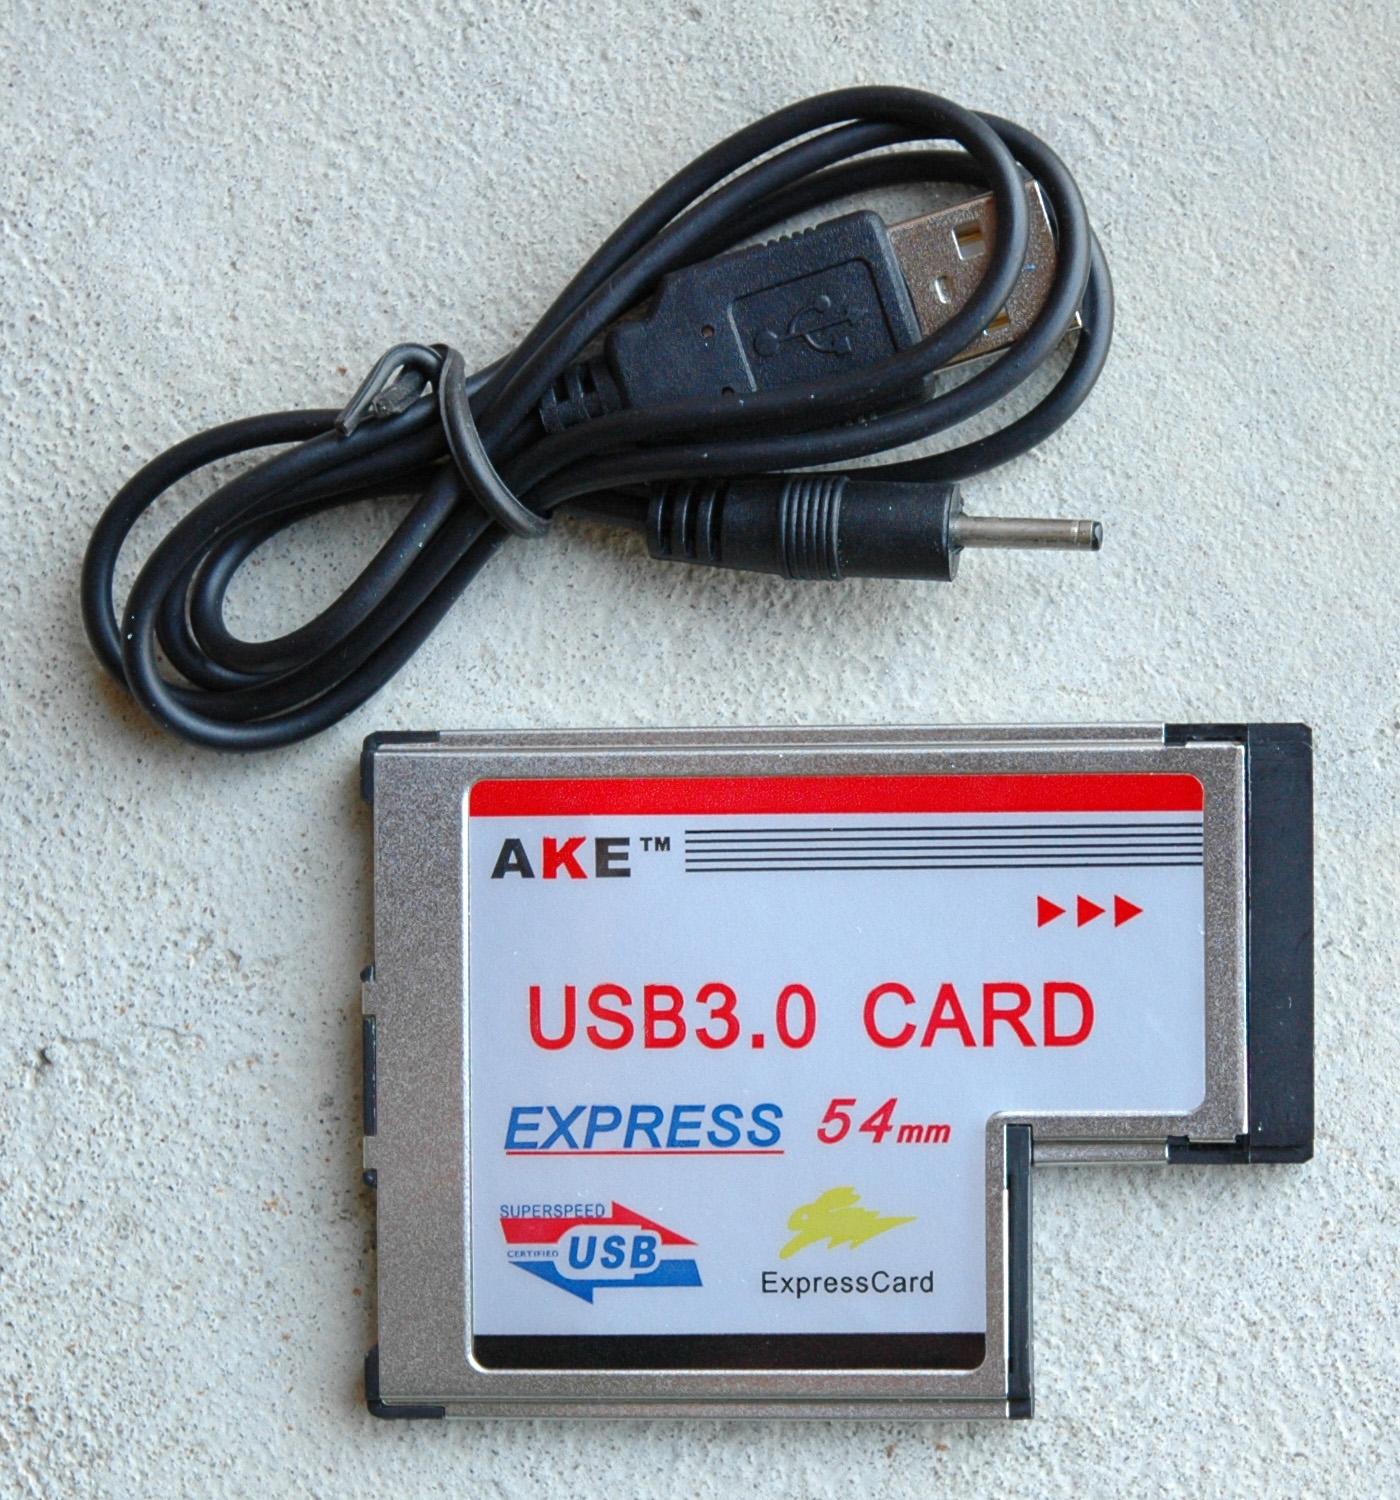
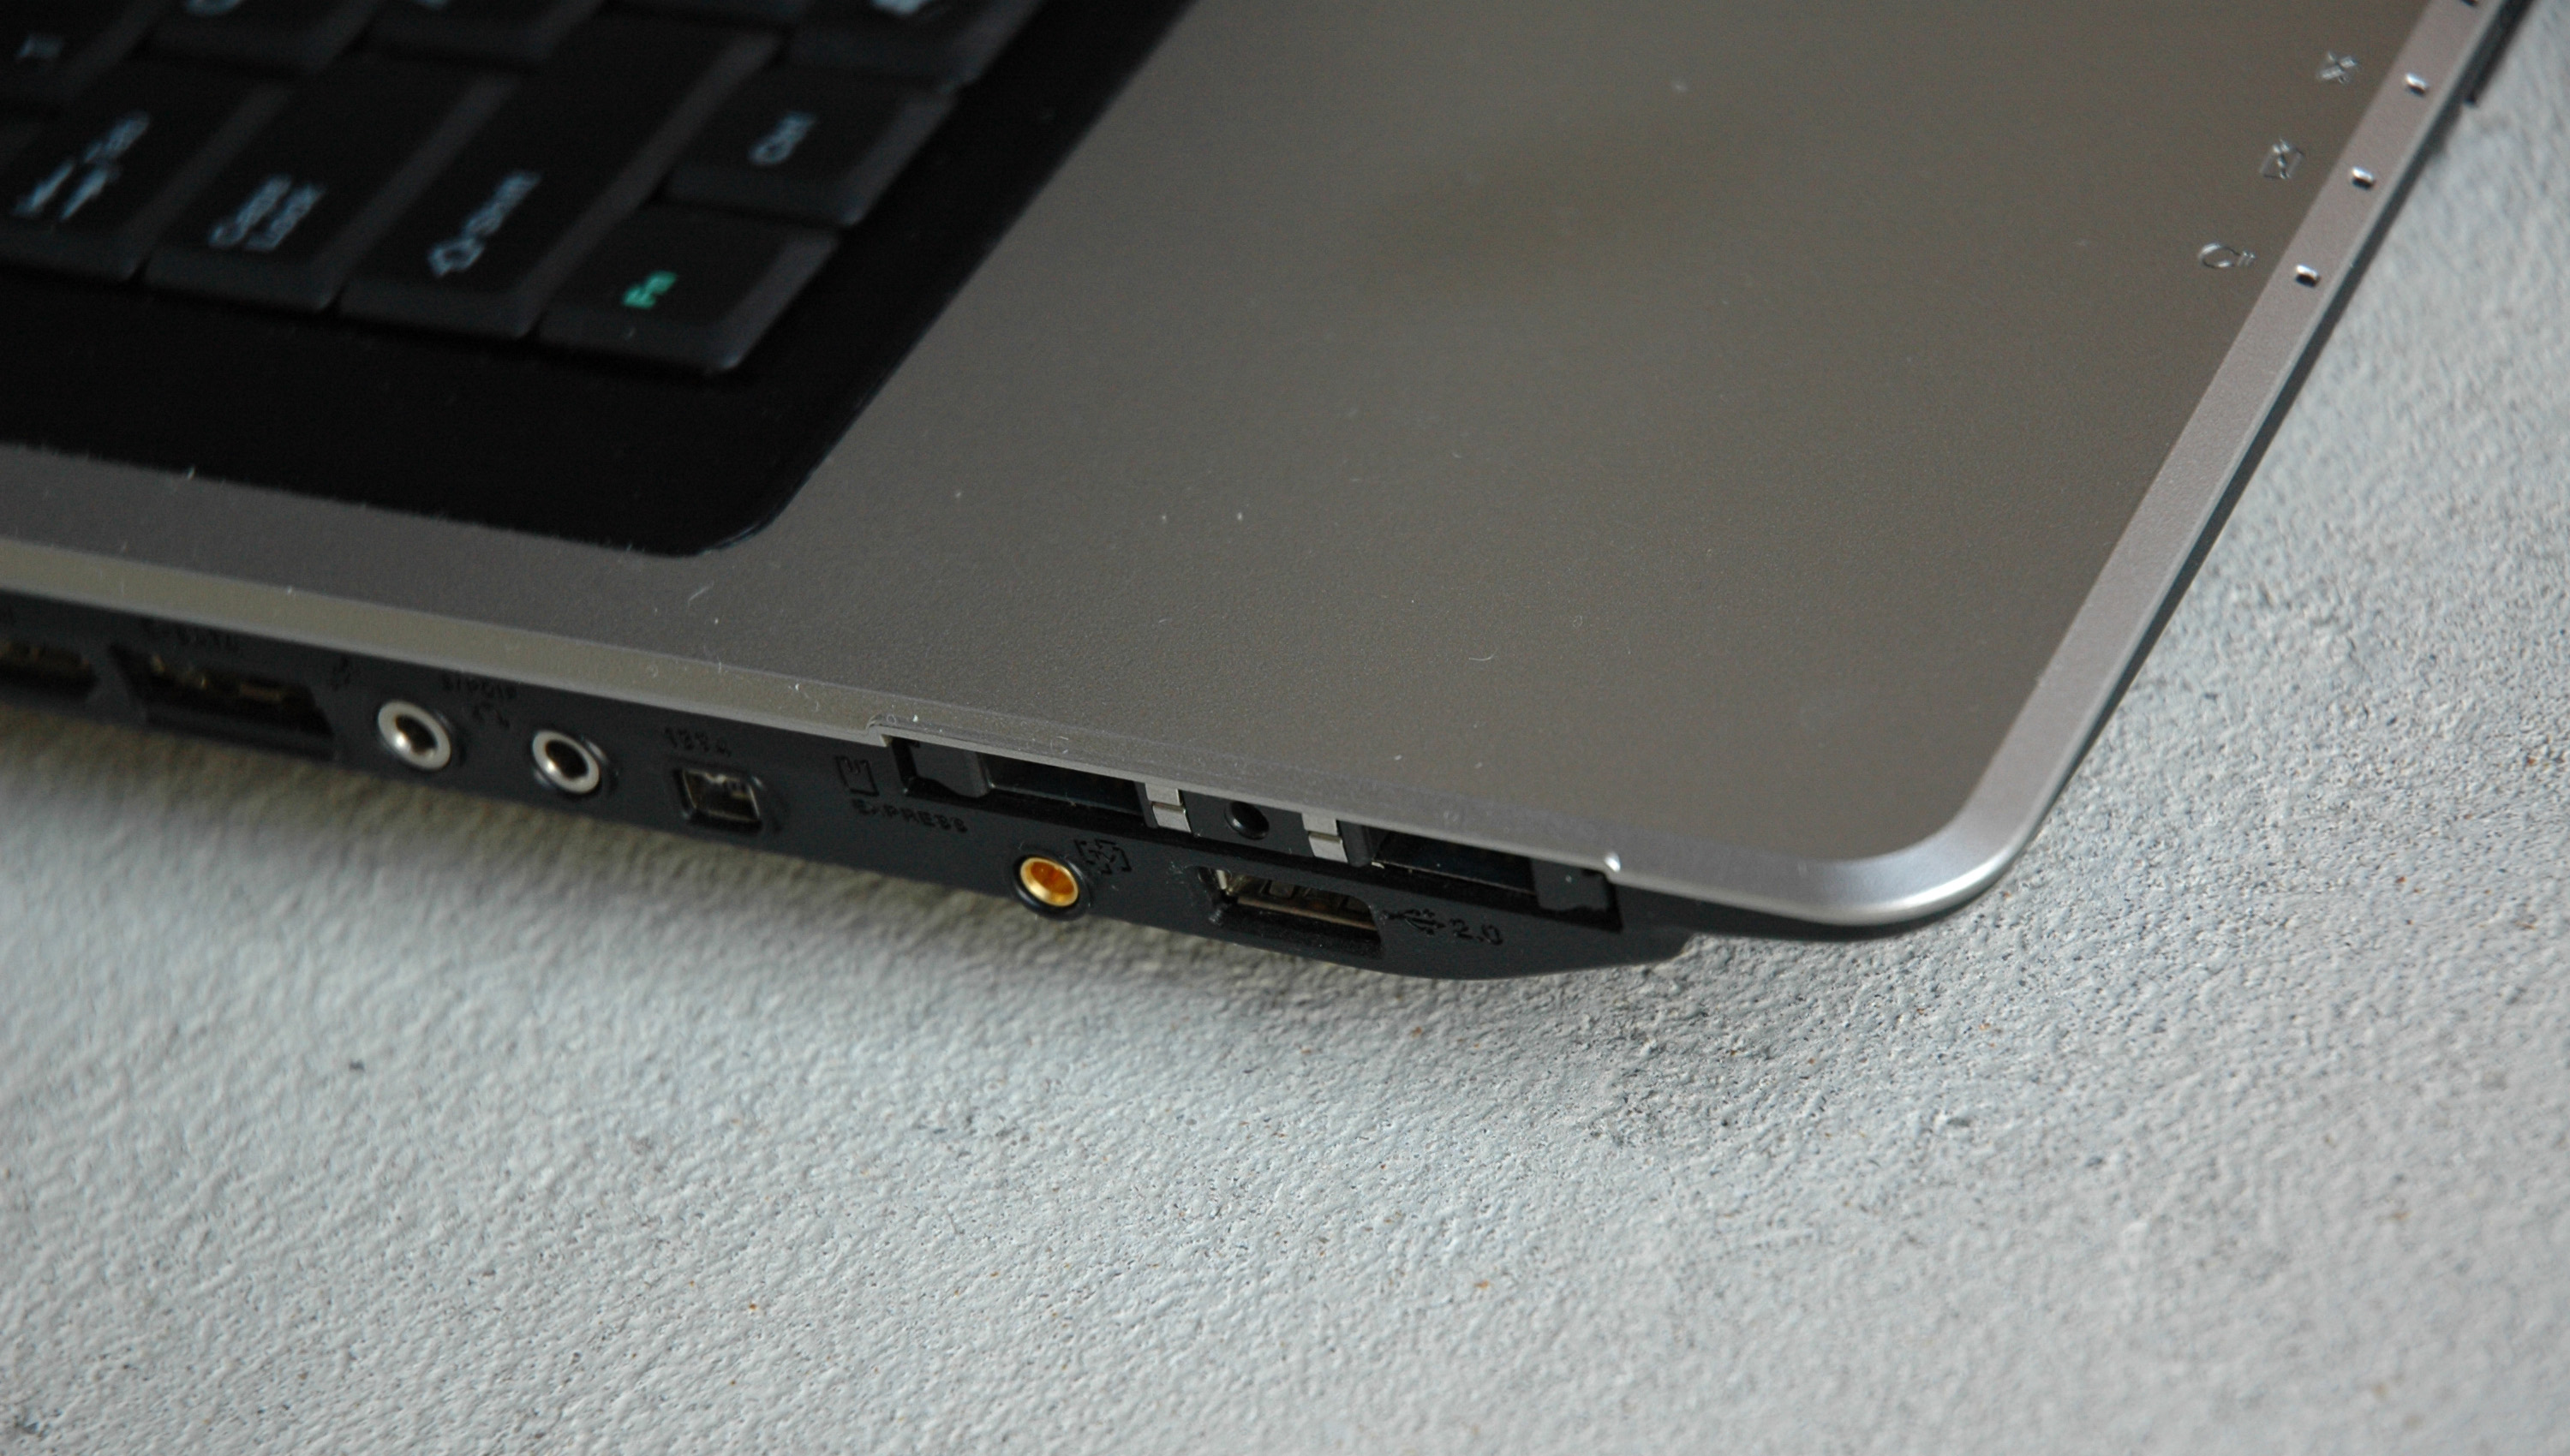
How to Attach USB 3.0 Peripherals
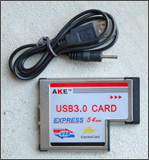
C90S doesn’t have USB 3.0 interfaces and that’s why any attached peripherals with such interface will be treated as a USB 2.0 one. We can benefit from the higher speed of the USB 3.0 devices thanks to our ExpressCard slot using a USB 3.0 adapter.
Here is the place to remind you about the difference between the interface speed and the speed of a device attached to and supporting that interface.
The C90S chipset (“Intel 945 Express Chipset Datasheet”) is based on PCI Express revision 1.0 with the maximum data transfer speed of 2.5 GT/s or 244 MB/s while the max USB 3.0 speed is 5 Gbits/s or 488 MB/s. It’s obvious that with the ExpressCard USB 3.0 adapter we can’t achieve a speed more than 244 MB/s.
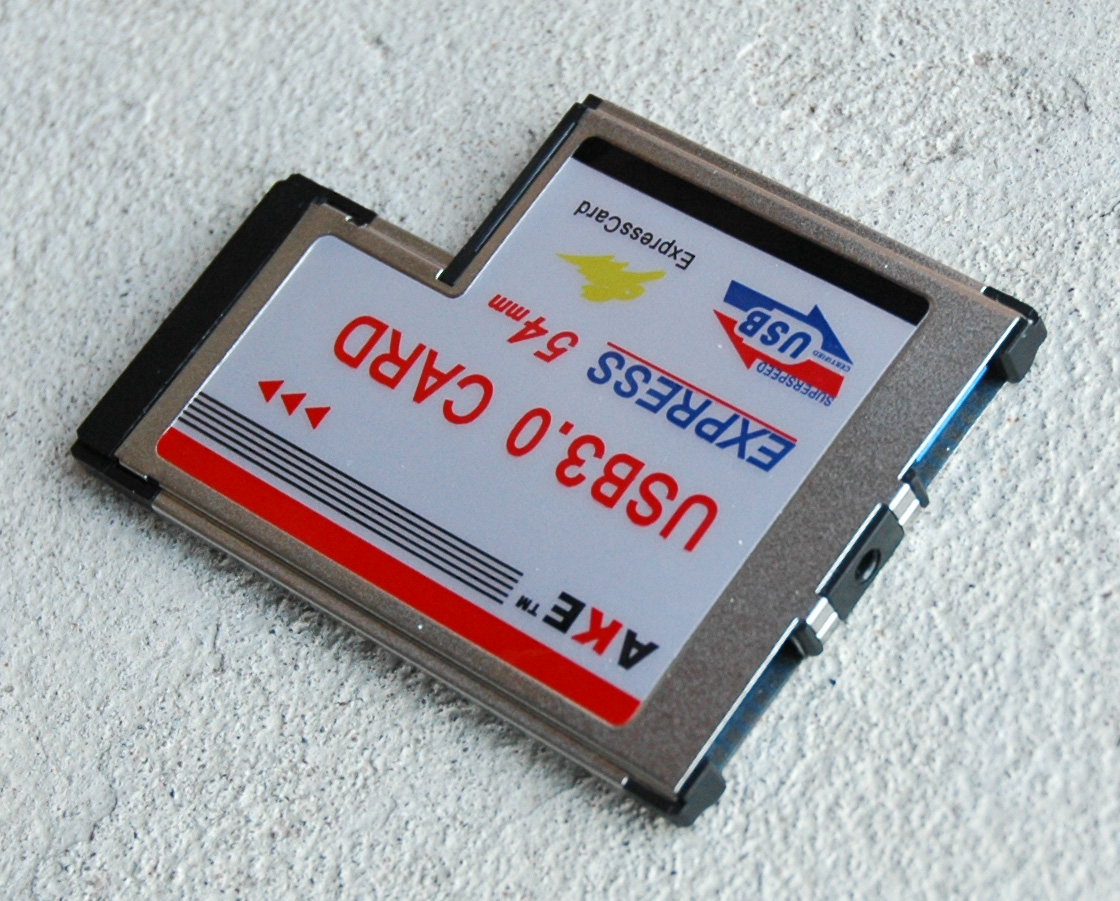
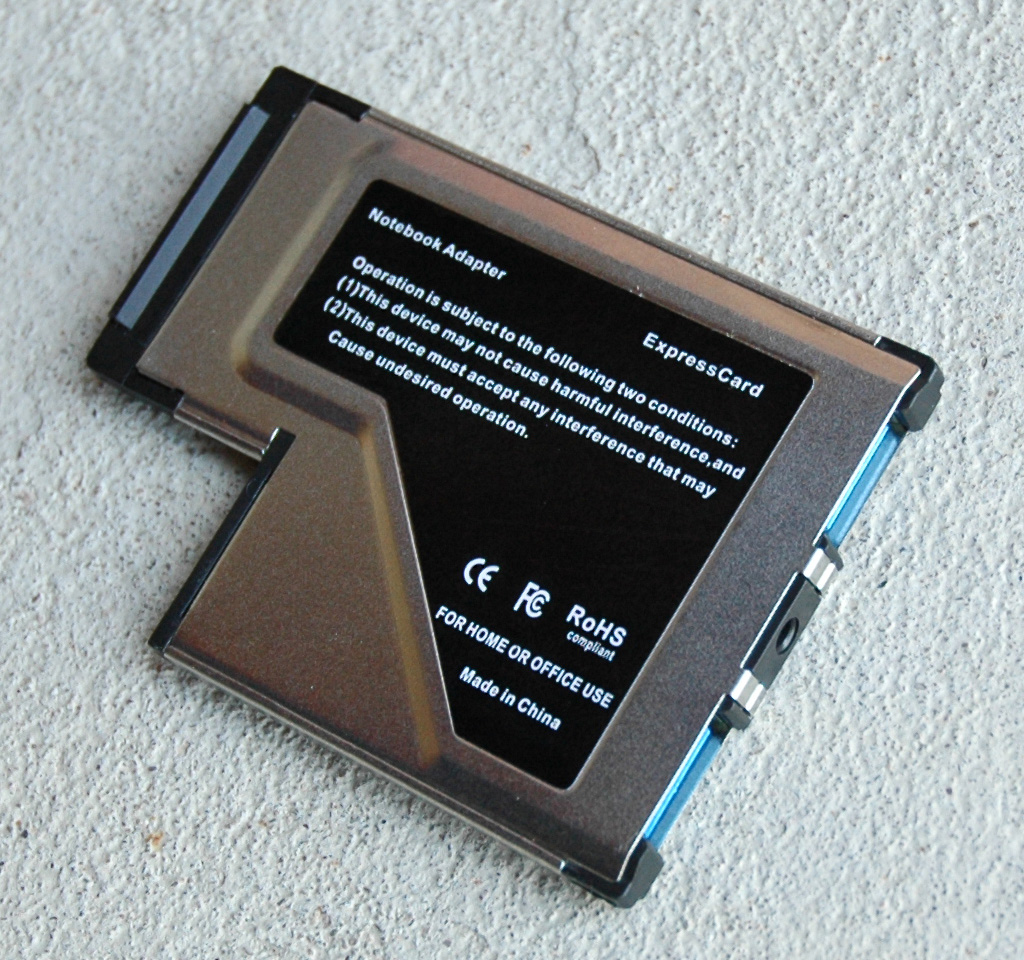
I’m using the ExpressCard based on Renesas USB 3.0 Controller with the Driver 3.0.23.0 / Firmware 2.0.1.8.
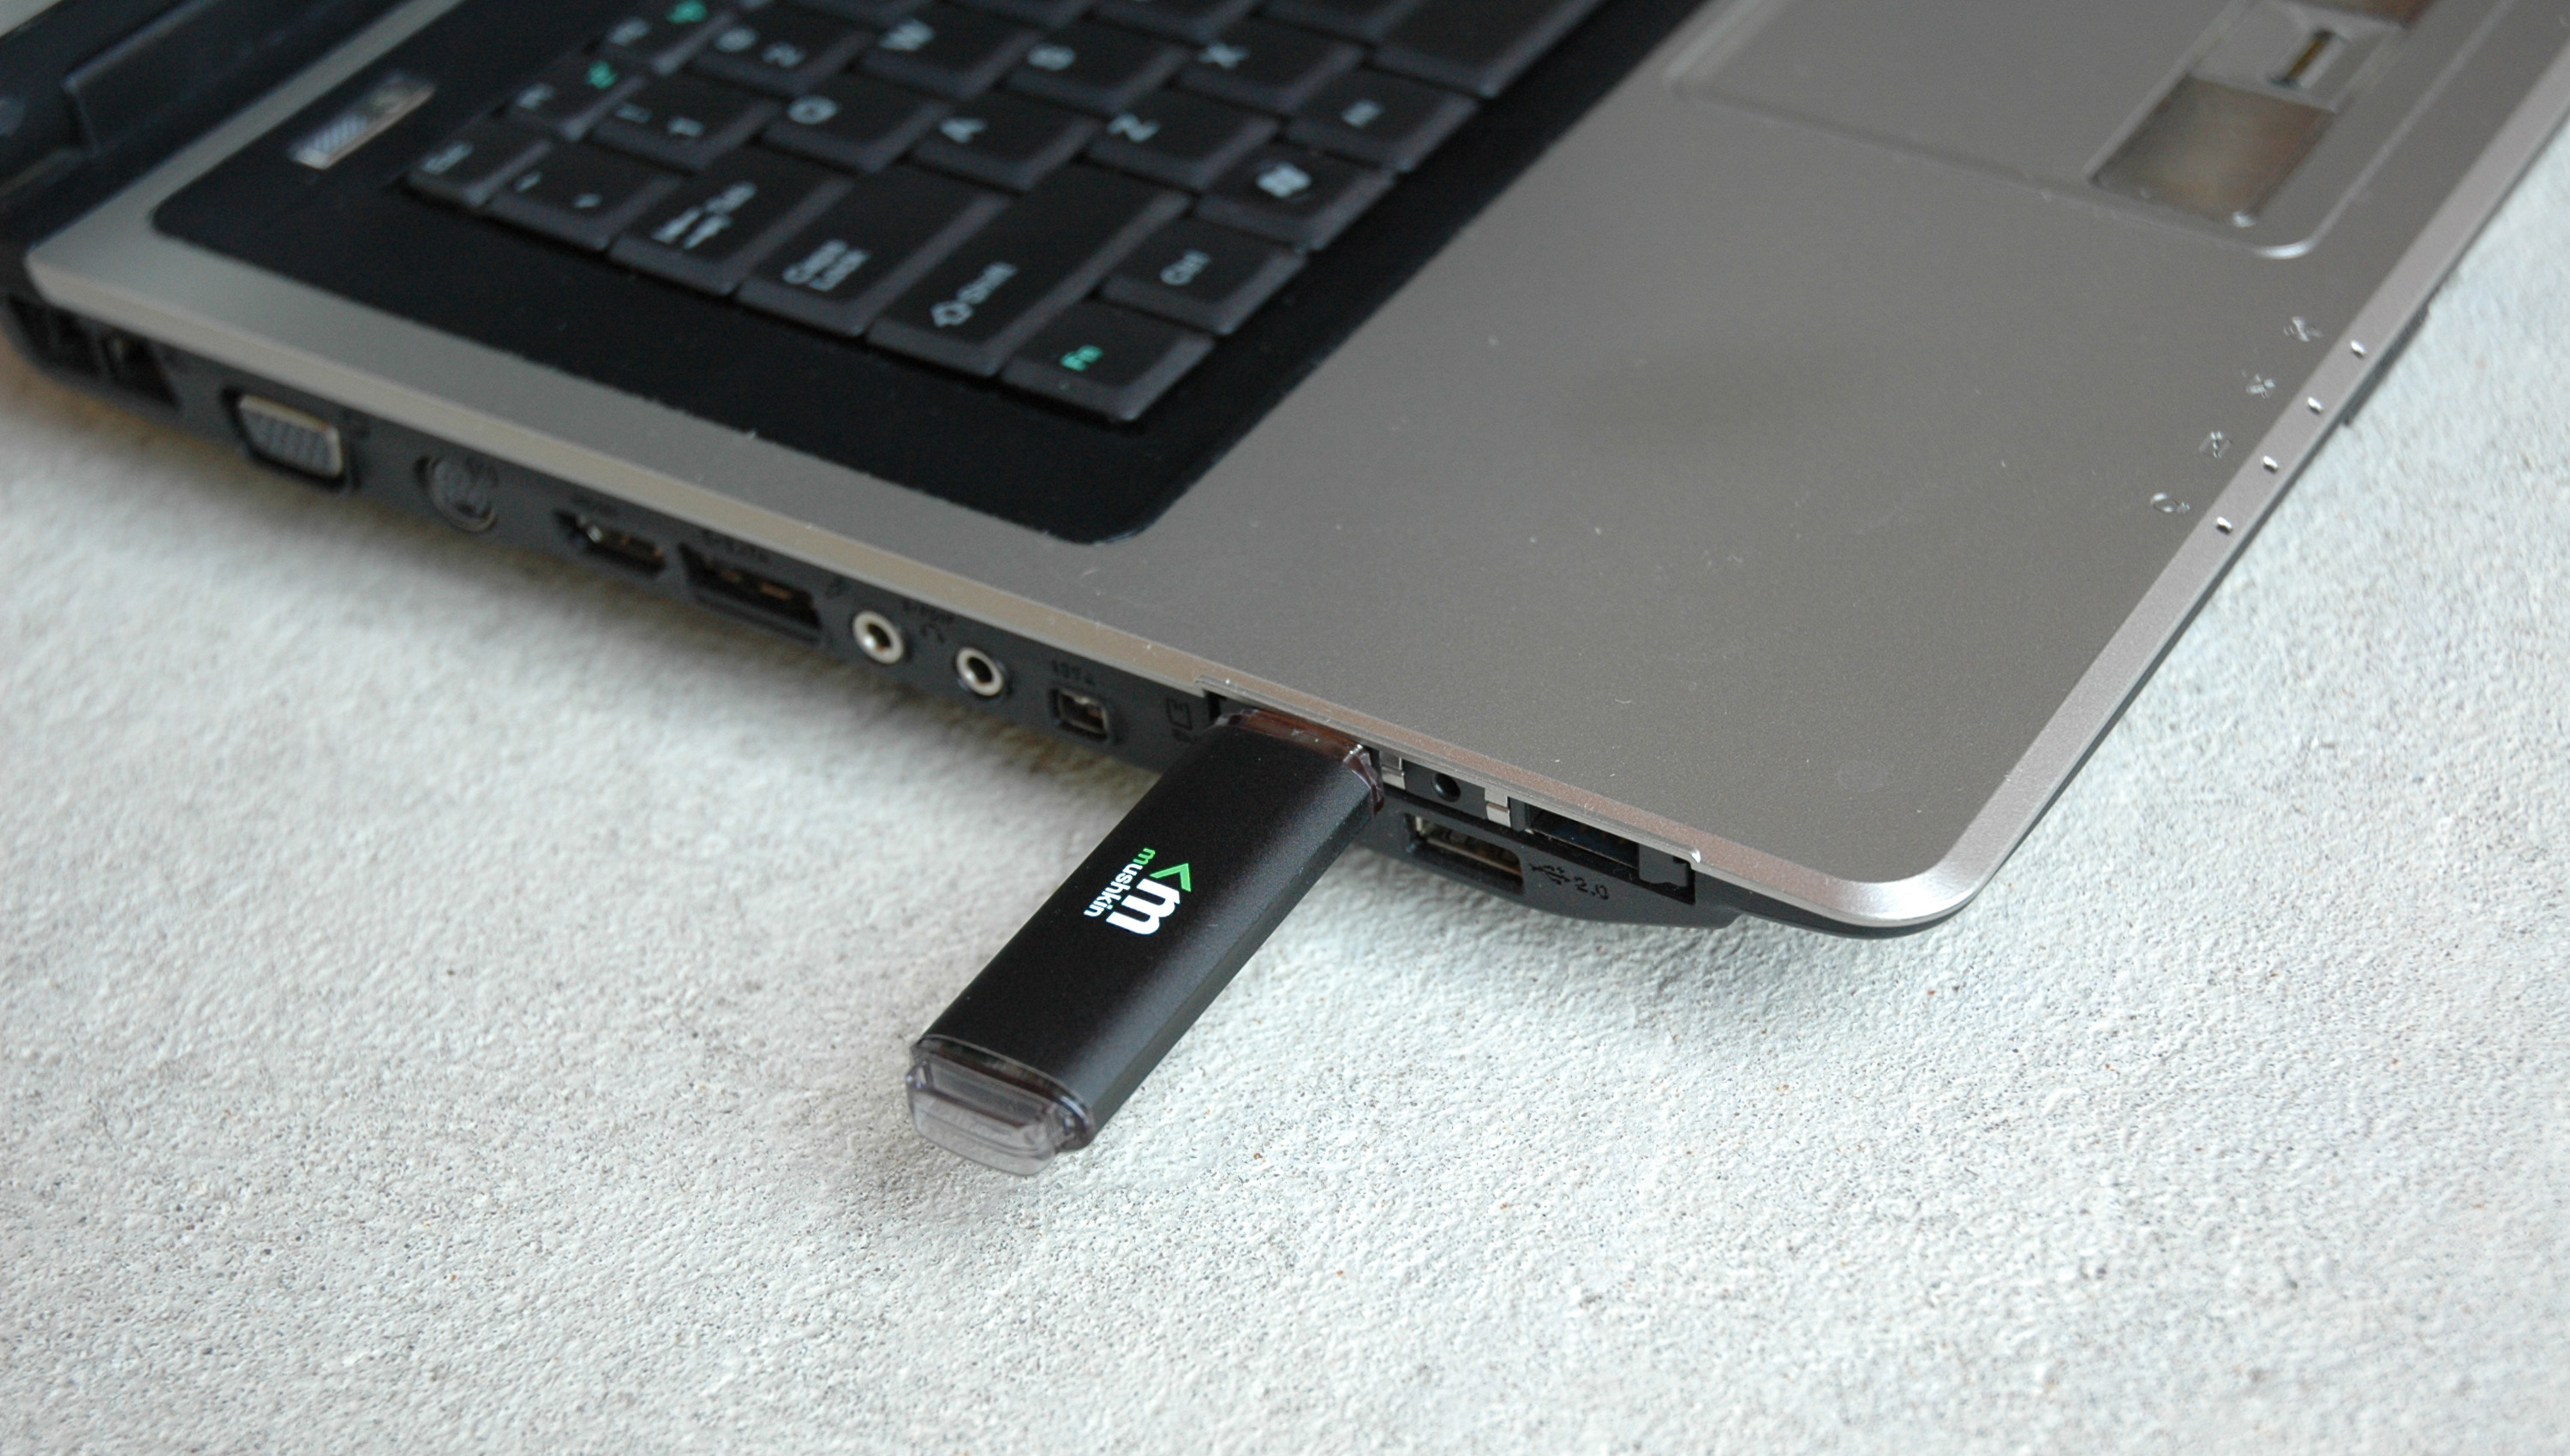
Here you are pictures:
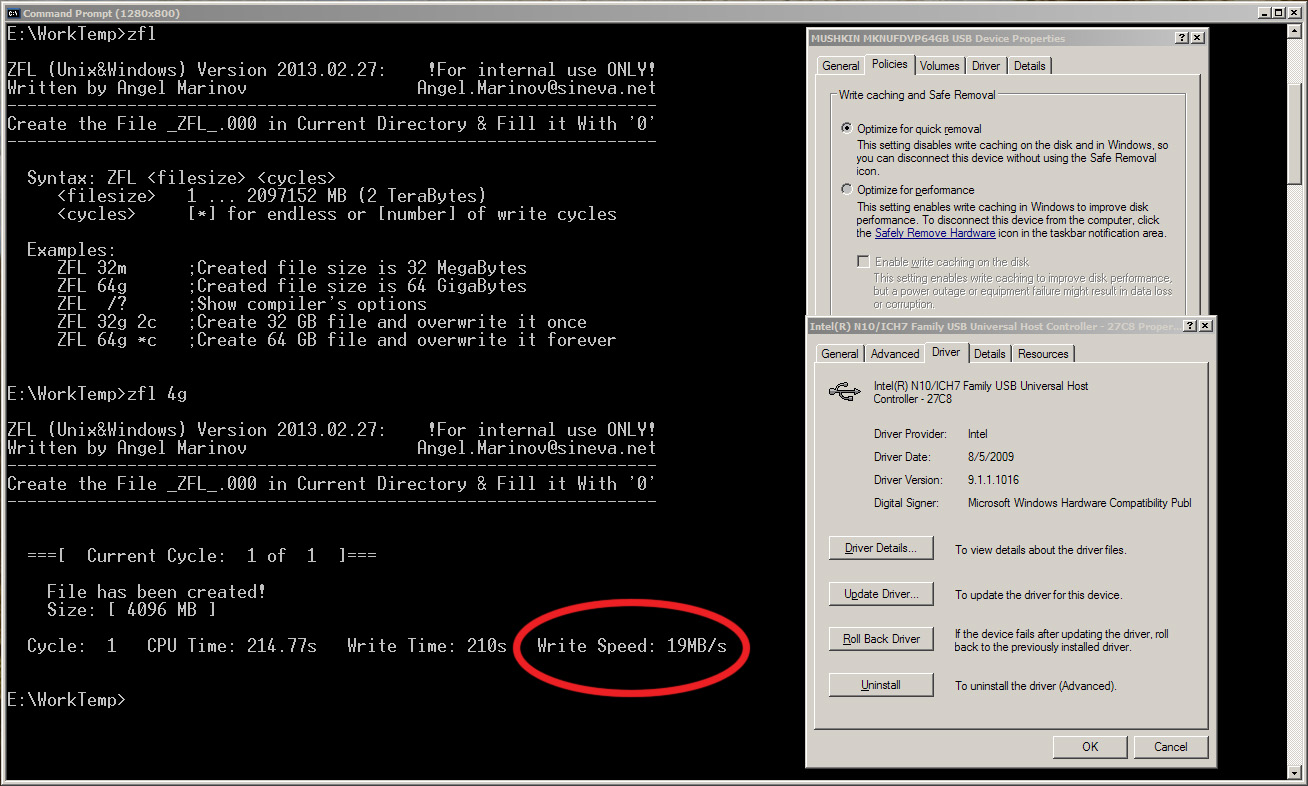
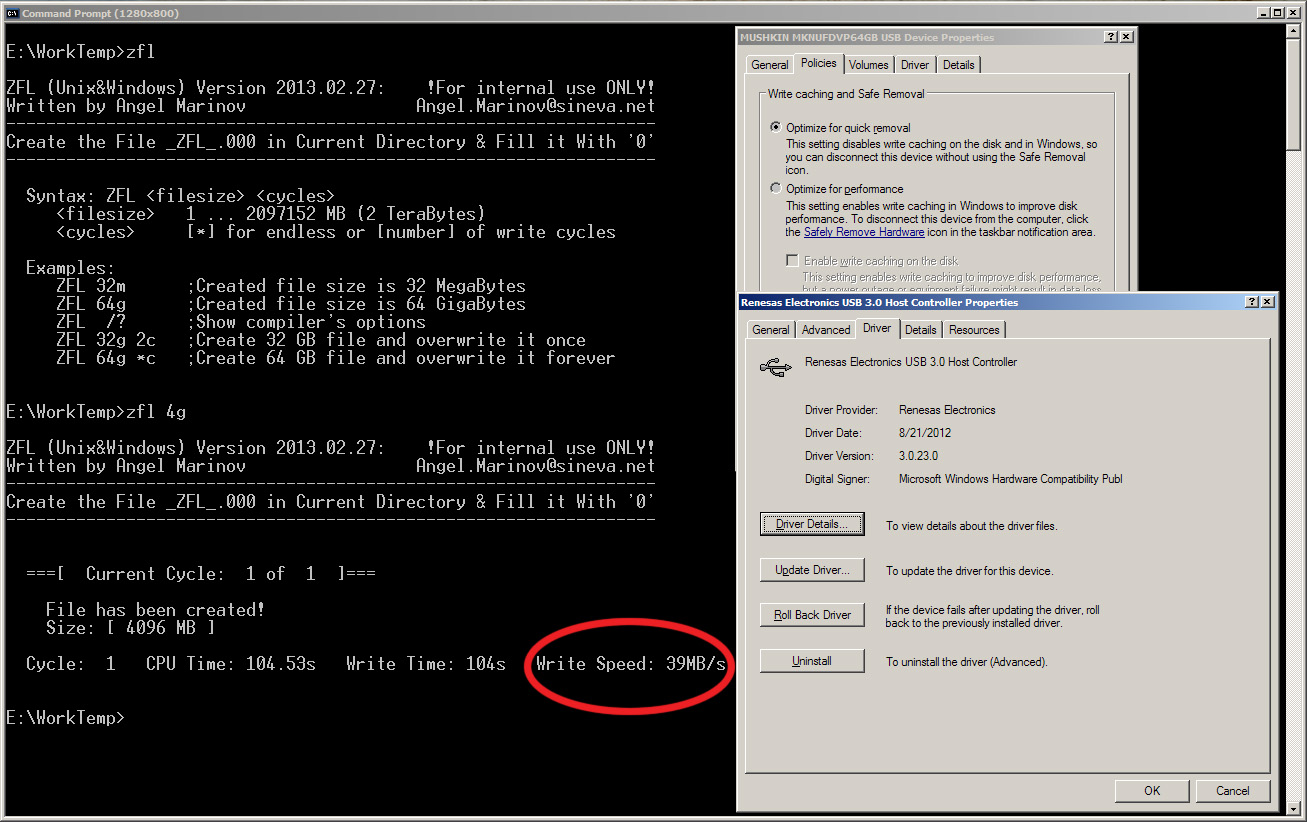
To test the new USB 3.0 interface I’ve used the Mushkin Enhanced Ventura Pro 64GB USB 3.0 Flash Drive (Model: MKNUFDVP64GB). Here are the pictures with the write speed results of the drive via USB 2.0 and USB 3.0 respectively:

The test was performed under WinXP Pro & SP3 (32-bits) using the tool ZFL on FAT32 file system.
How to Refill the Laptop Battery
The most important characteristic of one mobile system is how it works when the power source is its own battery.
My first C90S (One of Seven) in its original configuration had been working on battery only 27 minutes. As a result of the applied modifications the system performance was increased along with the running time on battery to 74 minutes. In both cases I’ve used the same battery and you can see the difference.
The star fighter Seven of Seven came into the star base “C90 Unleashed” with two dead batteries. After the inspection it appears that only one of them was dead and I’ve decided to repair it. I’ve used 6 unprotected fresh Panasonic NCR18650B 3400 mAh (Green) in 3S2P with a final capacity of 6800 mAh or nominal 6500 mAh.
The result is amazing – 122 minutes running time. The used battery cells are top quality with long life span around 1000 charge/discharge cycles.
Here will be addition information about Lithium Ion Batteries and how to do the mod.
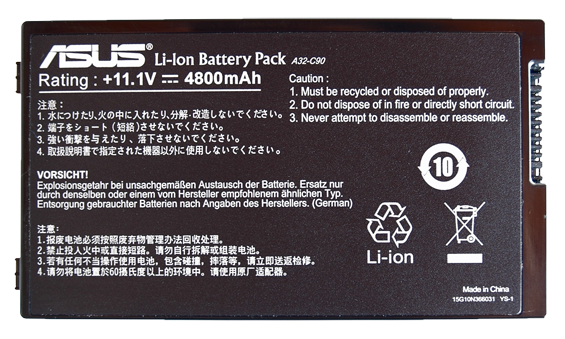
C90S Original A32-C90 Battery Characteristics:
- Lithium Ion
- 6 Cells (3S2P, cell: 18650 3.7V/2400 mAh)
- 11.1V
- Capacity 4800 mAh

The Best Sounding Dynamic Closed Cans
Question: “Who is the best musician in the world’s history?”
Human hearing is low quality device for sound perception and unfortunately it is the only device we have. Besides it is fragile and slowly degrades with the age. The understanding of the human hearing physiology is something very important. It will help you to learn how to prevent the hearing damage and what the optimum conditions are for listening.
Knowledge in the field of Theory of the Sound will help too and will extend the sound picture in details. This is the bare minimum to start learning how to listen and develop your hearing skills.
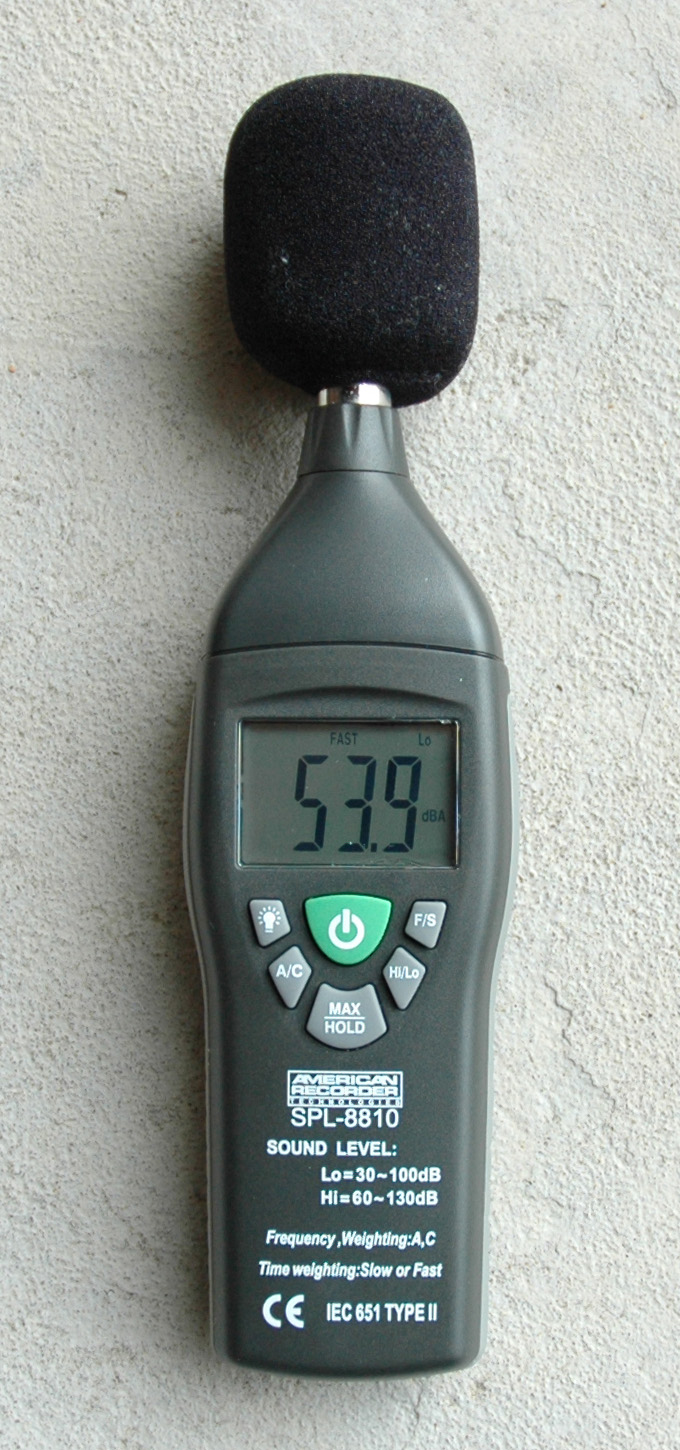
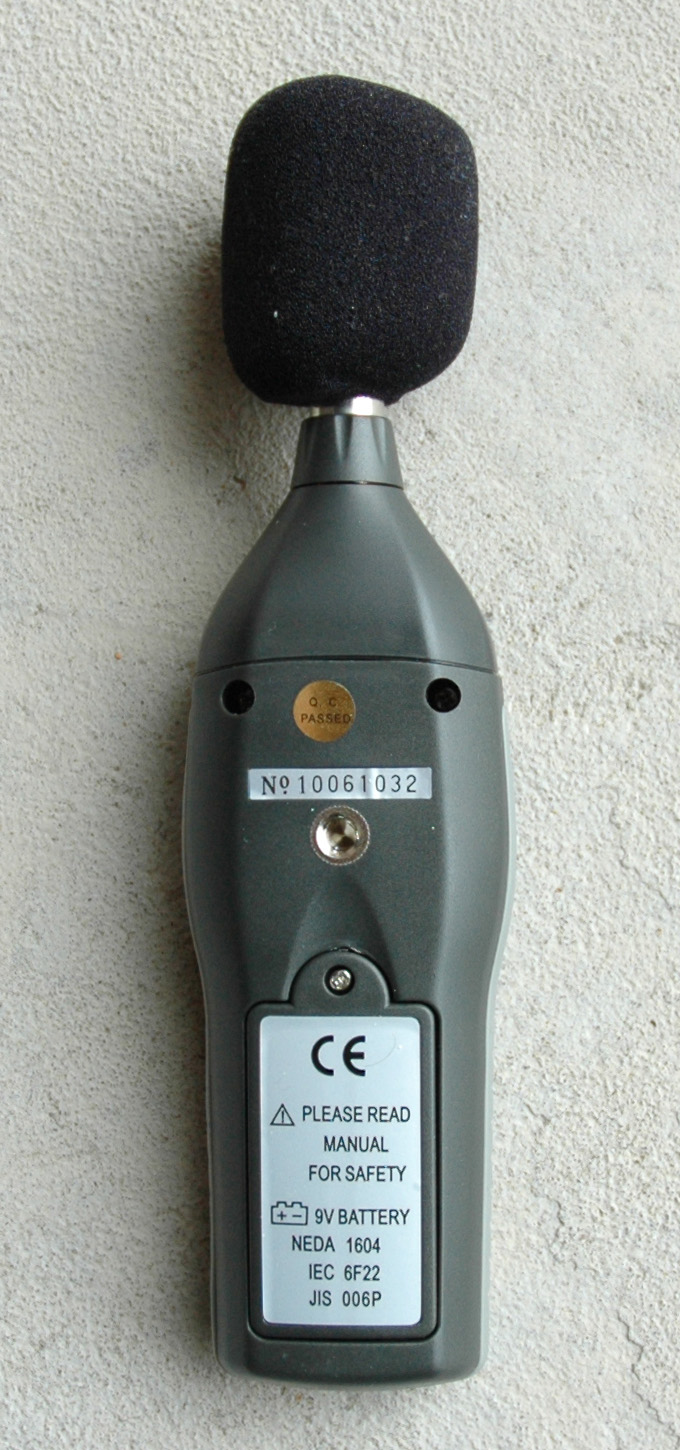
The level of the sound and the quality of the sound are two different things! It will be good if you have at your disposal a sound meter device as American Recorder SPL-8810 or better one. Here you are pictures of the sound meter:
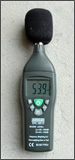
My personal advice is to not cross the border of 80 dBA sound level.
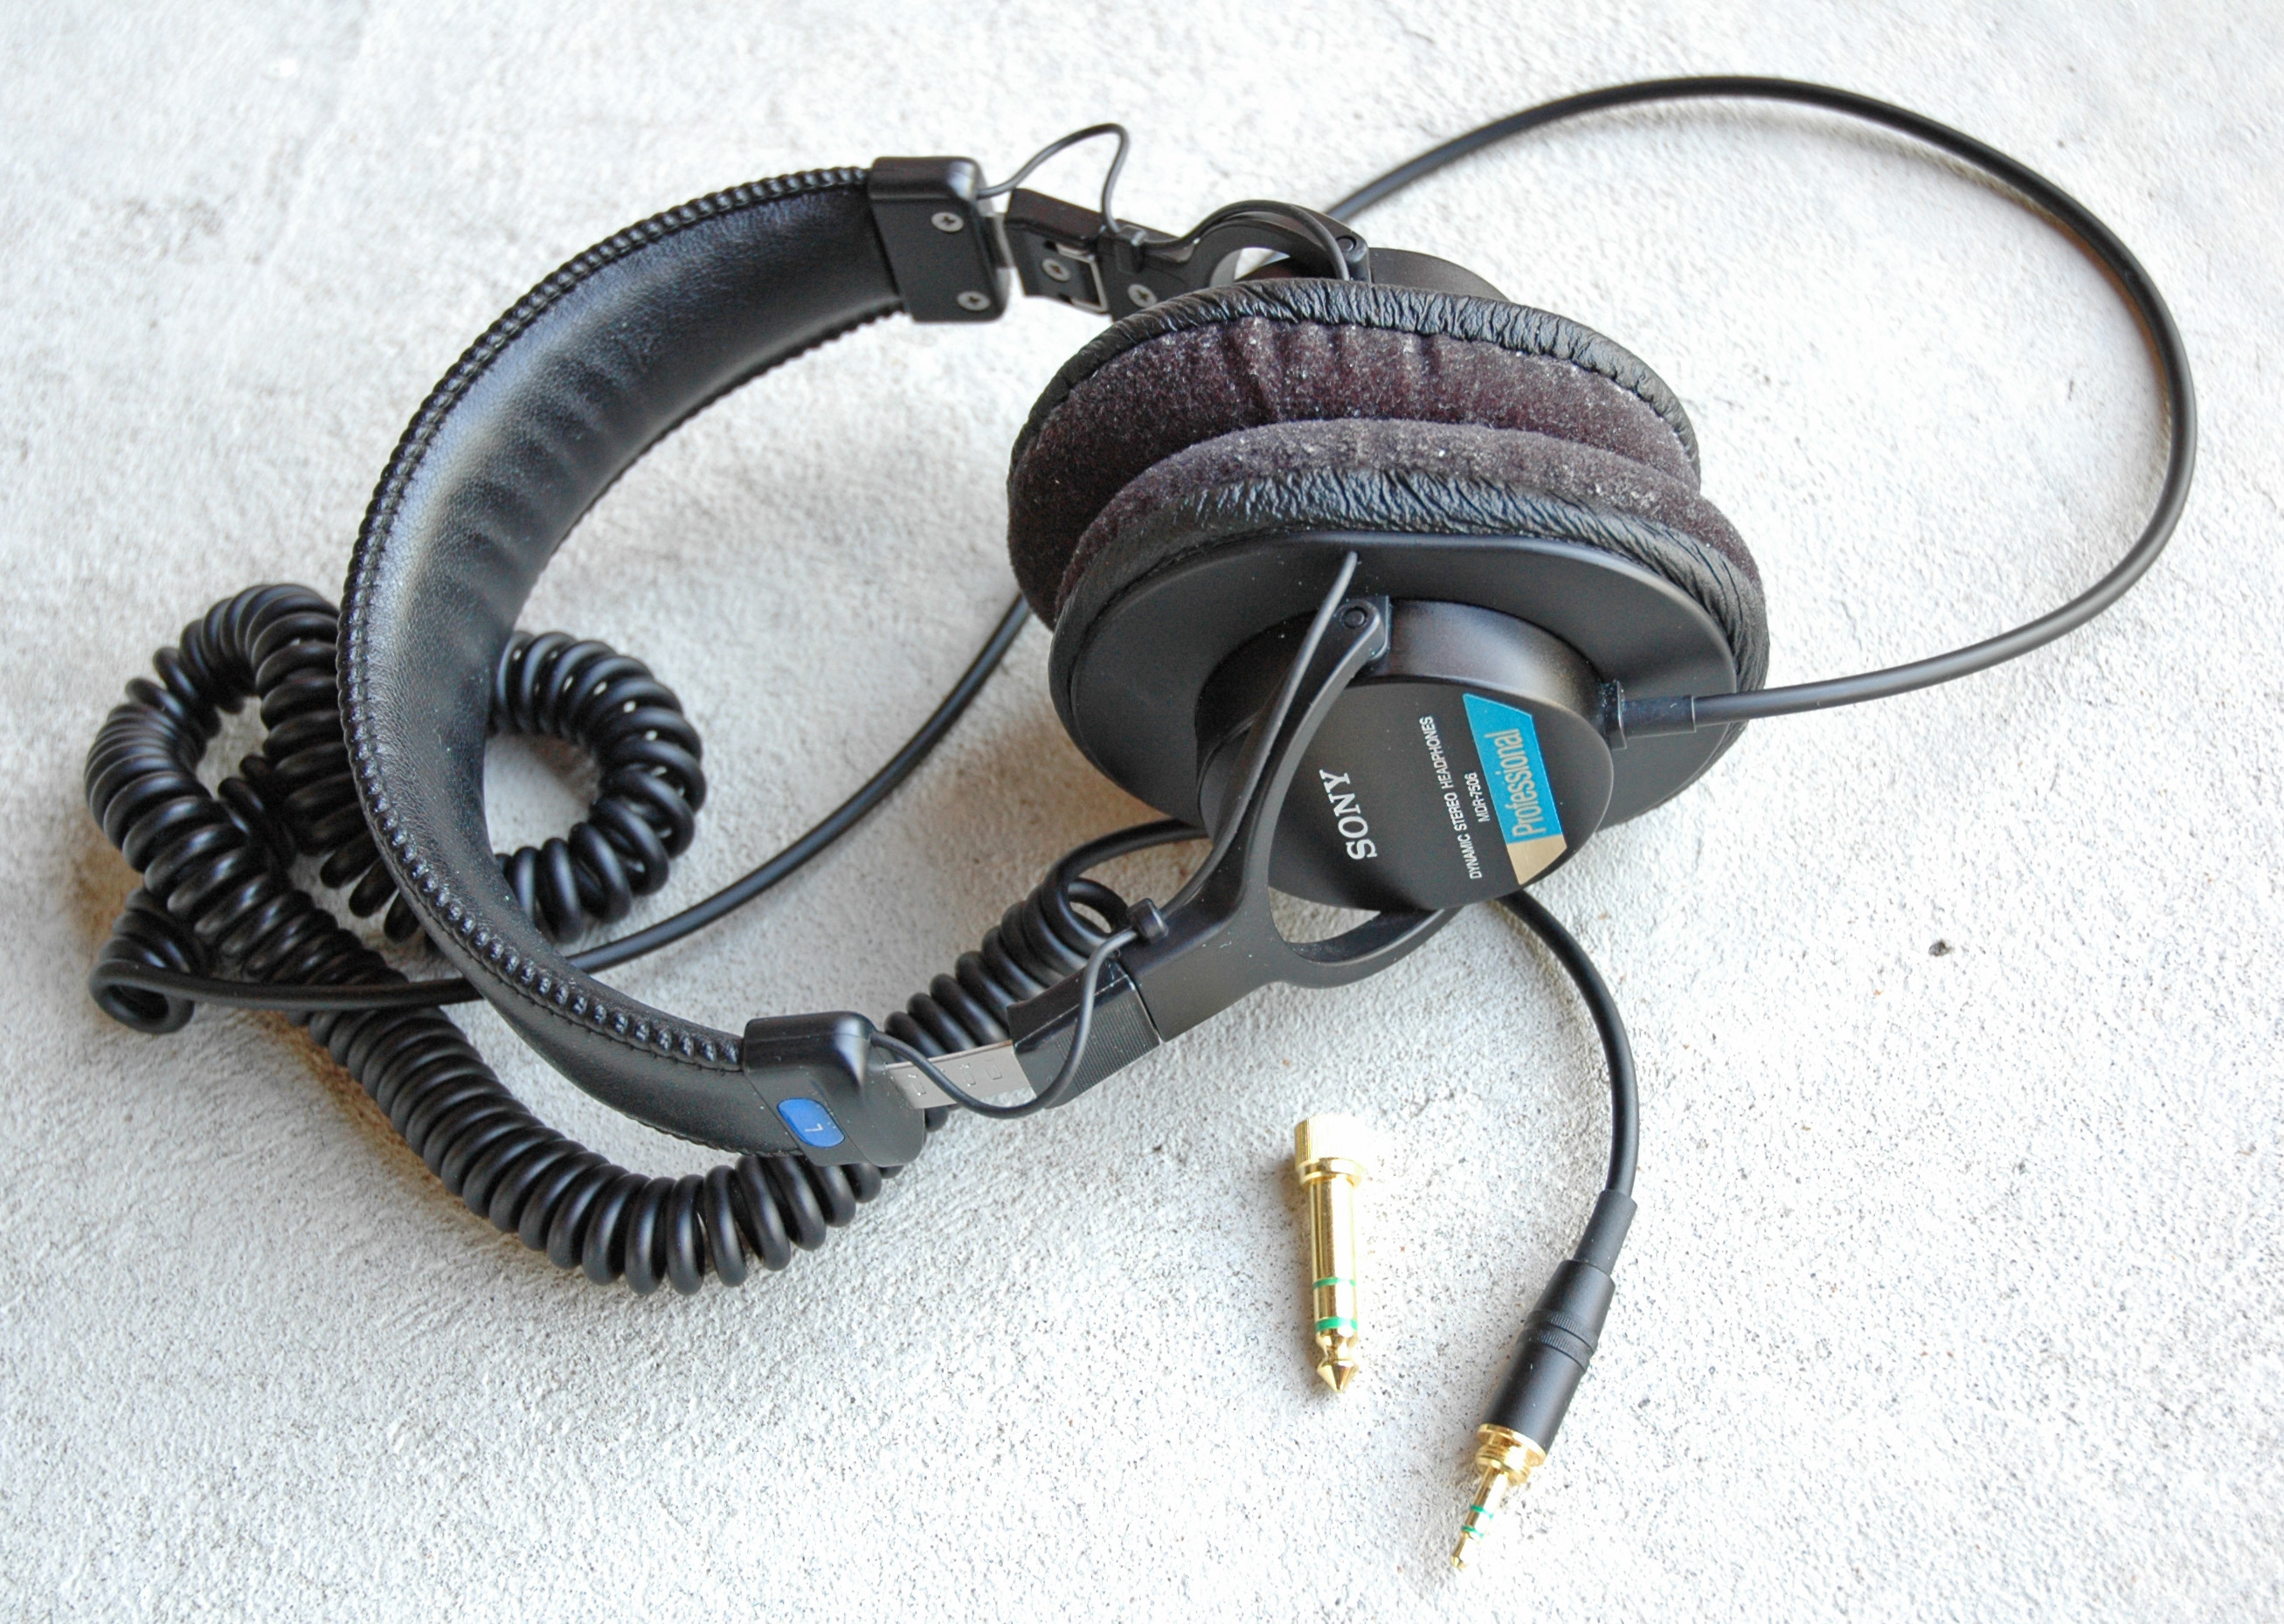
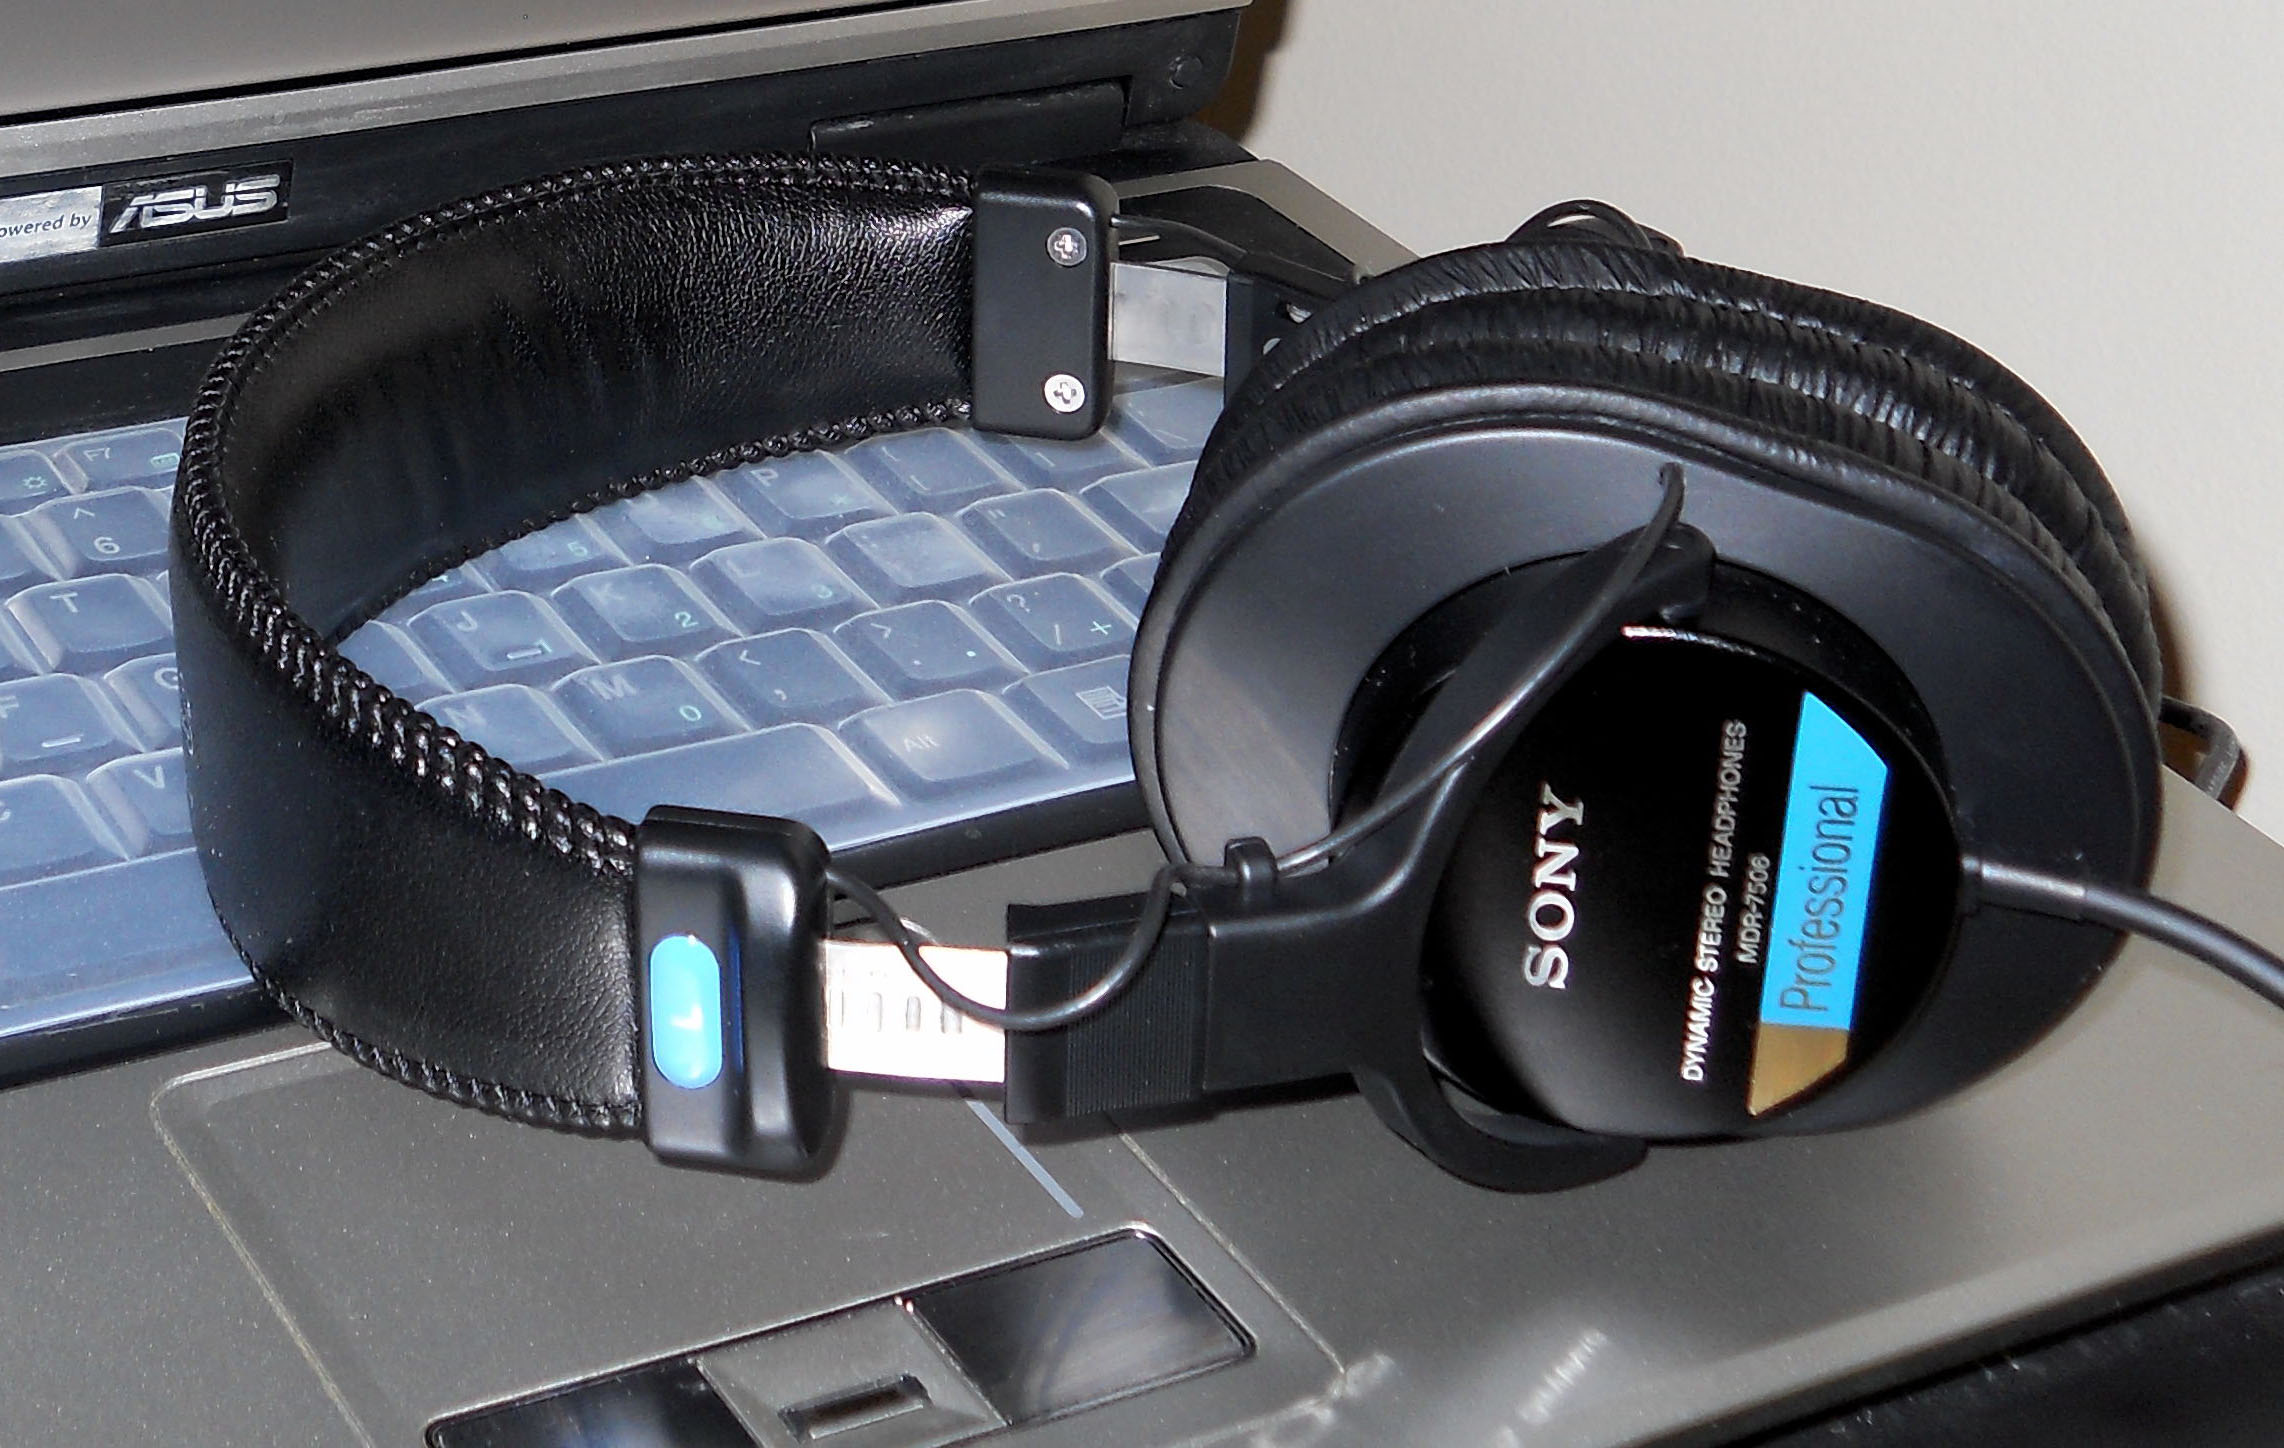
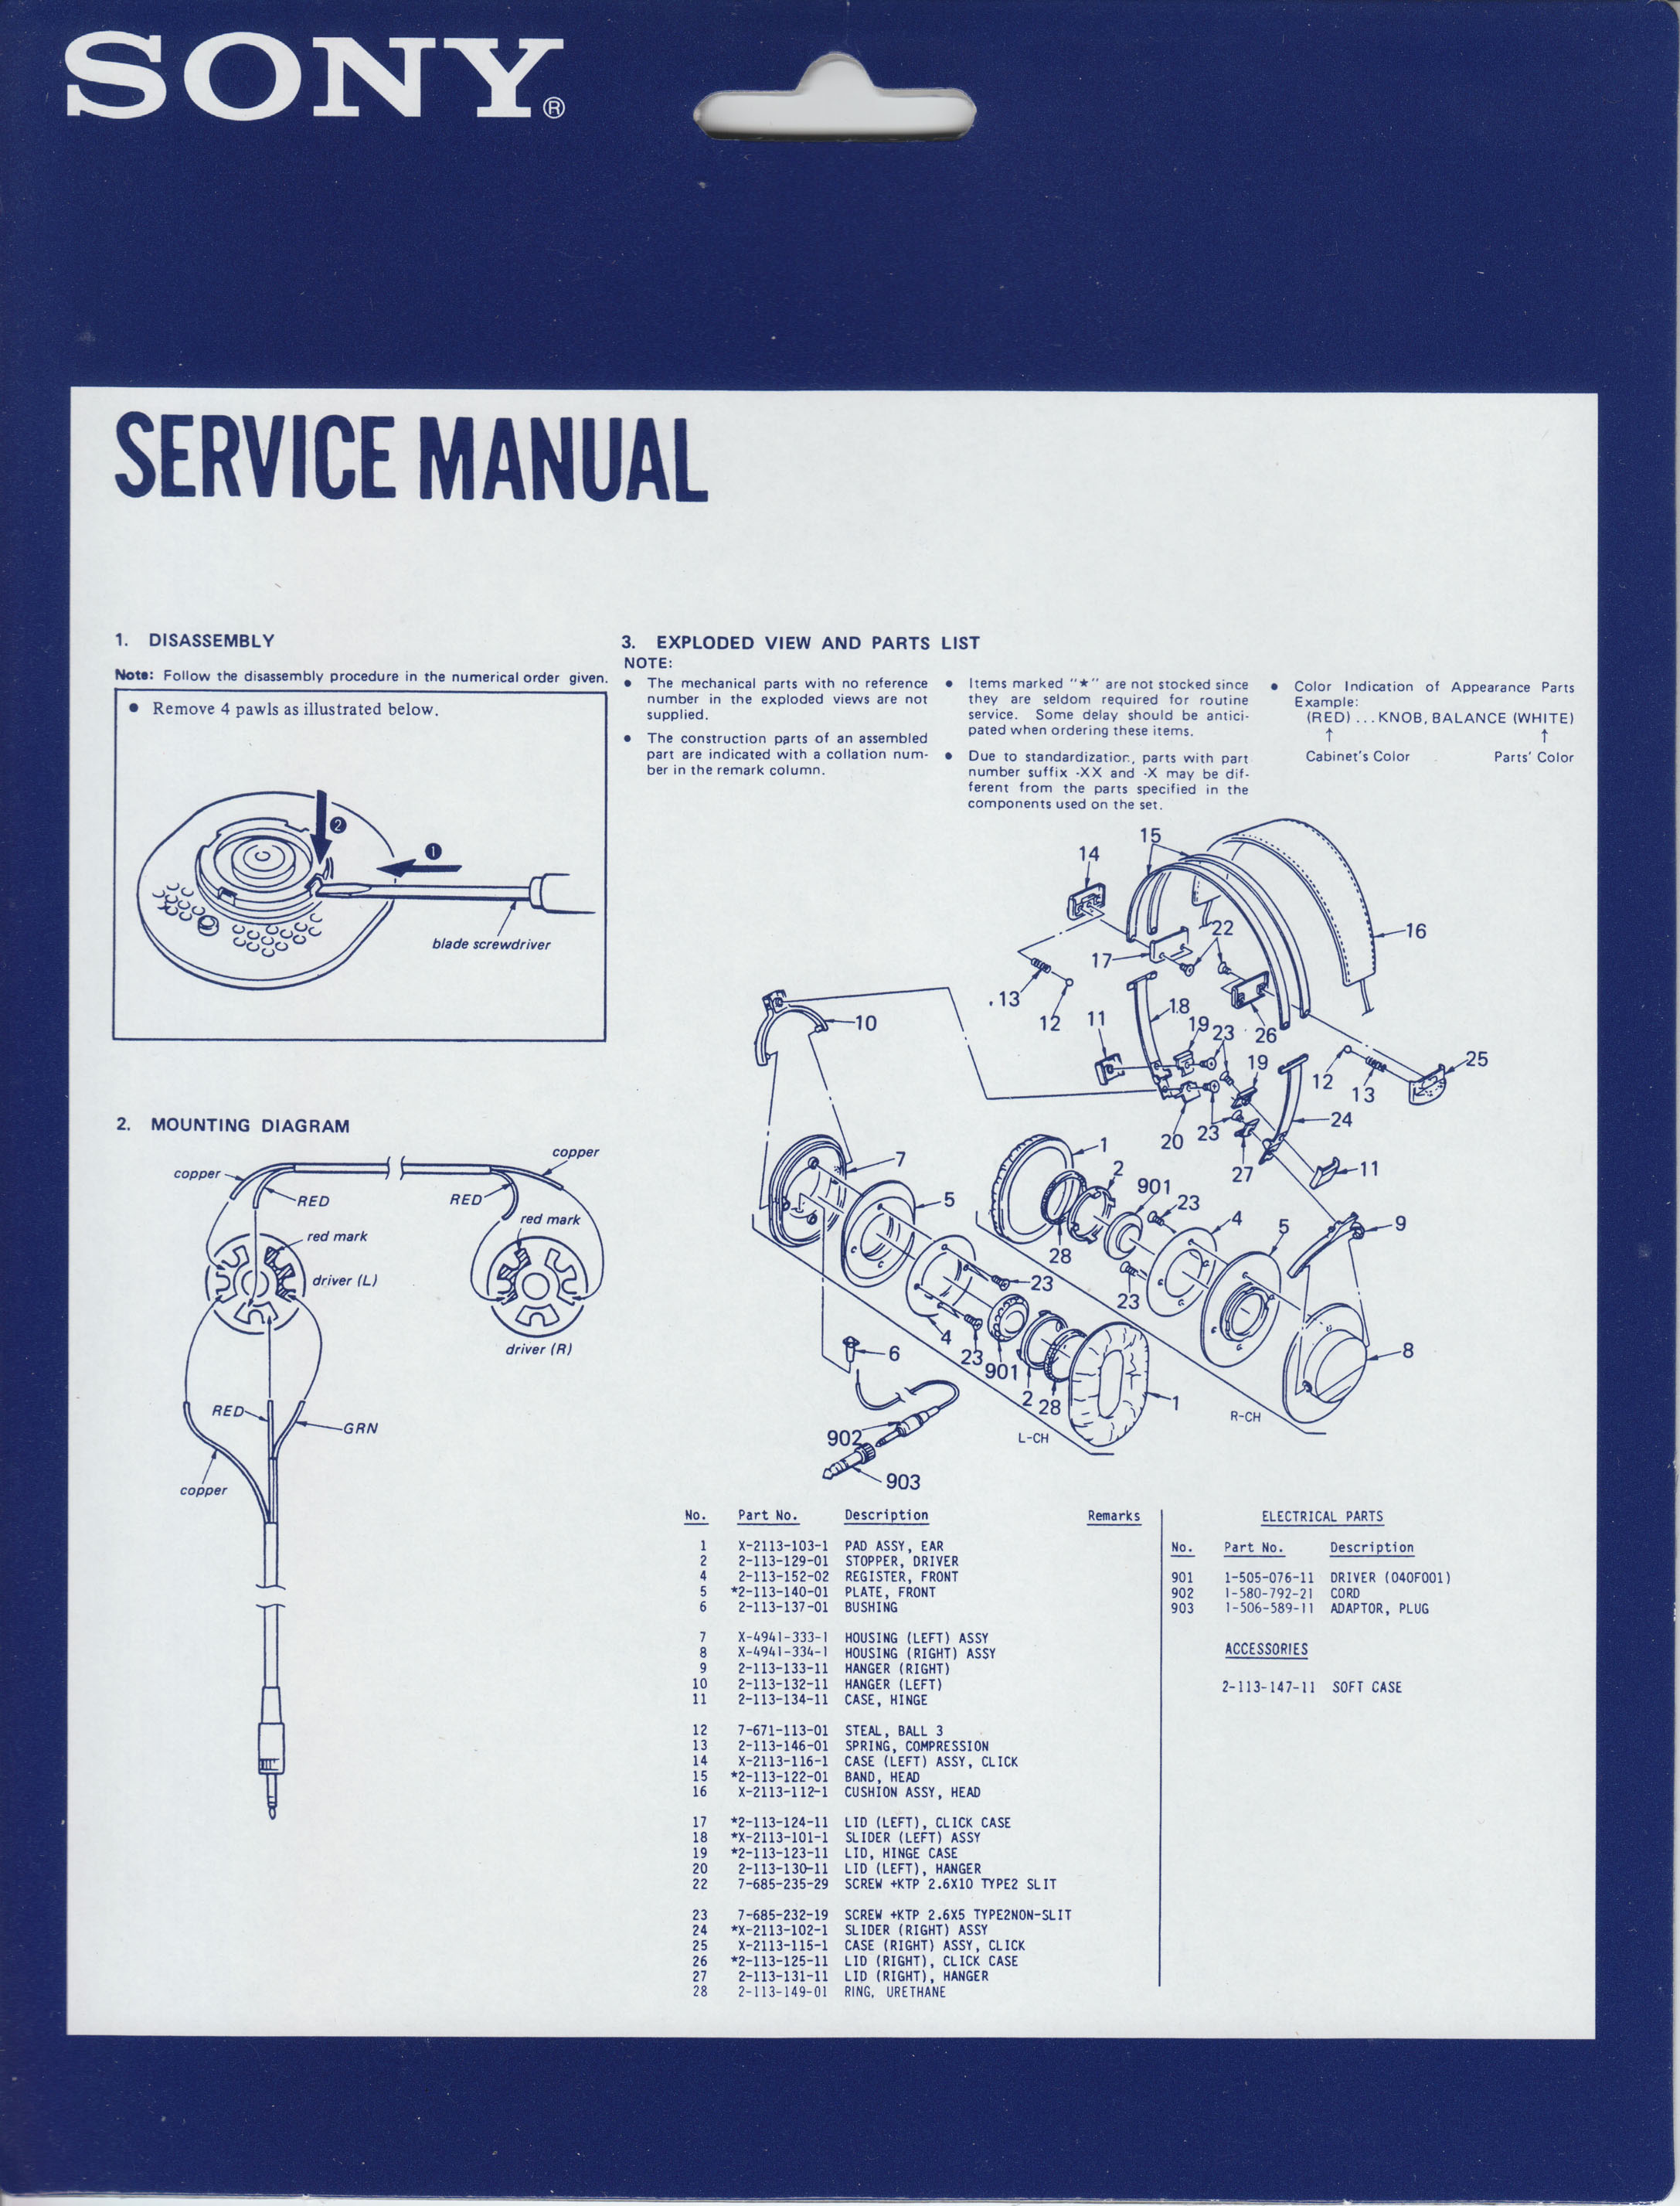
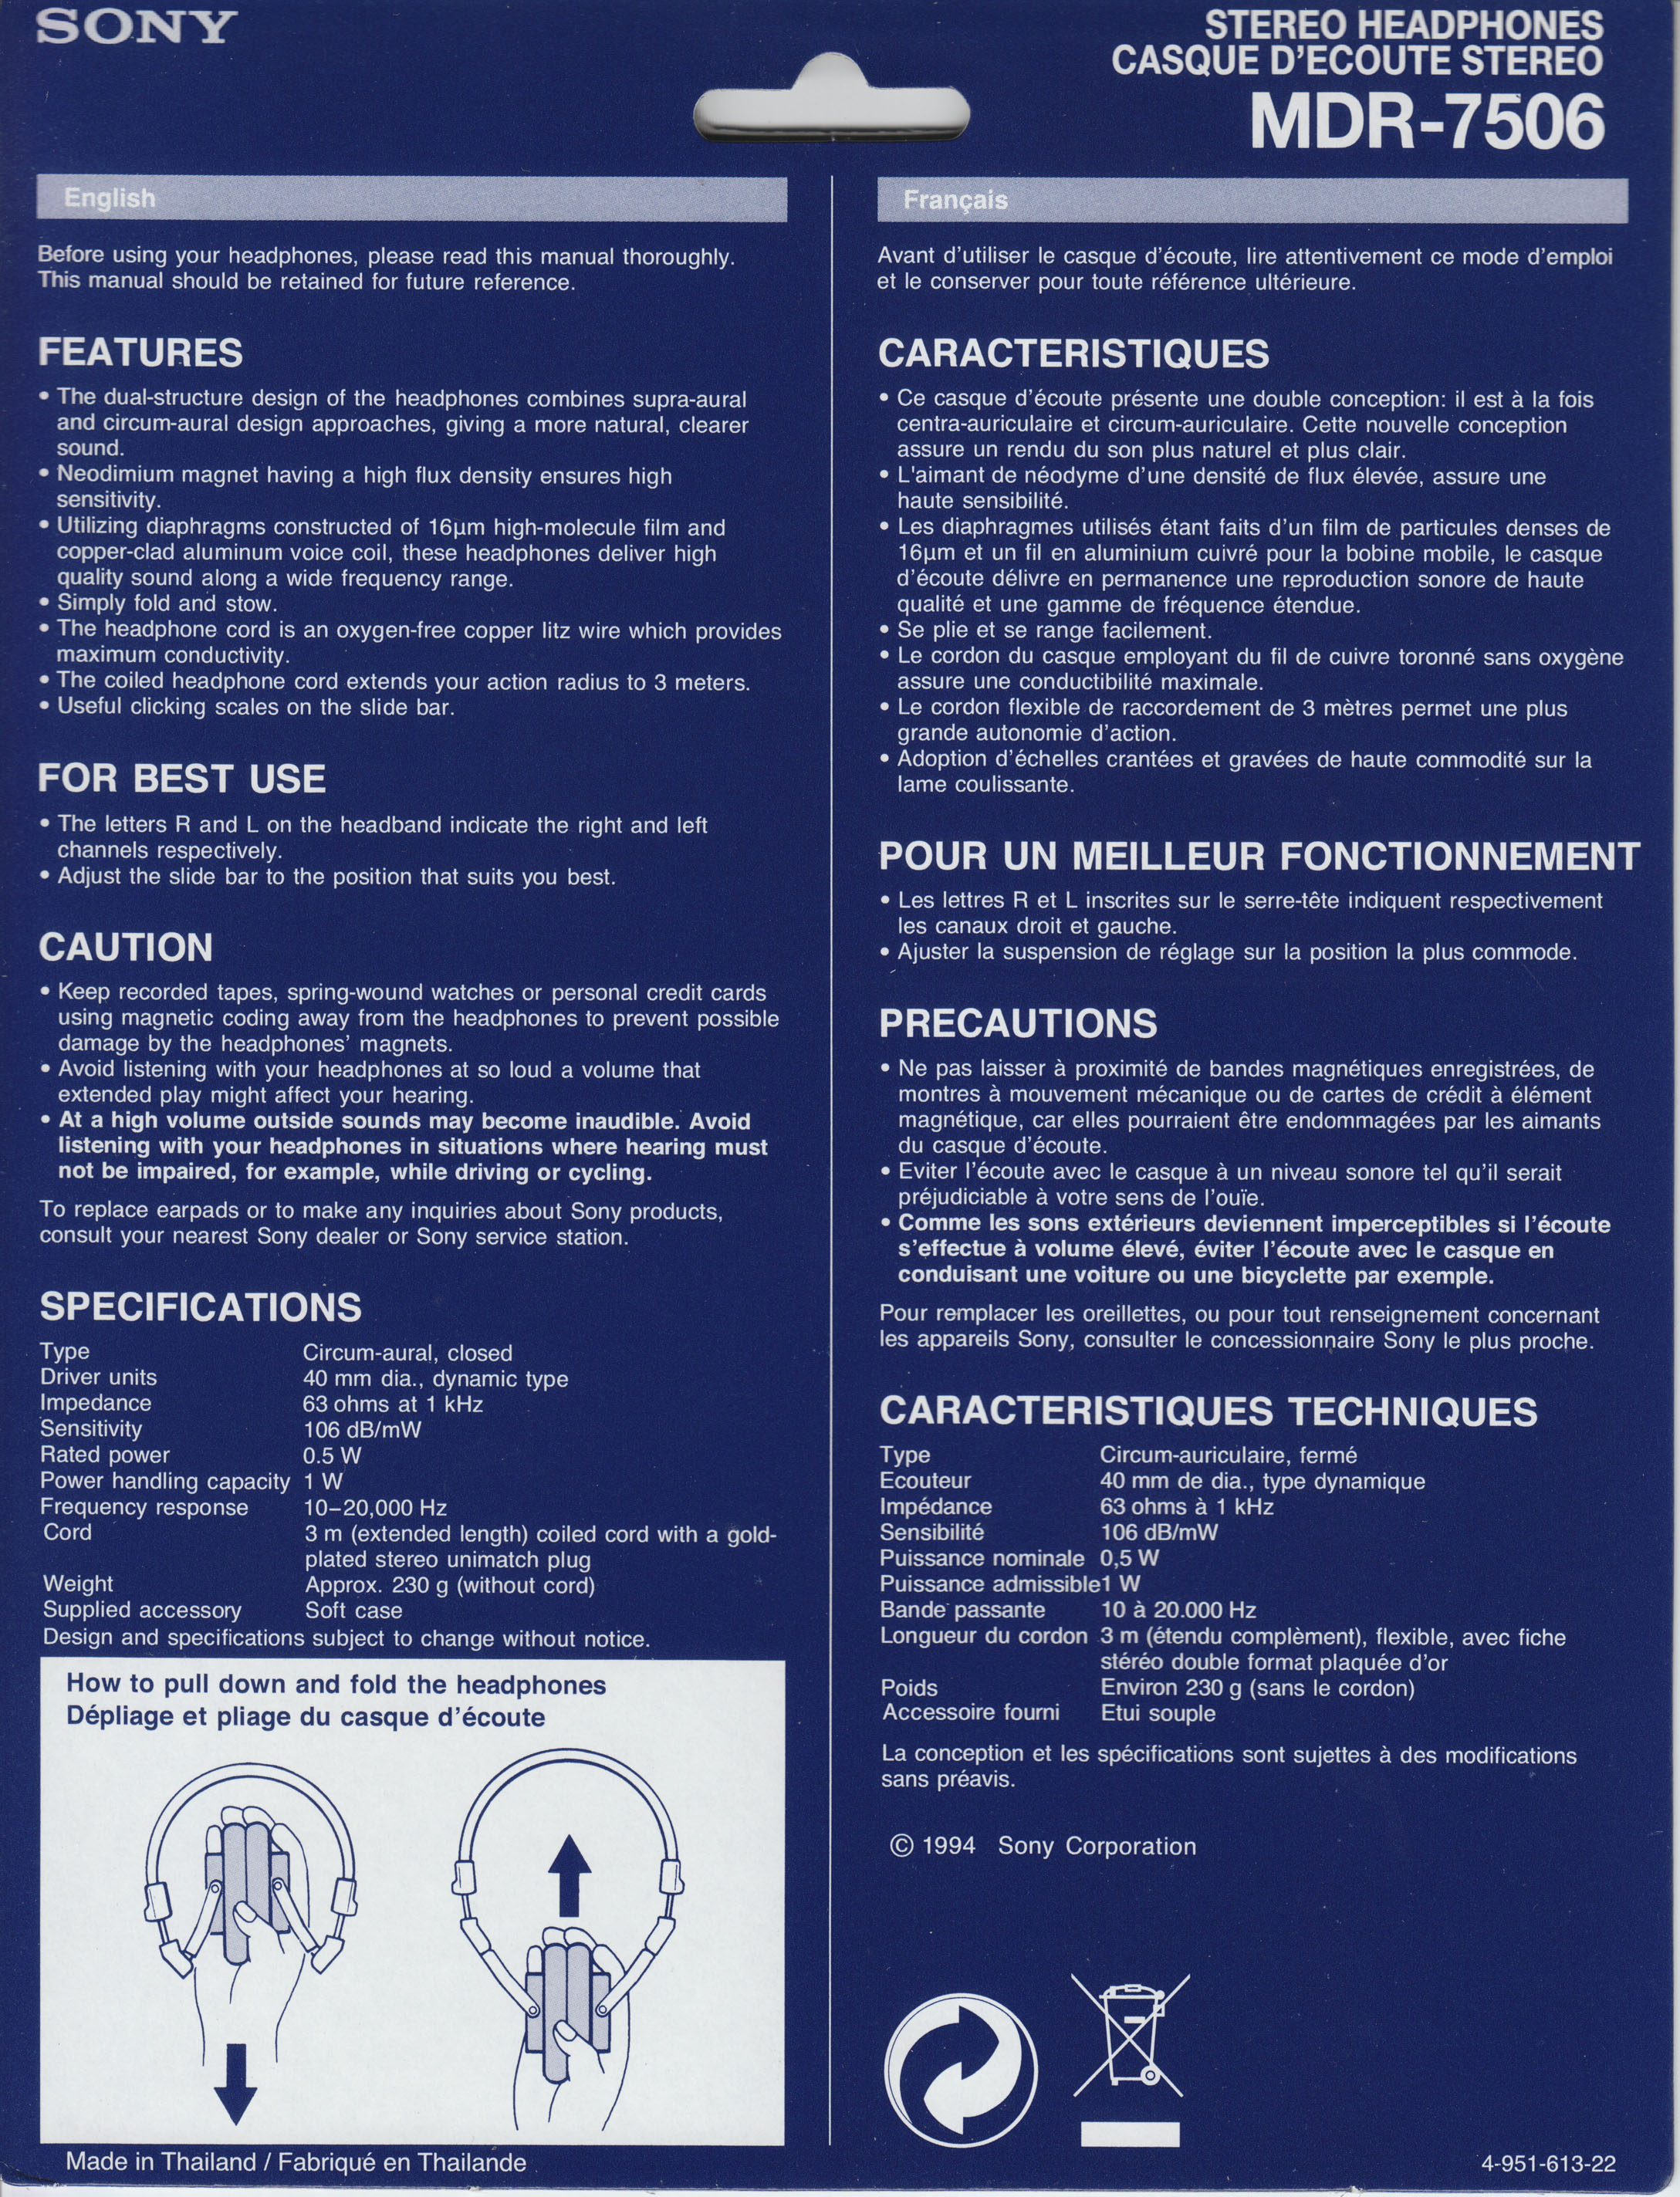
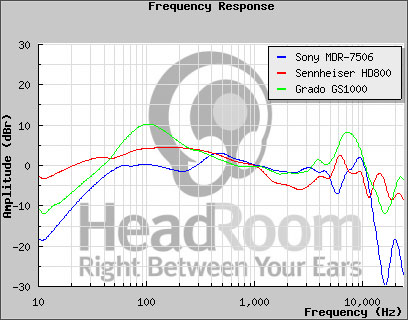
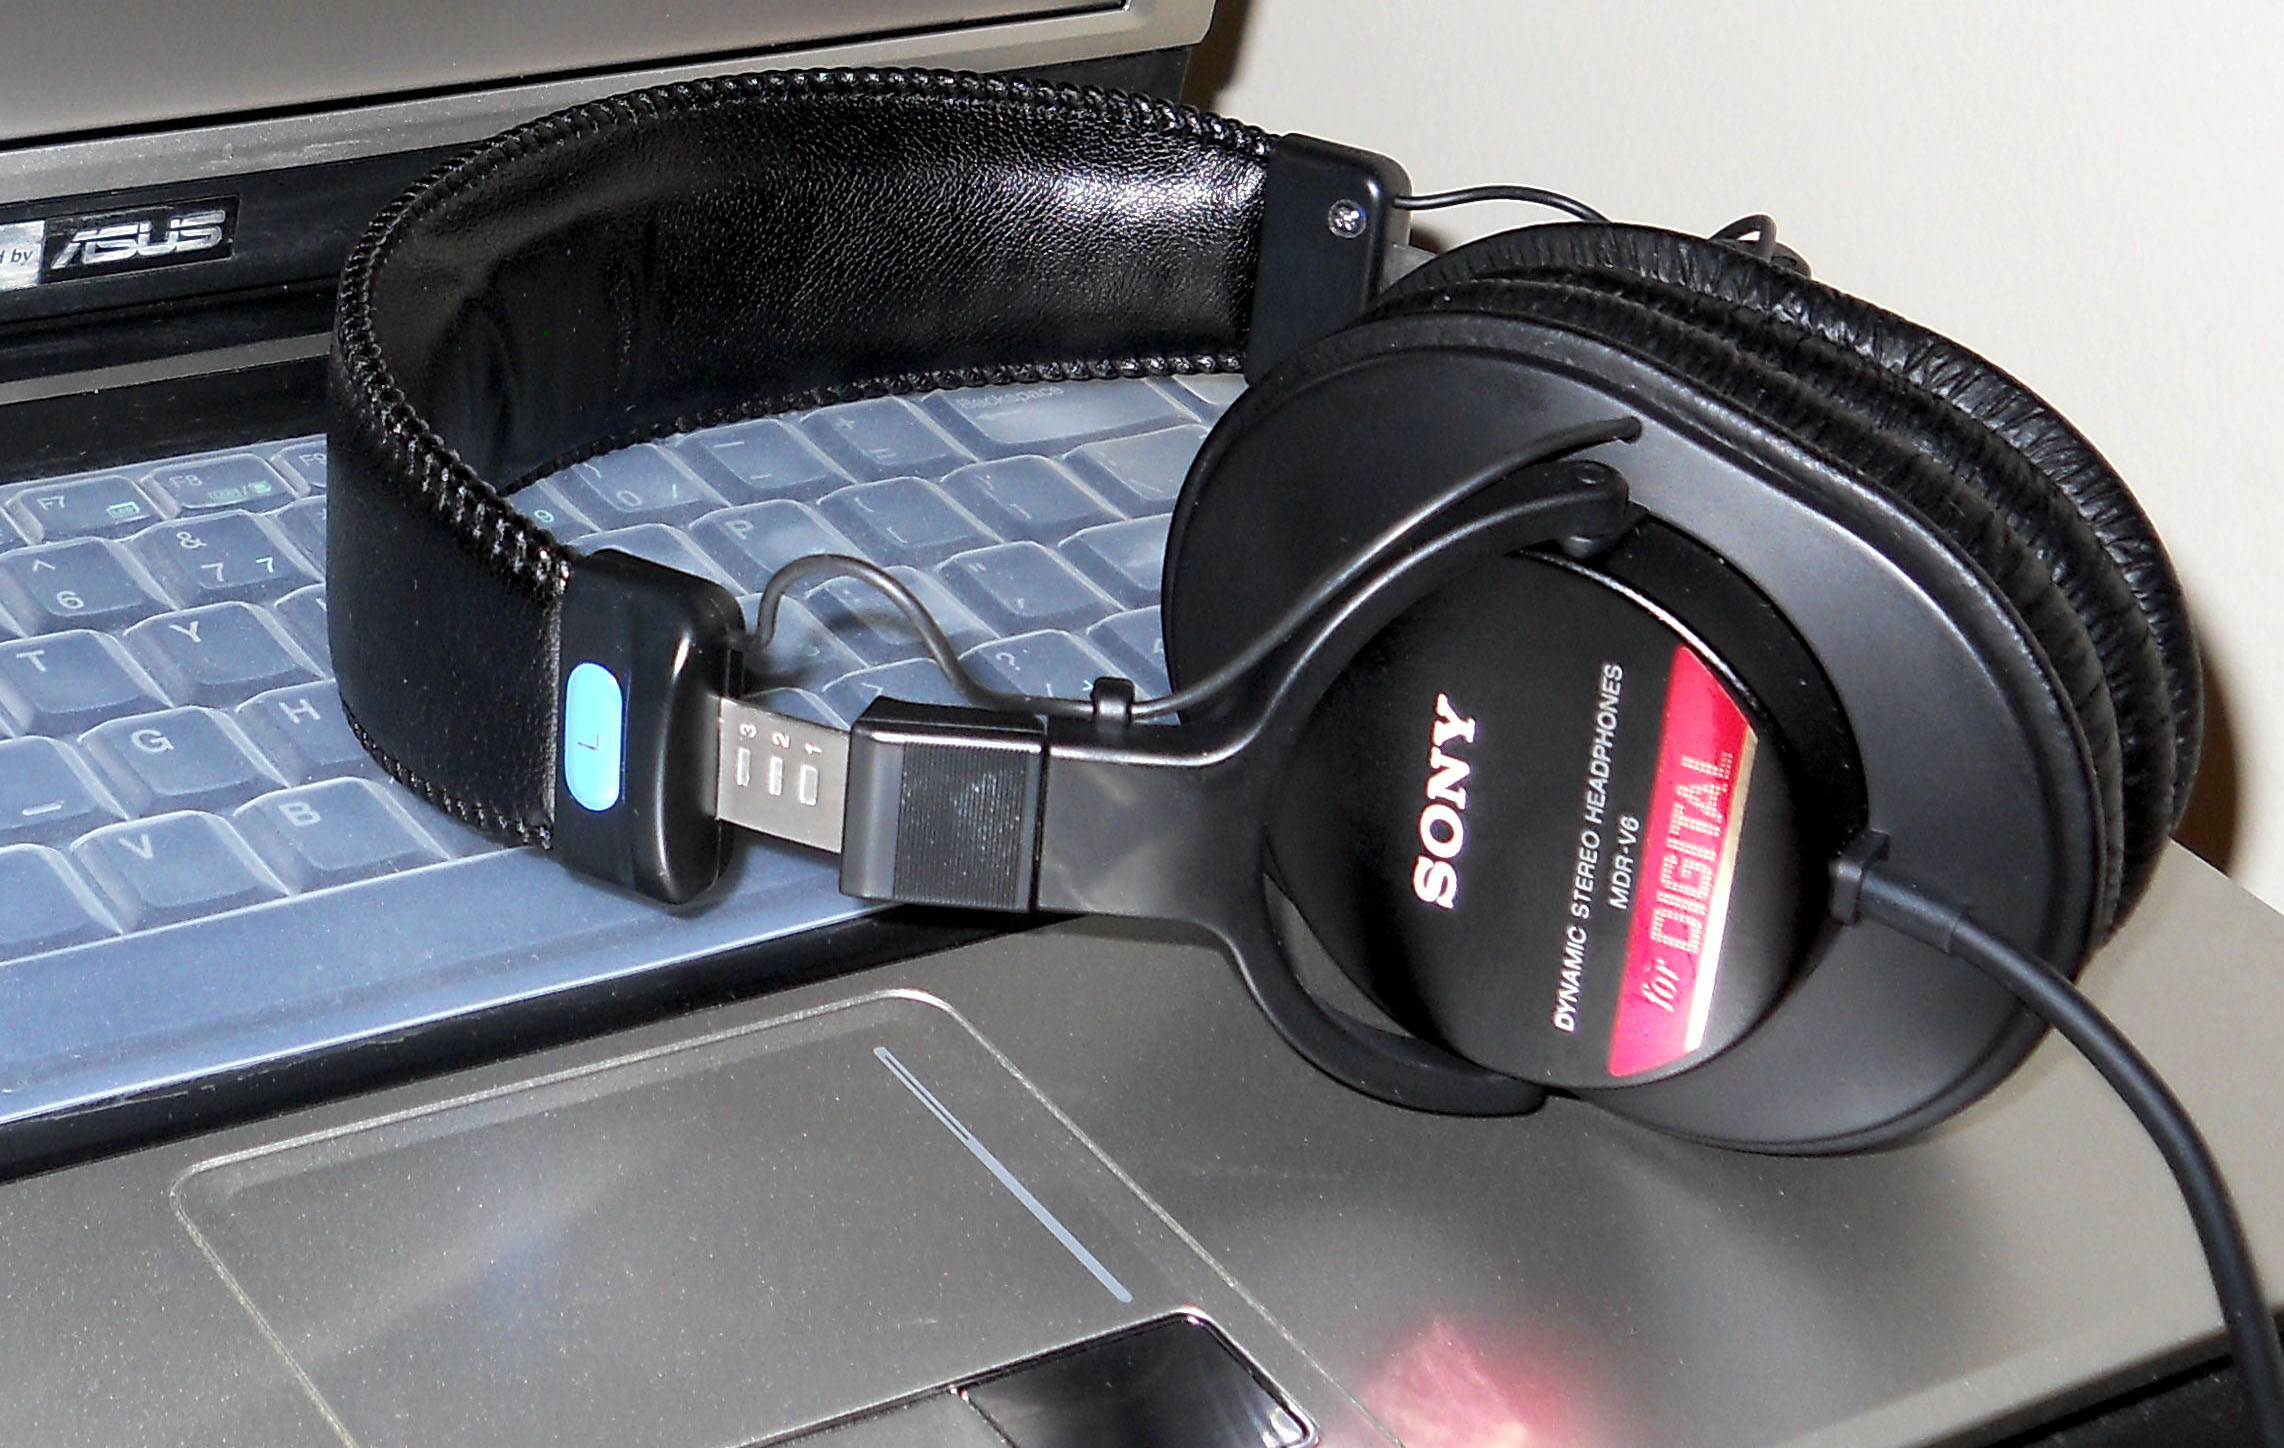
In the last 5 years in my recording studio I am using the 7506 which are the perfect headphones monitors with its sound quality, design, rugged construction and comfort. Here are the pictures of the headphones with their respective characteristics and “manuals”.
Sony MDR-7506

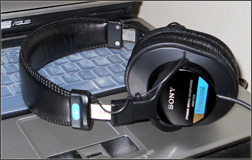
The graph data are correct according to my ears and HeadRoom is a good place where you can find a lot of information.
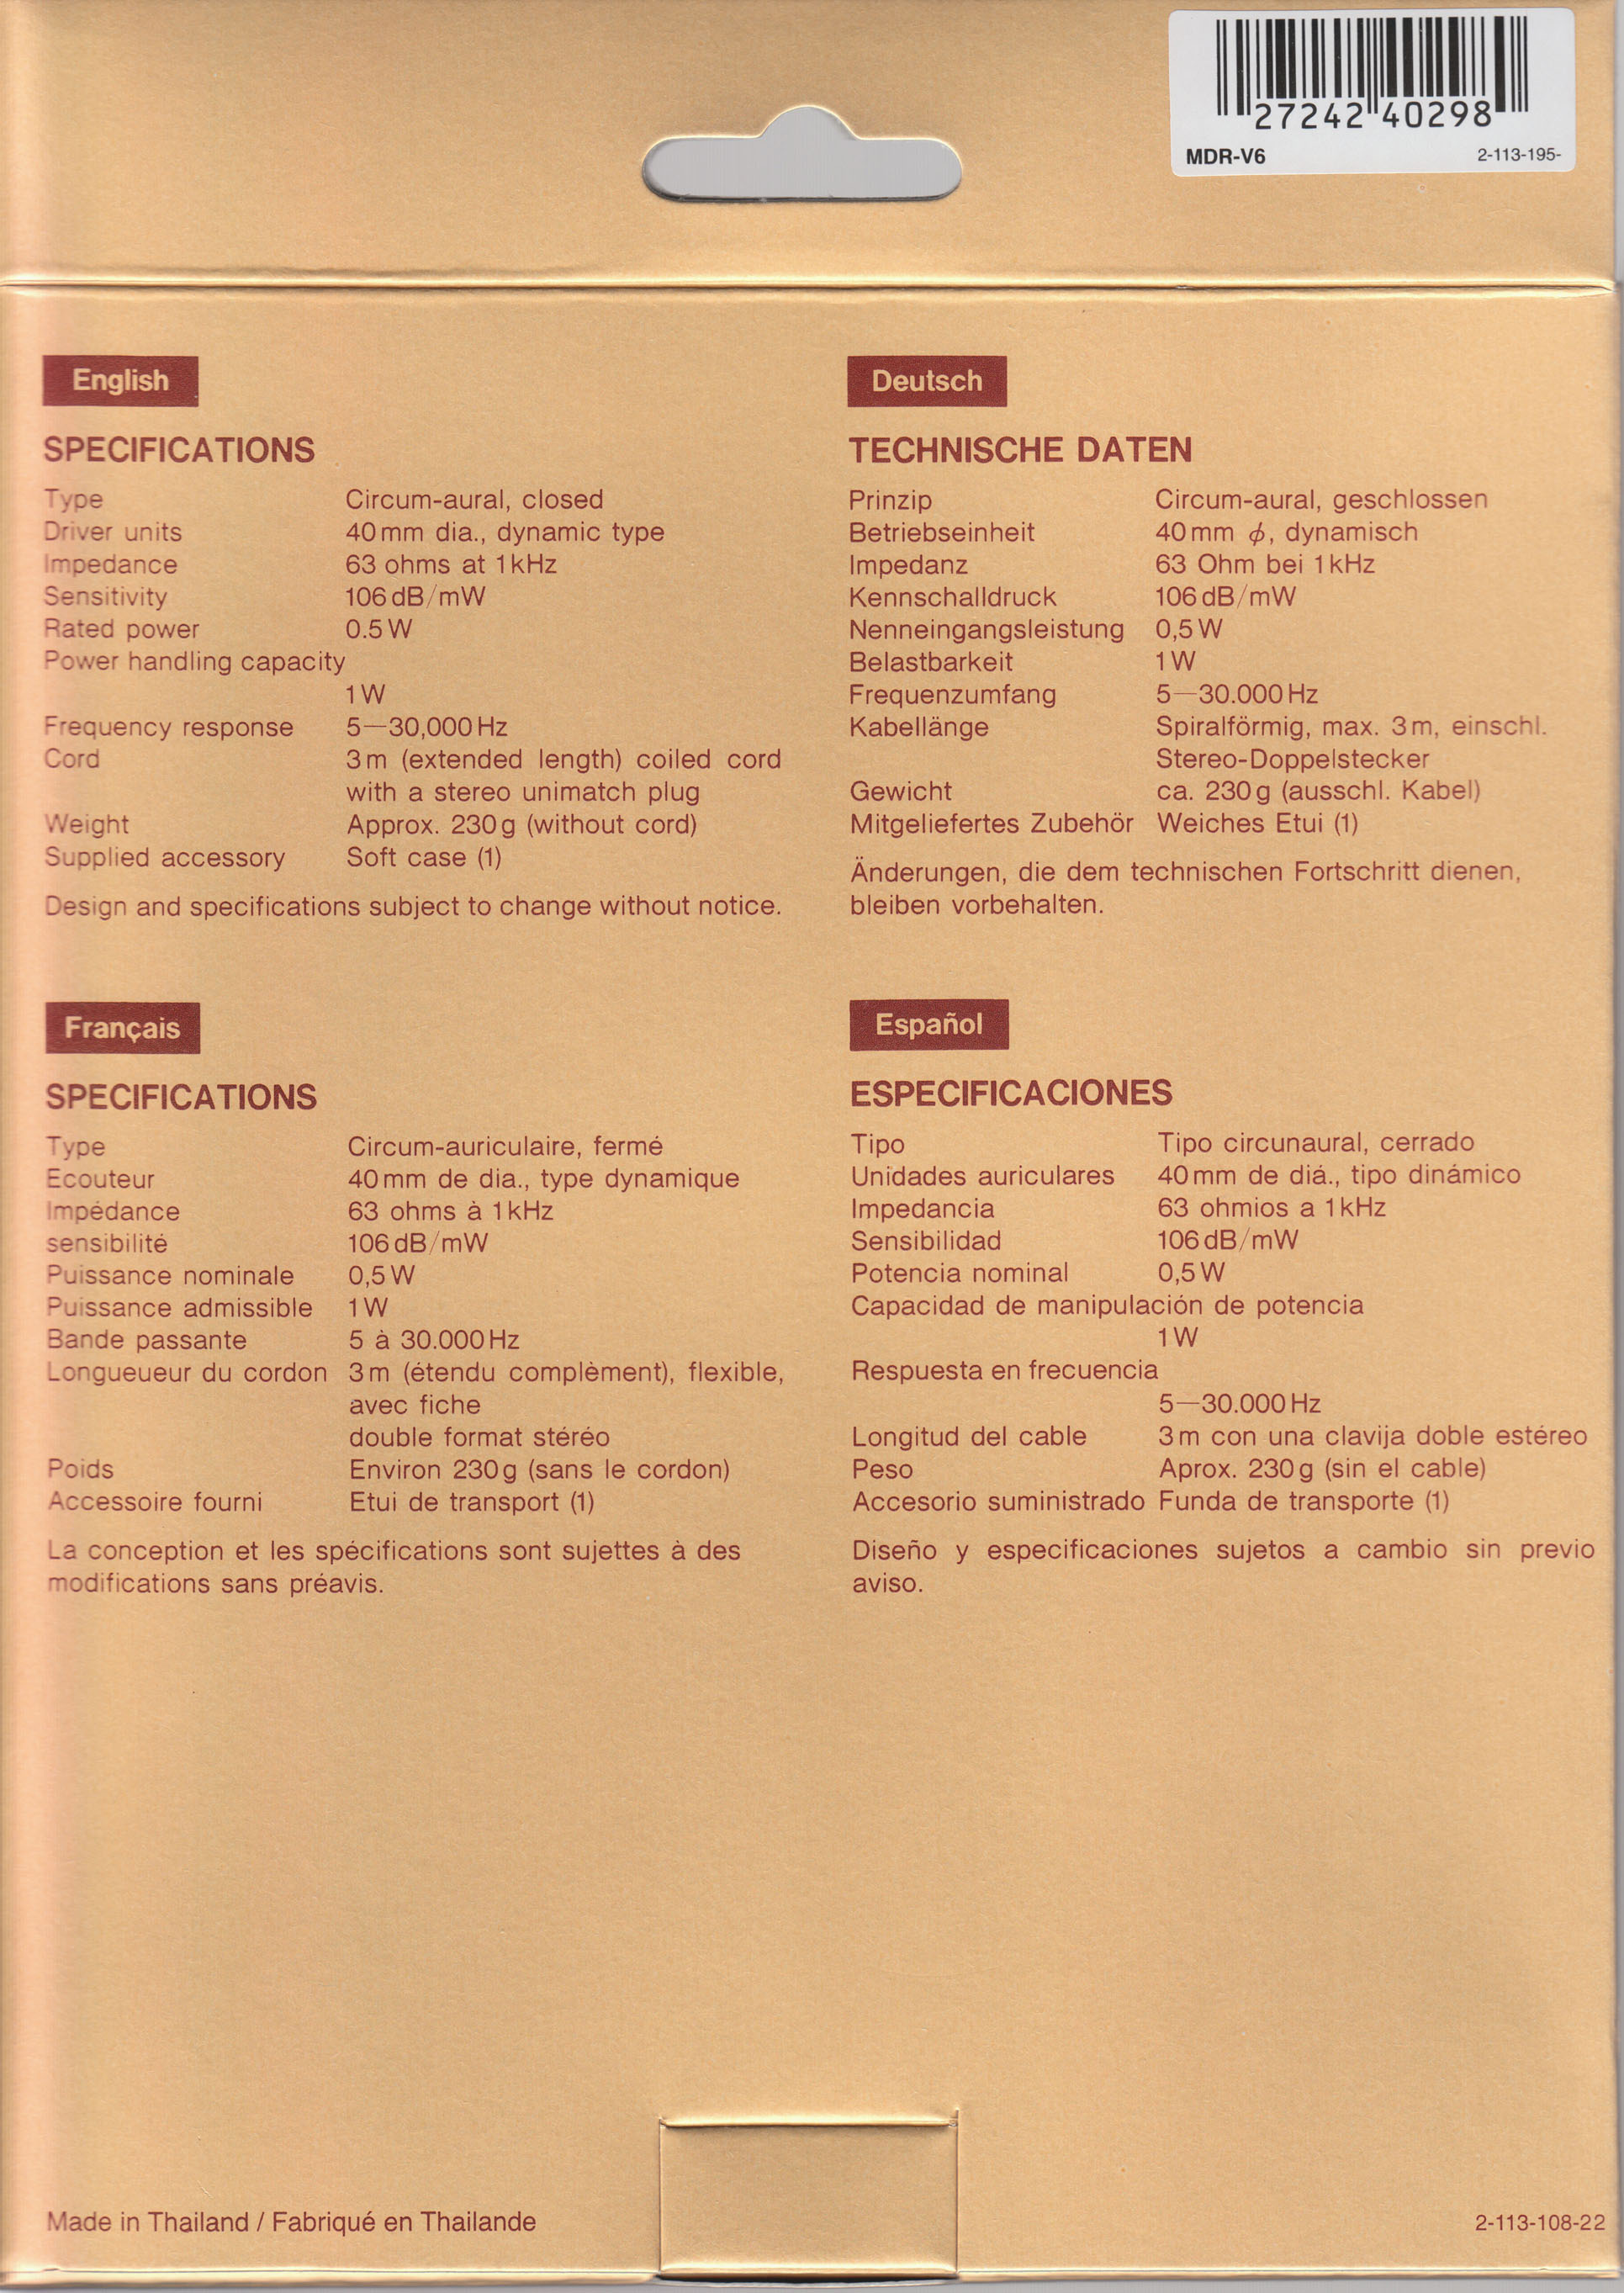
Sony MDR-V6
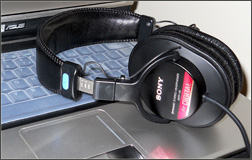
For everyday use V6 are solid and reliable as 7506 with its extended frequency range and slightly boosted bass. I have more than 6 years of satisfaction with the powerful and quality sound of the V6 model.
Specifications: Sony MDR-7500 Series Professional Headphones Datasheet
Who is behind "ASME" Design and its Revisions
That’s me!
Angel Marinov